Lenovo RS110 User Guide - Page 58
Using, Logic, Configuration, Utility, program, Starting, Configuring, controller, devices - review
 |
UPC - 884343312484
View all Lenovo RS110 manuals
Add to My Manuals
Save this manual to your list of manuals |
Page 58 highlights
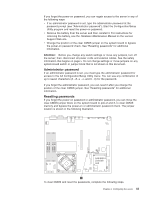
Note: All configuration settings will be cleared by this action; you might have to configure the settings again. 1. Review the safety information that begins on page v. 2. Turn off the server and peripheral devices and disconnect all power cords and external cables. 3. Remove the server from the rack and place it on a flat, static-protective surface. 4. Remove the cover. See "Removing the cover" on page 21 for instructions. 5. If necessary, remove the riser-card assembly. See "Installing an adapter" on page 22 for instructions. 6. Move the clear-CMOS jumper 1 from pins 1 and 2 to pins 2 and 3 and leave it there for at least 5 seconds; then, move the clear-CMOS jumper back to pins 1 and 2. 7. Reinstall the riser-card assembly and cover. See "Installing an adapter" on page 22 for instructions. 8. Replace the server in the rack and connect the server to a keyboard, monitor, and mouse; then, connect the server to a power source. 9. Turn on the server. You can now start the Configuration/Setup Utility program and either delete the old password or set a new power-on or administrator password. Using the LSI Logic Configuration Utility program Use the LSI Logic Configuration Utility program to configure hot-swap hard disk drives that are connected to the SAS/SATA controller. Important: v If the server is a simple-swap SATA model that contains a SATA RAID back plate, you can use the LSI Logic Configuration Utility program to configure the simple-swap SATA hard disk drives. v If you install an optional RAID controller in the server, such as the ServeRAID-MR10i controller, use the configuration software that comes with the adapter to configure the hard disk drives. Starting the LSI Logic Configuration Utility program To start the LSI Logic Configuration Utility program, complete the following steps: 1. Turn on the server. 2. When the prompt Press CTRL-C to start LSI Logic Configuration Utility... is displayed, press Ctrl+C. If you have set an administrator password, you are prompted to type the password. 3. Use the arrow keys to select the adapter (SAS controller) for which you want to change settings. Use the Help function to see instructions and available actions for this screen. 4. To change the settings of the selected items, follow the instructions on the screen. 5. Press Enter to save your changes. Configuring the controller and devices To configure a SAS controller and attached devices, select the controller from the initial LSI Logic Configuration Utility program screen; then, press Enter. You can view and change settings for the following items for the selected controller: 44 ThinkServer RS110 Types 6435, 6436, 6437 and 6438: User Guide
-
 1
1 -
2
-
3
-
4
-
5
-
6
-
7
-
8
-
9
-
10
-
11
-
12
-
13
-
14
-
15
-
16
-
17
-
18
-
19
-
20
-
21
-
22
-
23
-
24
-
25
-
26
-
27
-
28
-
29
-
30
-
31
-
32
-
33
-
34
-
35
-
36
-
37
-
38
-
39
-
40
-
41
-
42
-
43
-
44
-
45
-
46
-
47
-
48
-
49
-
50
-
51
-
52
-
 53
53 -
 54
54 -
 55
55 -
 56
56 -
 57
57 -
 58
58 -
 59
59 -
 60
60 -
 61
61 -
 62
62 -
 63
63 -
64
-
65
-
66
-
67
-
68
-
69
-
70
-
71
-
72
-
73
-
74
-
75
-
76
 |
 |