Lenovo ThinkPad i Series 1300 ThinkPad 130, 1200, 1300 - Hardware Maintenance - Page 42
Creating the service partition, Product Recovery Program? Y/N
 |
View all Lenovo ThinkPad i Series 1300 manuals
Add to My Manuals
Save this manual to your list of manuals |
Page 42 highlights
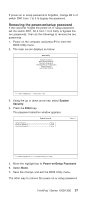
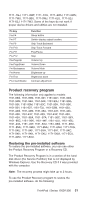
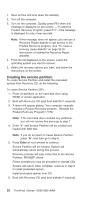
1. Save all files and shut down the desktop. 2. Turn off the computer. 3. Turn on the computer. Quickly press F11 when this message is displayed on the screen: ...″To start the Product Recovery Program, press F11″...This message is displayed for only a few seconds. Note: If this message does not appear, you can use a Recovery Repair diskette to get access to the Product Recovery program. (see "To create a recovery repair diskette" on page 33 for instructions of making the Recovery Repair diskette). 4. From the list displayed on the screen, select the operating system you want to recover. 5. Select the recovery options you want, and follow the instructions on the screen. Creating the service partition To create Service Partition and install the preloaded system from Recovery CD, do the following; To create Service Partition (SP): 1. Erase all partitions on the hard-disk drive using FDISK or similar application. 2. Boot with Recovery CD (and boot diskette if required). 3. A menu will appear stating ″Your computer originally included a Product Recovery program...Reinstall the Product Recovery Program? (Y/N)″. Note: If the hard-disk drive contains any partitions, you will not receive this menu-go to step 1. 4. Enter ″Y″ and Service Partition will be created and loaded with D2D files. Note: If you do not want to create Service Partition, press ″N″, and then go to step 8. 5. Press Enter at next window to continue. Service Partition will be created. System will automatically reboot during this process. Recovery process will copy some files to the Service Partition, PKUNZIP others. Follow prompts-you may be prompted to change CDs. System will reboot when complete, continue to step 6 to install preloaded system. Install preloaded system from CD. 6. Boot with Recovery CD (and boot diskette if required). 32 ThinkPad i Series 1200/1300 HMM
-
 1
1 -
2
-
3
-
4
-
5
-
6
-
7
-
8
-
9
-
10
-
11
-
12
-
13
-
14
-
15
-
16
-
17
-
18
-
19
-
20
-
21
-
22
-
23
-
24
-
25
-
26
-
27
-
28
-
29
-
30
-
31
-
32
-
33
-
34
-
35
-
36
-
 37
37 -
 38
38 -
 39
39 -
 40
40 -
 41
41 -
 42
42 -
 43
43 -
 44
44 -
 45
45 -
 46
46 -
 47
47 -
48
-
49
-
50
-
51
-
52
-
53
-
54
-
55
-
56
-
57
-
58
-
59
-
60
-
61
-
62
-
63
-
64
-
65
-
66
-
67
-
68
-
69
-
70
-
71
-
72
-
73
-
74
-
75
-
76
-
77
-
78
-
79
-
80
-
81
-
82
-
83
-
84
-
85
-
86
-
87
-
88
-
89
-
90
-
91
-
92
-
93
-
94
-
95
-
96
-
97
-
98
-
99
-
100
-
101
-
102
-
103
-
104
-
105
-
106
-
107
-
108
-
109
-
110
-
111
-
112
-
113
-
114
-
115
-
116
-
117
-
118
-
119
-
120
-
121
-
122
-
123
-
124
-
125
-
126
-
127
-
128
-
129
-
130
-
131
-
132
-
133
-
134
-
135
-
136
-
137
-
138
-
139
-
140
-
141
-
142
-
143
-
144
-
145
-
146
-
147
-
148
-
149
-
150
-
151
-
152
-
153
-
154
-
155
-
156
-
157
-
158
-
159
-
160
-
161
-
162
-
163
-
164
-
165
-
166
-
167
-
168
-
169
-
170
-
171
-
172
-
173
-
174
-
175
-
176
-
177
-
178
-
179
-
180
-
181
-
182
-
183
-
184
-
185
-
186
-
187
-
188
-
189
-
190
-
191
-
192
-
193
-
194
-
195
-
196
-
197
-
198
-
199
-
200
-
201
-
202
-
203
-
204
-
205
-
206
-
207
-
208
-
209
-
210
-
211
-
212
-
213
-
214
-
215
-
216
-
217
-
218
-
219
-
220
-
221
-
222
-
223
-
224
-
225
-
226
-
227
-
228
-
229
-
230
-
231
-
232
-
233
 |
 |
