Lexmark 4600 T64x - Setup Guide - Page 11
Customizing your MFP option, Input options
 |
View all Lexmark 4600 manuals
Add to My Manuals
Save this manual to your list of manuals |
Page 11 highlights
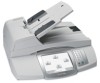
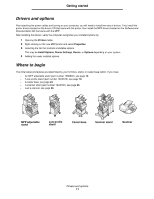
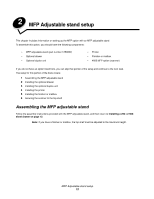
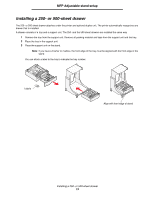
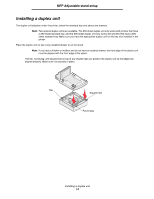
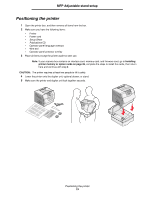
Getting started Customizing your MFP option You can customize your MFP with various input, output, and memory options. Note: Leave all components and hardware in the boxes until you are ready to install them. Check the boxes you received to make sure you have all the necessary components for the configuration you ordered. Install the printer and any options you have purchased in the following order: CAUTION: If you are installing options after setting up the printer, turn the printer off, and unplug the power cord from the wall outlet before continuing. 1 Scanner stand, furniture stand, or caster base 2 2000-sheet drawer 3 250-sheet or 500-sheet drawer 4 Duplex unit 5 Printer 6 Scanner shelf or output options 7 MFP option (scanner) The following options are available for your MFP. Note: Additional options may be available for your MFP. Input options 250-sheet drawer 500-sheet drawer 2000-sheet drawer (letter/A4) 250-Sheet Universally Attached Tray with Drawer 400-Sheet Universally Attached Tray with Drawer Envelope feeder Output options Output expander 5-bin mailbox High capacity output stacker StapleSmart™ finisher Other options Duplex unit Spacer Scanner shelf Caster base Scanner stand Furniture stand CAUTION: Floor-mounted configurations require additional furniture for stability. You must use either a printer stand or caster base if you are using a 2000-sheet drawer. Certain other configurations also must have a printer stand or caster base. More information is available on our Lexmark Web site at www.lexmark.com/multifunctionprinters. Customizing your MFP option 10
-
 1
1 -
2
-
3
-
4
-
5
-
 6
6 -
 7
7 -
 8
8 -
 9
9 -
 10
10 -
 11
11 -
 12
12 -
 13
13 -
 14
14 -
 15
15 -
 16
16 -
17
-
18
-
19
-
20
-
21
-
22
-
23
-
24
-
25
-
26
-
27
-
28
-
29
-
30
-
31
-
32
-
33
-
34
-
35
-
36
-
37
-
38
-
39
-
40
-
41
-
42
-
43
-
44
-
45
-
46
-
47
-
48
-
49
-
50
-
51
-
52
 |
 |