Lexmark 4600 T64x - Setup Guide - Page 40
Installing a firmware card
 |
View all Lexmark 4600 manuals
Add to My Manuals
Save this manual to your list of manuals |
Page 40 highlights
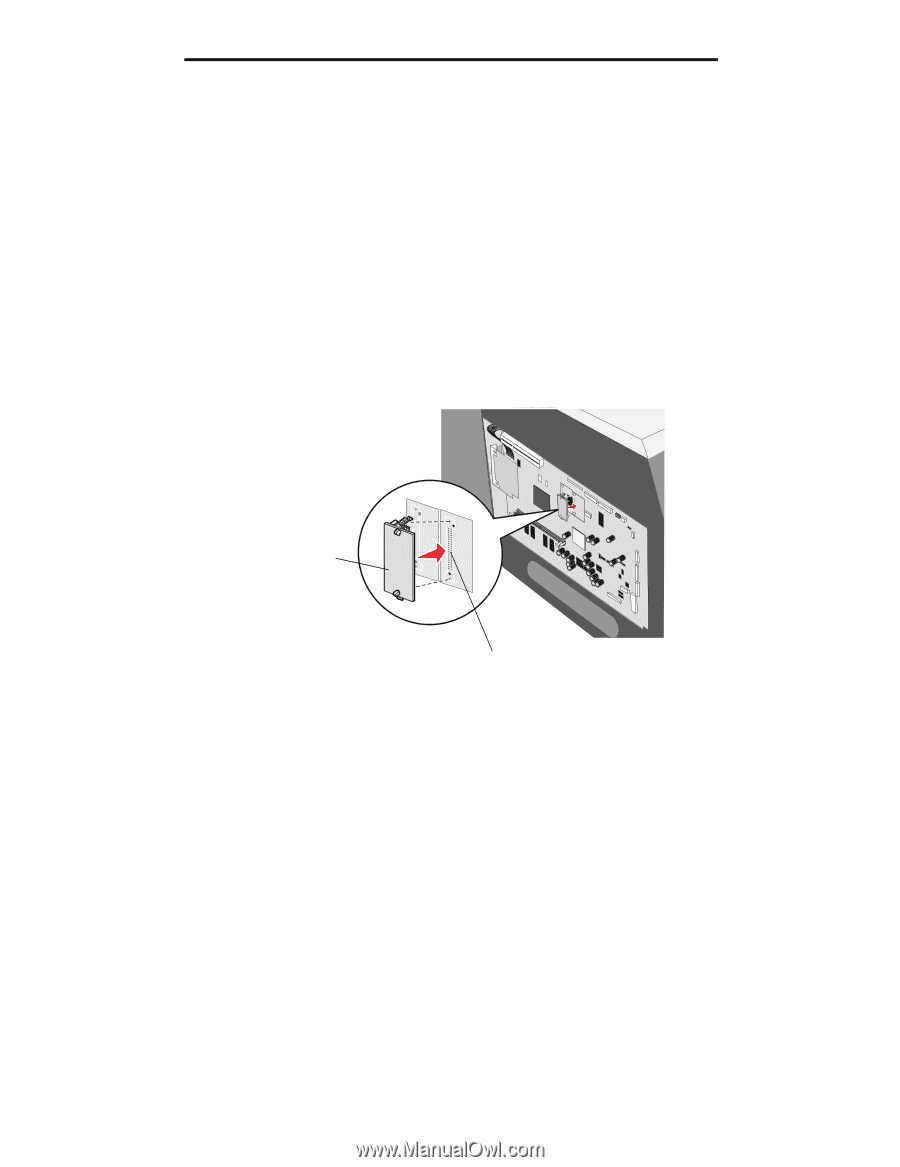
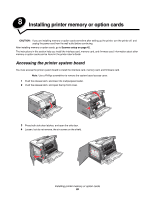
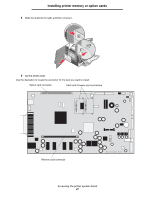
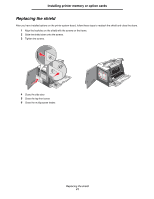
Installing printer memory or option cards Installing a firmware card Note: Firmware cards designed for other Lexmark printers may not work with the printer. 1 Remove the system board access cover. (See Accessing the printer system board.) Note: If a firmware card has been installed, you must remove it. Only one firmware card is allowed. 2 Unpack the firmware card. 3 Holding the firmware card by the locking clips, align the plastic pins on the card with the holes on the system board. 4 Push the firmware card firmly into place, and release the locking clips. The entire length of the connector on the firmware card must touch the system board and be locked into the connector. Be careful not to damage the connectors. Firmware card Connector Installing a firmware card 39
-
 1
1 -
2
-
3
-
4
-
5
-
6
-
7
-
8
-
9
-
10
-
11
-
12
-
13
-
14
-
15
-
16
-
17
-
18
-
19
-
20
-
21
-
22
-
23
-
24
-
25
-
26
-
27
-
28
-
29
-
30
-
31
-
32
-
33
-
34
-
 35
35 -
 36
36 -
 37
37 -
 38
38 -
 39
39 -
 40
40 -
 41
41 -
 42
42 -
 43
43 -
 44
44 -
 45
45 -
46
-
47
-
48
-
49
-
50
-
51
-
52
 |
 |