Lexmark C772 Menus and Messages Guide - Page 53
Resetting the Printer, Resetting Fuser Count - itu life warning
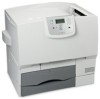 |
View all Lexmark C772 manuals
Add to My Manuals
Save this manual to your list of manuals |
Page 53 highlights
Understanding printer messages Message Remove paper from standard output bin Remove paper from bin Remove paper from all bins Remove paper from Replace ITU Replace Fuser Resetting Active Bin Resetting Fuser Count Resetting the Printer Restore Held Jobs Restoring Factory Defaults Restoring held job(s) x/y Serial Setup Required check Some held jobs were not restored Standard Bin Full Submitting selection Tray Empty Tray Low Tray Missing Unlocking Printer USB USB Action Remove the stack of paper from the standard output bin. Remove the paper from the specified output bin. Remove the paper from all output bins. The printer automatically senses media removal and resumes printing. If removing the media does not clear the message, press . • Image transfer unit is at end of life. • Replace the image transfer unit. Replace the fuser. If the fuser is not replaced when the warning is cleared, the printer will post the warning again. Wait for the message to clear. Wait for the message to clear. Wait for the message to clear. • Press to restore all Print and Hold jobs on the hard disk. • Select Do not restore to delete Print and Hold jobs. Wait for the message to clear. Note: When factory default settings are restored: • All downloaded resources (fonts, macros, symbol sets) in the printer memory are deleted. • All menu settings return to the factory default setting except: - The Display Language setting in the Setup Menu - All settings in the Parallel Menu, Serial Menu, Network Menu, Infrared Menu, LocalTalk Menu, USB Menu, and Fax Menu. • Wait for the message to clear. • Select Quit restoring to delete unrestored Print and Hold jobs. Note: x represents the number of the job being restored, and y represents the total number of jobs to be restored. A serial interface is the active communication link. Packing material was detected in one or more areas. Remove any remaining packing material. • Press to clear the message and continue printing. The printer frees memory by deleting the oldest held job and continues deleting held jobs until there is enough printer memory to process the job. • Cancel the current job. Remove the stack of paper from the bin to clear the message. Wait for the message to clear. Load paper in the tray to clear the message. Add paper to the tray to clear the message. Insert the tray into the printer. PIN entry is successful. Wait for the message to clear. The printer is processing data through the specified USB port. 53
-
 1
1 -
2
-
3
-
4
-
5
-
6
-
7
-
8
-
9
-
10
-
11
-
12
-
13
-
14
-
15
-
16
-
17
-
18
-
19
-
20
-
21
-
22
-
23
-
24
-
25
-
26
-
27
-
28
-
29
-
30
-
31
-
32
-
33
-
34
-
35
-
36
-
37
-
38
-
39
-
40
-
41
-
42
-
43
-
44
-
45
-
46
-
47
-
 48
48 -
 49
49 -
 50
50 -
 51
51 -
 52
52 -
 53
53 -
 54
54 -
 55
55 -
 56
56 -
 57
57 -
 58
58 -
59
-
60
-
61
 |
 |
