Lexmark Forms Printer 2590n Lexmark Forms Printer 2500+ Series User's Guide - Page 46
Converting the pull tractor to push tractor position
 |
View all Lexmark Forms Printer 2590n manuals
Add to My Manuals
Save this manual to your list of manuals |
Page 46 highlights
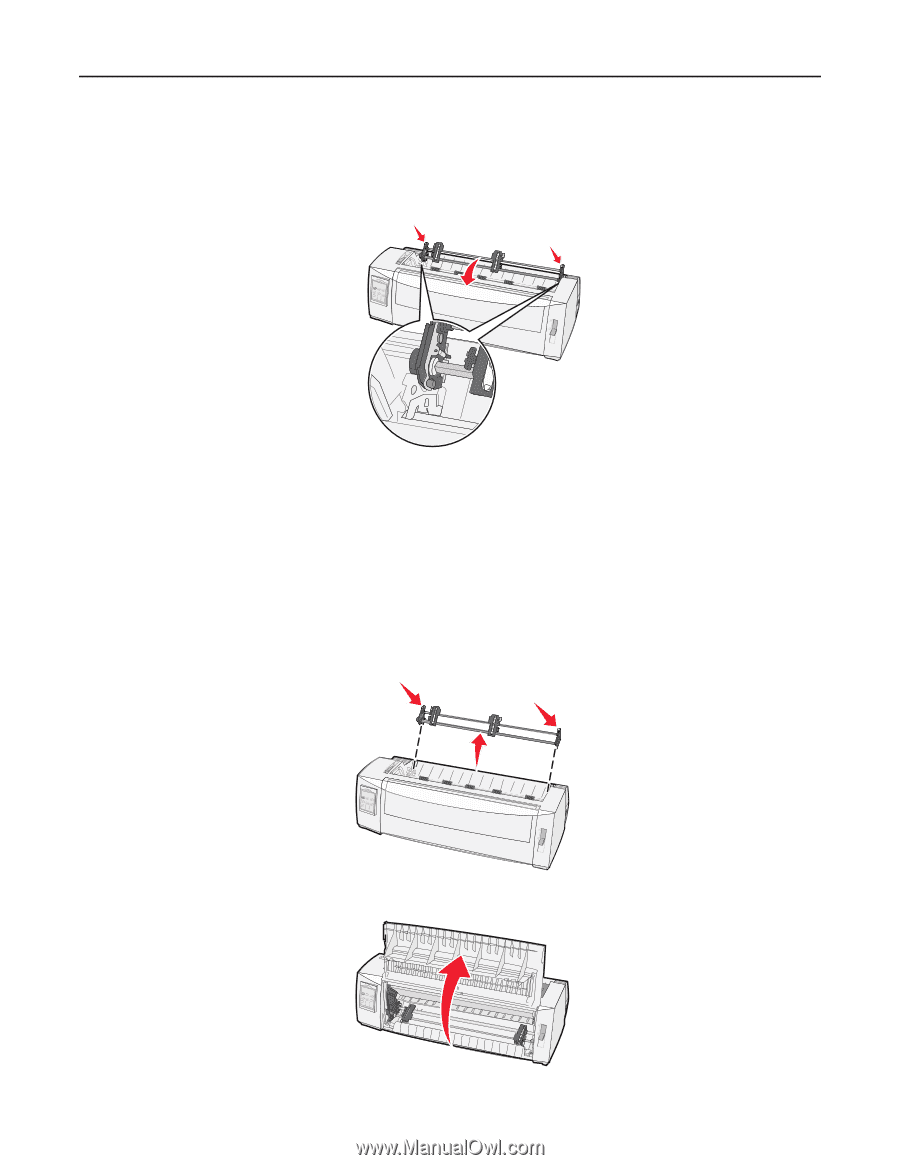
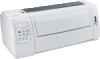
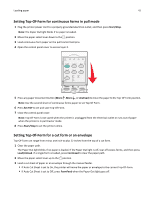
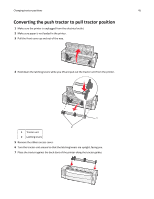
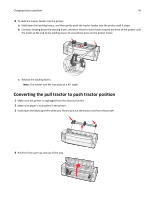
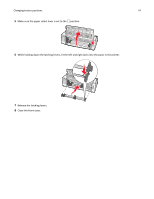
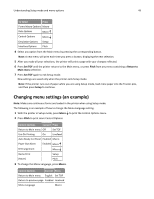
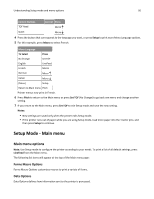
Changing tractor positions 46 8 To slide the tractor feeder into the printer: a Hold down the latching levers, and then gently push the tractor feeder into the printer until it stops. b Continue holding down the latching levers, and then tilt the tractor feeder toward the front of the printer until the hooks at the end of the latching levers fit around the posts on the printer frame. c Release the latching levers. Note: The tractor unit fits into place at a 40° angle. Converting the pull tractor to push tractor position 1 Make sure the printer is unplugged from the electrical outlet. 2 Make sure paper is not loaded in the printer. 3 Hold down the latching levers while you lift and pull out the tractor unit from the printer. 4 Pull the front cover up and out of the way.
-
 1
1 -
2
-
3
-
4
-
5
-
6
-
7
-
8
-
9
-
10
-
11
-
12
-
13
-
14
-
15
-
16
-
17
-
18
-
19
-
20
-
21
-
22
-
23
-
24
-
25
-
26
-
27
-
28
-
29
-
30
-
31
-
32
-
33
-
34
-
35
-
36
-
37
-
38
-
39
-
40
-
 41
41 -
 42
42 -
 43
43 -
 44
44 -
 45
45 -
 46
46 -
 47
47 -
 48
48 -
 49
49 -
 50
50 -
 51
51 -
52
-
53
-
54
-
55
-
56
-
57
-
58
-
59
-
60
-
61
-
62
-
63
-
64
-
65
-
66
-
67
-
68
-
69
-
70
-
71
-
72
-
73
-
74
-
75
-
76
-
77
-
78
-
79
-
80
-
81
-
82
-
83
-
84
-
85
 |
 |