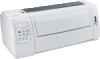
Lexmark Forms Printer 2590n Lexmark Forms Printer 2500+ Series User's Guide - Page 67
Solving printing problems, Printer test works
 |
View all Lexmark Forms Printer 2590n manuals
Add to My Manuals
Save this manual to your list of manuals |
Page 67 highlights
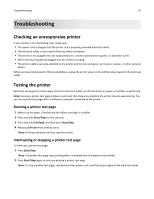
Troubleshooting 67 Solving printing problems Printer test works, but the printer does not print when attached to the computer Try one or more of the following: • Unplug the printer power cord from the electrical outlet, and then turn off the computer. • Make sure the printer cable is correctly connected at both ends. • See the documentation that came with the program to make sure you have selected the correct printer driver. • If you are using Windows, then use the Windows Forms Printer 2500 Series driver available at www.lexmark.com. • If you are using DOS, then follow the instructions that came with the application. Printer is noisy These are possible solutions. Try one of more of the following: • Move any objects that are touching the printer. • Make sure the printer is on a level, sturdy surface. • Close the ribbon access cover. • Close the front cover. Printer sounds like it is printing, but does not print Try one or more of the following: • Make sure the forms thickness lever is properly set for the paper thickness being used. • Make sure the ribbon cartridge is correctly and securely installed on the carrier. • Adjust the ribbon density control knob. • Replace the ribbon cartridge if it is out of ink. • Unplug the printer power cord, and then plug it again to the electrical outlet. Printer alarm sounds Try one or more of the following: • Check the status of the control panel lights. • Unplug the printer power cord, and then plug it again to the electrical outlet. Printer goes to the Tear Off position before the print job finishes Set Auto Tear Off to On: 1 Press Start/Stop. 2 Press and hold Tear Off until the printer beeps and the light blinks. 3 Open the control panel to access layer 2.
-
 1
1 -
2
-
3
-
4
-
5
-
6
-
7
-
8
-
9
-
10
-
11
-
12
-
13
-
14
-
15
-
16
-
17
-
18
-
19
-
20
-
21
-
22
-
23
-
24
-
25
-
26
-
27
-
28
-
29
-
30
-
31
-
32
-
33
-
34
-
35
-
36
-
37
-
38
-
39
-
40
-
41
-
42
-
43
-
44
-
45
-
46
-
47
-
48
-
49
-
50
-
51
-
52
-
53
-
54
-
55
-
56
-
57
-
58
-
59
-
60
-
61
-
 62
62 -
 63
63 -
 64
64 -
 65
65 -
 66
66 -
 67
67 -
 68
68 -
 69
69 -
 70
70 -
 71
71 -
 72
72 -
73
-
74
-
75
-
76
-
77
-
78
-
79
-
80
-
81
-
82
-
83
-
84
-
85
 |
 |