Lexmark LexPrint User's Guide - Page 13
Customizing print settings, My Printer
 |
View all Lexmark LexPrint manuals
Add to My Manuals
Save this manual to your list of manuals |
Page 13 highlights
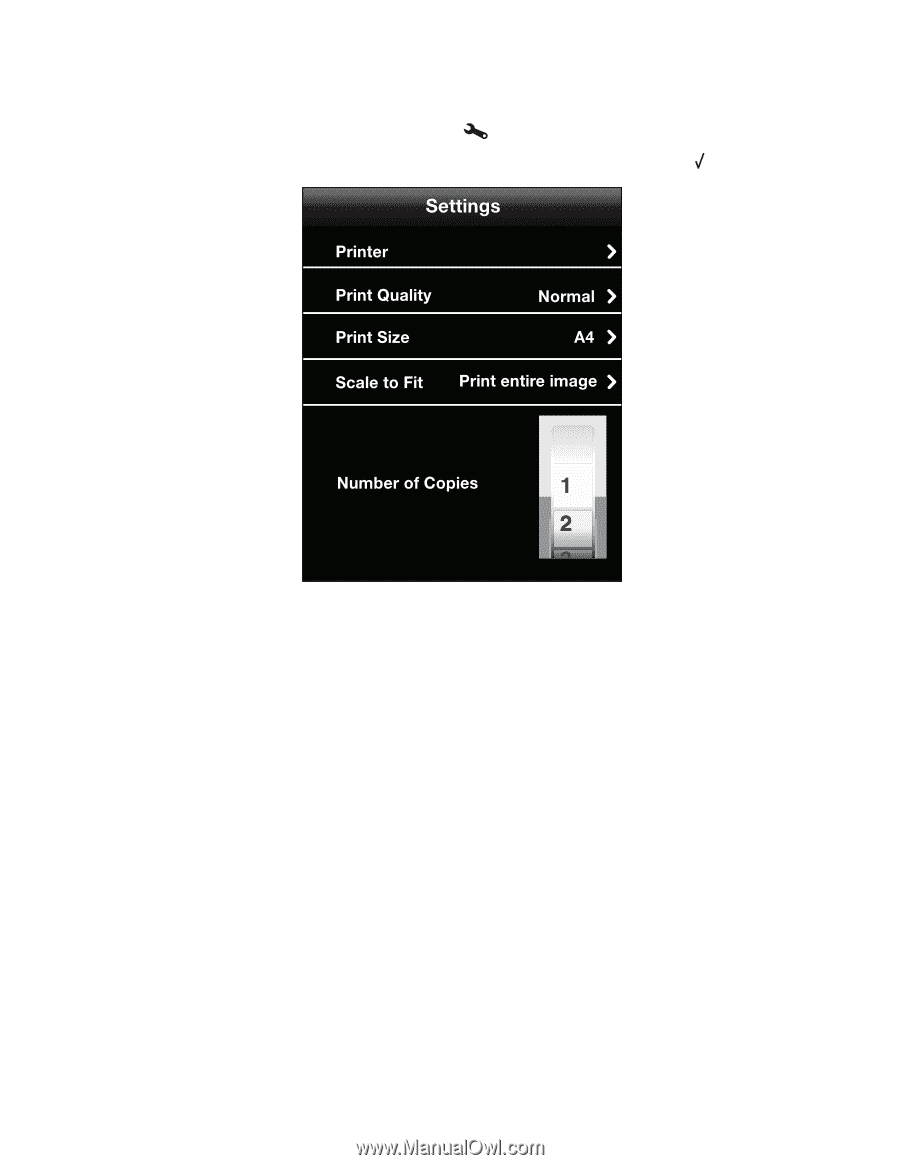
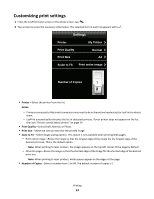
Customizing print settings 1 From the LexPrint home screen or the photo screen, tap . 2 Tap an item to enter the necessary information. The selected item in each list appears with a . My Printer • Printer-Select the printer from the list. Notes: - Printers connected to Macintosh computers may need to be in shared and ready state for LexPrint to detect them. - LexPrint automatically refreshes the list of detected printers. If your printer does not appear on the list, then see "Device cannot detect printer" on page 14. • Print Quality-Select Draft, Normal, or Photo. • Print Size-Select the size you want for the printed image. • Scale to Fit-Select image scaling options. This option is not available when printing Web pages. - Print entire image-Resize the image so that the longest edge of the image fits the longest edge of the desired print size. This is the default option. Note: When printing to laser printers, the image appears on the top left corner of the page by default. - Fill entire page-Resize the image so that the shortest edge of the image fits the shortest edge of the desired print size. Note: When printing to laser printers, white spaces appear on the edges of the page. • Number of Copies-Select a number from 1 to 99. The default number of copies is 1. Printing 13
-
 1
1 -
2
-
3
-
4
-
5
-
6
-
7
-
 8
8 -
 9
9 -
 10
10 -
 11
11 -
 12
12 -
 13
13 -
 14
14 -
 15
15 -
 16
16 -
 17
17 -
 18
18 -
19
-
20
 |
 |