Lexmark X5320 User's Guide - Page 147
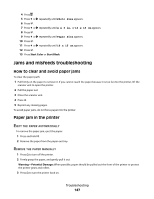
Jams and misfeeds troubleshooting, How to clear and avoid paper jams, Paper jam in the printer
 |
View all Lexmark X5320 manuals
Add to My Manuals
Save this manual to your list of manuals |
Page 147 highlights
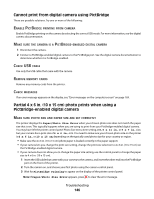
4 Press . 5 Press or repeatedly until Photo Size appears. 6 Press . 7 Press or repeatedly until 4 x 6 in. or 10 x 15 cm appears. 8 Press . 9 Press or repeatedly until Paper Size appears. 10 Press . 11 Press or repeatedly until 10 x 15 cm appears. 12 Press . 13 Press Start Color or Start Black. Jams and misfeeds troubleshooting How to clear and avoid paper jams To clear the paper path: 1 Pull firmly on the paper to remove it. If you cannot reach the paper because it is too far into the printer, lift the scanner unit to open the printer. 2 Pull the paper out. 3 Close the scanner unit. 4 Press . 5 Reprint any missing pages. To avoid paper jams, do not force paper into the printer. Paper jam in the printer EJECT THE PAPER AUTOMATICALLY To remove the paper jam, eject the paper: 1 Press and hold . 2 Remove the paper from the paper exit tray. REMOVE THE PAPER MANUALLY 1 Press to turn off the printer. 2 Firmly grasp the paper, and gently pull it out. Warning-Potential Damage: When possible, paper should be pulled out the front of the printer to protect the printer gears and rollers. 3 Press to turn the printer back on. Troubleshooting 147
-
 1
1 -
2
-
3
-
4
-
5
-
6
-
7
-
8
-
9
-
10
-
11
-
12
-
13
-
14
-
15
-
16
-
17
-
18
-
19
-
20
-
21
-
22
-
23
-
24
-
25
-
26
-
27
-
28
-
29
-
30
-
31
-
32
-
33
-
34
-
35
-
36
-
37
-
38
-
39
-
40
-
41
-
42
-
43
-
44
-
45
-
46
-
47
-
48
-
49
-
50
-
51
-
52
-
53
-
54
-
55
-
56
-
57
-
58
-
59
-
60
-
61
-
62
-
63
-
64
-
65
-
66
-
67
-
68
-
69
-
70
-
71
-
72
-
73
-
74
-
75
-
76
-
77
-
78
-
79
-
80
-
81
-
82
-
83
-
84
-
85
-
86
-
87
-
88
-
89
-
90
-
91
-
92
-
93
-
94
-
95
-
96
-
97
-
98
-
99
-
100
-
101
-
102
-
103
-
104
-
105
-
106
-
107
-
108
-
109
-
110
-
111
-
112
-
113
-
114
-
115
-
116
-
117
-
118
-
119
-
120
-
121
-
122
-
123
-
124
-
125
-
126
-
127
-
128
-
129
-
130
-
131
-
132
-
133
-
134
-
135
-
136
-
137
-
138
-
139
-
140
-
141
-
 142
142 -
 143
143 -
 144
144 -
 145
145 -
 146
146 -
 147
147 -
 148
148 -
 149
149 -
 150
150 -
 151
151 -
 152
152 -
153
-
154
-
155
-
156
-
157
-
158
-
159
-
160
-
161
-
162
-
163
-
164
-
165
-
166
-
167
-
168
-
169
-
170
-
171
-
172
-
173
-
174
-
175
-
176
-
177
-
178
-
179
-
180
-
181
-
182
-
183
-
184
-
185
-
186
-
187
-
188
-
189
-
190
-
191
-
192
-
193
-
194
 |
 |