Linksys WAP54G User Guide - Page 11
Add a Member, Member Registration, Permission to Initiate Network Fallback - setup
 |
UPC - 745883553860
View all Linksys WAP54G manuals
Add to My Manuals
Save this manual to your list of manuals |
Page 11 highlights
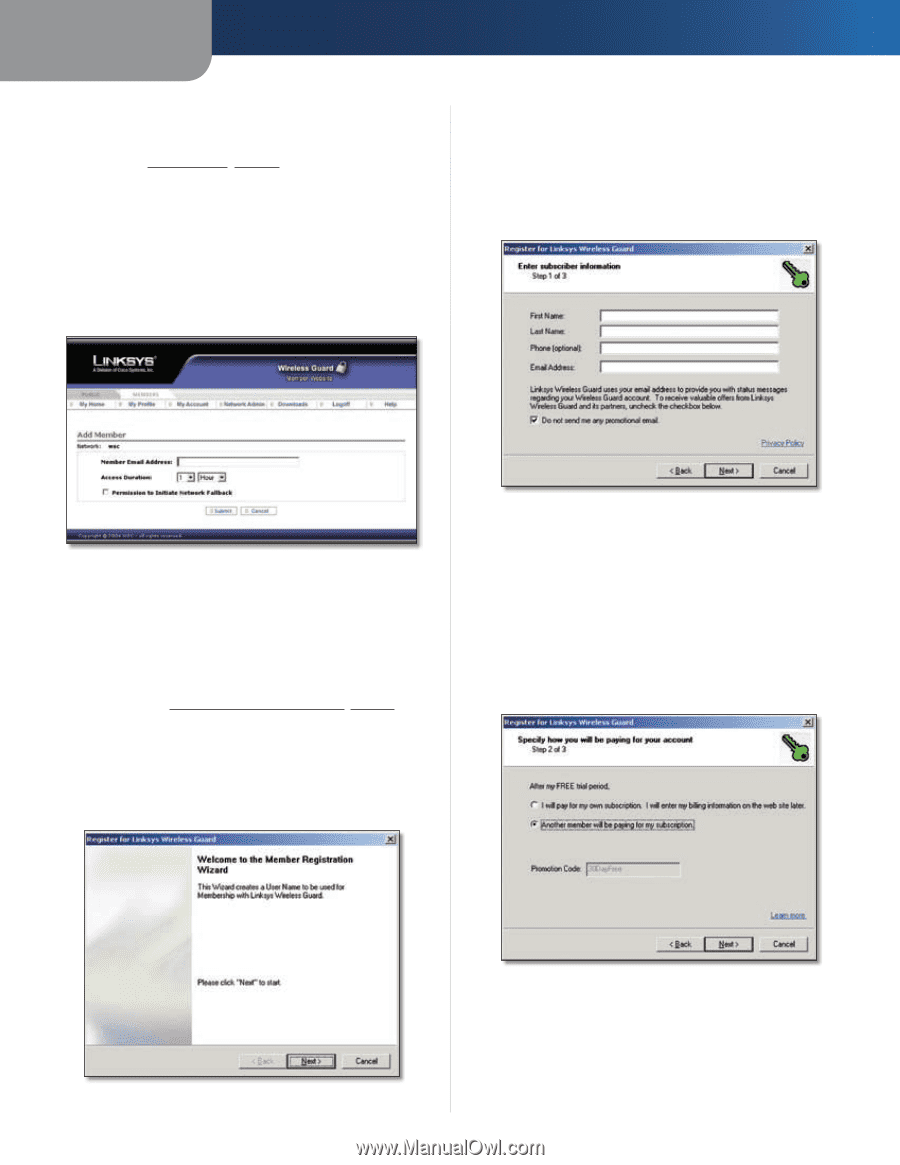
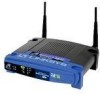
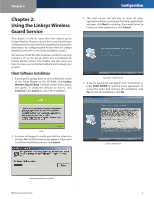
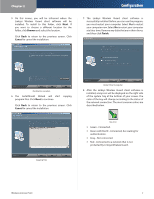
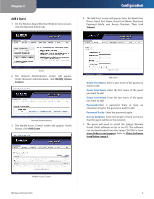
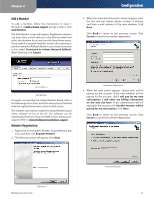
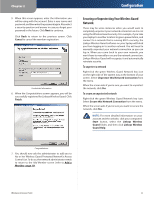
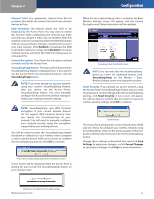
Chapter 2 Add a Member To add a member, follow the instructions in steps 1 through 3 of Add a Guest, page 9, except in step 3, click Add Member. The Add Member screen will appear. Registered members can enter their e-mail address in the field provided and select the duration for access from the drop-down menu. If you want this network member to have the authority to put the network in Fallback Mode in case network security is lost, select Permission to Initiate Network Fallback. When finished, click Submit. Configuration 3. When the Subscriber information screen appears, enter the first and last names, phone number, if desired, and then e-mail address of the new member. Click Next. Click Back to return to the previous screen. Click Cancel to cancel the member registration. Add Member To register as a member for Linksys Wireless Guard, refer to the following instructions, and then when you are finished with the registration process, return to this screen. The member will need to install the Linksys Wireless Guard Client software on his or her PC. The software can be downloaded from the Setup CD-ROM or from linksys.com/ support. Refer to Client Software Installation, page 6. Member Registration 1. Right-click on the green Wireless Guard Network key icon, and then click Register Member. 2. The Welcome screen will appear. Click Next. Subscriber Information 4. When the next screen appears, choose who will be paying for the account. If the new member will be paying for the account, click I will pay for my own subscription. I will enter my billing information on the web site later. If the administrator will be paying for the account, click Another member will be paying for my subscription. Click Next. Click Back to return to the previous screen. Click Cancel to cancel the member registration. Welcome Wireless-G Access Point Account Finances 10
-
 1
1 -
2
-
3
-
4
-
5
-
 6
6 -
 7
7 -
 8
8 -
 9
9 -
 10
10 -
 11
11 -
 12
12 -
 13
13 -
 14
14 -
 15
15 -
 16
16 -
17
-
18
-
19
-
20
-
21
-
22
-
23
-
24
-
25
-
26
-
27
-
28
-
29
-
30
-
31
-
32
-
33
-
34
-
35
-
36
-
37
-
38
-
39
-
40
-
41
-
42
-
43
-
44
-
45
 |
 |