Linksys WAP54G User Guide - Page 13
Configuring the Wireless-G Access Point, How to Access the Web-Based Utility
 |
UPC - 745883553860
View all Linksys WAP54G manuals
Add to My Manuals
Save this manual to your list of manuals |
Page 13 highlights
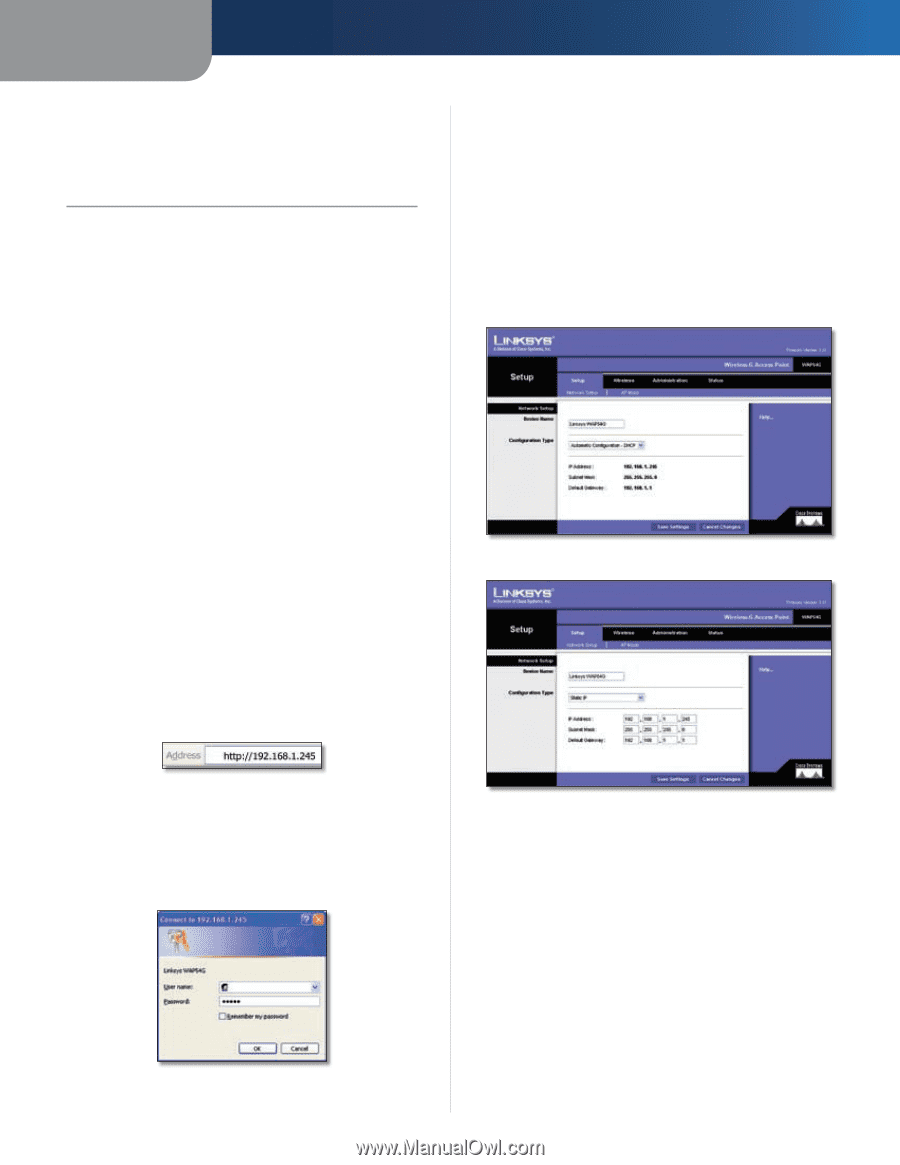
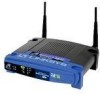
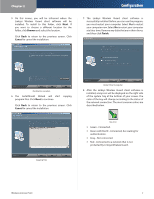
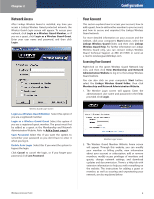
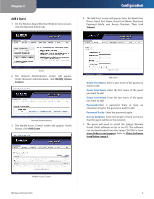
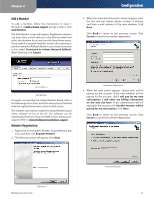
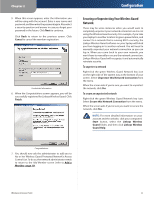
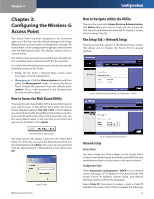
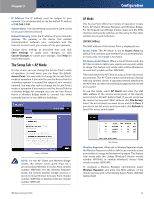
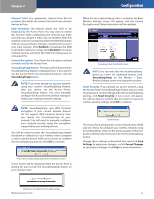
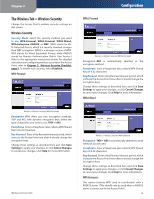
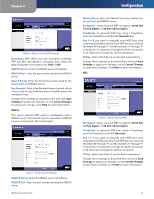
Chapter 3 Chapter 3: Configuring the Wireless-G Access Point The Access Point has been designed to be functional right out of the box, with the default settings in the Setup Wizard. However, if you want to change these settings, the Access Point can be configured through your web browser with the Web-based Utility. This chapter explains how to use the Utility. The Utility can be accessed via a web browser through use of a computer that is networked with the Access Point. For a basic network setup, most users only have to use the following screens of the Utility: •• Setup On the Setup > Network Setup screen, enter your basic network settings here. •• Management Click the Administration tab and then select the Management screen. To secure the Access Point, change the password from the default value (admin). Enter a new password in the Password and Re-enter to confirm fields. How to Access the Web-Based Utility To access the web-based utility of the Access Point, launch your web browser. In the Address field, enter the Access Point's default IP address, 192.168.1.245, or the IP address you entered during the Setup Wizard. (Should you need to learn what IP address the Access Point presently uses, run the Setup Wizard again. It will scan the Access Point and give you its IP address.) Press Enter. Internet Explorer Address Bar The login screen will appear. Leave the User Name field blank. The first time you open the Web-based Utility, use the default password, admin. (You can set a new password from the Administration > Management screen.) Then click OK. Login Screen Wireless-G Access Point Configuration How to Navigate within the Utility There are four main tabs: Setup, Wireless, Administration, and Status. When you select a main tab, the screens for that tab are listed below the main tab. To display a screen, click its name in the list. The Setup Tab > Network Setup The first screen that appears is the Network Setup screen. This allows you to change the Access Point's general settings. Setup > Network Setup (Automatic Configuration - DHCP) Setup > Network Setup (Static IP) Network Setup Device Name You may assign any Device Name to the Access Point. Unique, memorable names are helpful, especially if you are employing multiple access points on the same network. Configuration Type Select Automatic Configuration - DHCP if your network router will assign an IP address to the Access Point. The Access Point's IP Address, Subnet Mask, and Default Gateway address will then be displayed. Select Static IP if you want to assign a static or fixed IP address to the Access Point. Then complete the following: 12
-
 1
1 -
2
-
3
-
4
-
5
-
6
-
7
-
 8
8 -
 9
9 -
 10
10 -
 11
11 -
 12
12 -
 13
13 -
 14
14 -
 15
15 -
 16
16 -
 17
17 -
 18
18 -
19
-
20
-
21
-
22
-
23
-
24
-
25
-
26
-
27
-
28
-
29
-
30
-
31
-
32
-
33
-
34
-
35
-
36
-
37
-
38
-
39
-
40
-
41
-
42
-
43
-
44
-
45
 |
 |