Linksys WAP54G User Guide - Page 5
Product Overview, Front Panel, Back Panel - lan
 |
UPC - 745883553860
View all Linksys WAP54G manuals
Add to My Manuals
Save this manual to your list of manuals |
Page 5 highlights
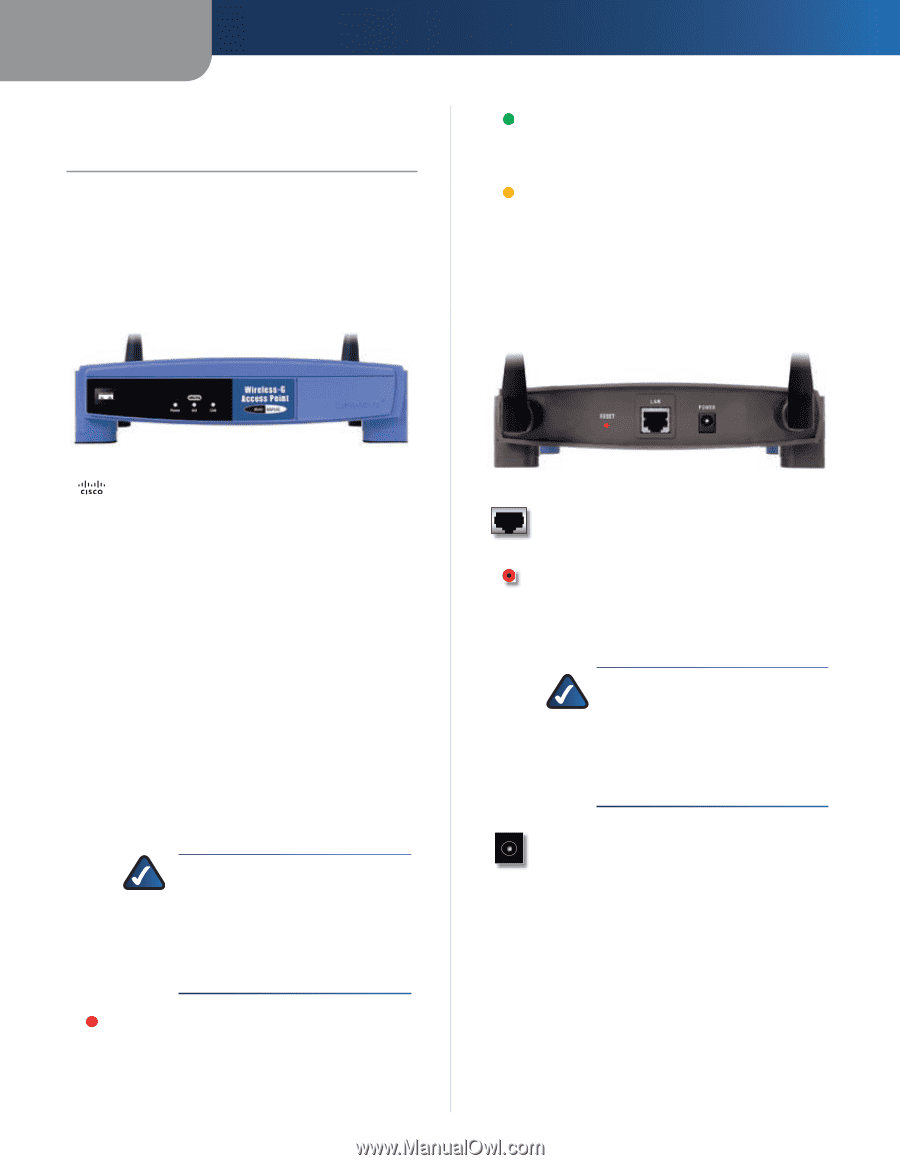
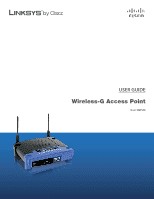
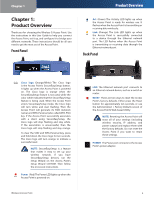
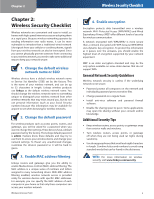
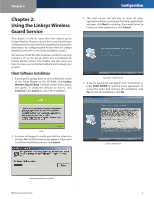
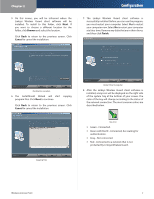
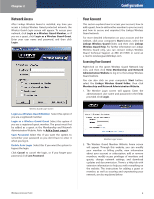
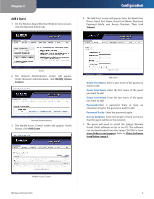
Chapter 1 Chapter 1: Product Overview Thank you for choosing the Wireless-G Access Point. Use the instructions in this User Guide to help you connect the Access Point, set it up, and configure it to bridge your different networks. These instructions should be all you need to get the most out of the Access Point. Front Panel Product Overview Act (Green) The Activity LED lights up when Act the Access Point is ready for wireless use. It flashes when the Access Point is transmitting or receiving data wirelessly. Link (Orange) The Link LED lights up when Link the Access Point is successfully connected to a device through the Ethernet network port. The LED flashes when the Access Point is transmitting or receiving data through the Ethernet network port. Back Panel Cisco logo (Orange/White) The Cisco logo is the Access Point's SecureEasySetup button. It lights up when the Access Point is powered on. The Cisco logo is orange when the SecureEasySetup feature is not used, while the color white indicates that the SecureEasySetup feature is being used. When the Access Point enters SecureEasySetup mode, the Cisco logo will turn white and start flashing. Then the Access Point will generate its SSID (network name) and WPA-Personal (also called WPA-PSK) key. If the Access Point successfully associates with a client using SecureEasySetup, the Cisco logo will stop flashing and stay white. If the association is unsuccessful, then the Cisco logo will stop flashing and stay orange. To clear the SSID and WPA-Personal key, press and hold down the Cisco logo for ten seconds. The Cisco logo will turn orange to indicate a successful reset. NOTE: SecureEasySetup is a feature that makes it easy to set up your wireless network. If you have SecureEasySetup devices, run the Setup Wizard on the Access Point's Setup Wizard CD-ROM. Then follow the on-screen instructions. Power (Red) The Power LED lights up when the Power Access Point is powered on. Wireless-G Access Point LAN The Ethernet network port connects to an Ethernet network device, such as a switch or router. RESET There are two ways to reset the Access Point's factory defaults. Either press the Reset button for approximately ten seconds, or use the Administration > Factory Defaults screen of the Access Point's Web-based Utility. NOTE: Resetting the Access Point will erase all of your settings (including wireless security, IP address, and power output) and replace them with the factory defaults. Do not reset the Access Point if you want to retain these settings. POWER The Power port connects to the Access Point's power adapter. 4
-
 1
1 -
 2
2 -
 3
3 -
 4
4 -
 5
5 -
 6
6 -
 7
7 -
 8
8 -
 9
9 -
 10
10 -
 11
11 -
12
-
13
-
14
-
15
-
16
-
17
-
18
-
19
-
20
-
21
-
22
-
23
-
24
-
25
-
26
-
27
-
28
-
29
-
30
-
31
-
32
-
33
-
34
-
35
-
36
-
37
-
38
-
39
-
40
-
41
-
42
-
43
-
44
-
45
 |
 |