MSI rc410M2 User Guide
MSI rc410M2 Manual
 |
View all MSI rc410M2 manuals
Add to My Manuals
Save this manual to your list of manuals |
MSI rc410M2 manual content summary:
- MSI rc410M2 | User Guide - Page 1
RC410M2 Series MS-7173 (v2.X) Mainboard G52-71731X1 i - MSI rc410M2 | User Guide - Page 2
, please try the following help resources for further guidance. Visit the MSI website for FAQ, technical guide, BIOS updates, driver updates, and other information: http://www.msi.com.tw/program/service/faq/ faq/esc_faq_list.php Contact our technical staff at: http://support.msi.com.tw ii - MSI rc410M2 | User Guide - Page 3
1. Always read the safety instructions carefully. 2. Keep this User's Manual for future reference. 3. Keep this equipment k . 11. If any of the following situations arises, get the equipment checked by service personnel: † The power cord or plug is damaged. † Liquid has penetrated into the - MSI rc410M2 | User Guide - Page 4
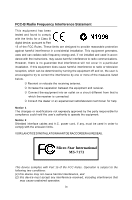
if not installed and used in accordance with the instructions, may cause harmful interference to radio communications. However, emission limits. VOIR LANOTICE D'INSTALLATIONAVANT DE RACCORDER AU RESEAU. Micro-Star International MS-7173 This device complies with Part 15 of the FCC Rules. Operation is - MSI rc410M2 | User Guide - Page 5
WEEE (Waste Electrical and Electronic Equipment) Statement v - MSI rc410M2 | User Guide - Page 6
vi - MSI rc410M2 | User Guide - Page 7
vii - MSI rc410M2 | User Guide - Page 8
History...ii Technical Support...ii Safety Instructions...iii FCC-B Radio Guide 2-2 Central Processing Unit: CPU 2-3 Introduction to LGA 775 CPU 2-3 CPU Connector: JCOM1 2-18 CD-In Connector: JCD1 2-18 Front Panel Audio Connector: JAUD1 2-18 IEEE 1394 Connectors: J1394_1 (Optional 2-19 - MSI rc410M2 | User Guide - Page 9
Setup 3-17 PNP/PCI Configurations 3-20 H/W Monitor...3-21 Load Optimized Defaults 3-23 BIOS Setting Password 3-23 Appendix A: Realtek ALC883 Audio A-1 Installing the Realtek HD Audio Driver A-2 Installation for W indows 2000/XP A-2 Software Configuration A-4 Sound Effect A-5 Mixer - MSI rc410M2 | User Guide - Page 10
System Requirements B-3 Installing a Graphics Card B-4 Before You Begin B-4 Basic Graphics Card Installation B-4 Enabling SURROUNDVIEWTM B-6 Enabling the Integrated Graphics Processor B-6 Enabling SURROUNDVIEW B-6 Frequently Asked Questions B-7 Using Multiple Displays B-8 Setting Up - MSI rc410M2 | User Guide - Page 11
Getting Started Chapter 1 Getting Started Thank you for choosing the RC410M2 Series (MS-7173 v2.X) Micro-ATX mainboard. The RC410M2 Series mainboards are based on AT I® RC410S & SB600 chipsets for optimal system efficiency. Designed to fit the advanced Intel® Pentium 4, Cedar Mill, and Celeron D - MSI rc410M2 | User Guide - Page 12
MS-7173 Mainboard Mainboard Specifications Processor Support - Supports LGA775 Intel® Pentium 4, Cedar Mill, and Celeron D proces- sors - Supports 2005 mainstream FMB 05A CPU VR design (For the latest information about CPU, please visit http://www.msi.com. t w / program / produc t s/ slim _pc /sl m - MSI rc410M2 | User Guide - Page 13
- 1 PS/2 m ouse port - 1 PS/2 keyboard port - 1 parallel port supporting SPP/EPP/ECP mode - 2 serial ports (Rear * 1 / Pinheader * 1) - 1 VGA port - 2 IEEE1394 ports (Rear * 1 / Front * 1) (Optional) - 4 USB2.0 ports - 1 RJ-45 LAN Jack - 1 audio ports (Line-In / Line-Out / MIC / Center Speaker Out - MSI rc410M2 | User Guide - Page 14
Mic (Optional) PCIE16X1 VIA VT6308P (Optional) PCIE 1X1 PCI1 ATI RC410S BATT + ATI SB600 BIOS ALC883 PCI 2 JAUD1 JCD1 SPDOUT J1394_1 (Optional) JBAT1 JLPC1 JUSB3 JUS B1 JUS B2 JFP1 SYS_FAN RC410M2 Series (MS-7173 v2.X) M-ATX Mainboard DIMM1 DIMM2 IDE1 ATX1 SATA4 SATA2 SATA3 SATA1 - MSI rc410M2 | User Guide - Page 15
Packing Checklist Getting Started MSI mainboard MSI Driver/Utility CD SATA Cable 1394 Bracket (Optional) Standard Cable for IDE Devices Power Cable User's Guide USB Bracket (Optional) Back IO Shield * These pictures are for yuour reference only. Your packing contents may vary depending on - MSI rc410M2 | User Guide - Page 16
will not work properly. Use a grounded wrist strap before handling computer c om ponent s . St atic elec tr ic ity may d amage the components. ONLY FOR SERVICE PERSONEL Always unplug the power cord before inserting any add-on card or module. 2-1 - MSI rc410M2 | User Guide - Page 17
MS-7173 Mainboard Quick Components Guide JTV1, JPW1, p.2-21 p.2-11 (Optional) JCOM1, p.2-18 CPU, p.2-3 CPU_FAN1, p.2-15 Rear Panel I/O, p.2-12 DDR DIMMs, p.2-8 FDD1, p.2-15 ATX1, p.2-10 PCI Express Slots, p.2-25 PCI Slots, p.2-25 IDE1, p.2-16 SATA 1-4, p.2-17 JLPC1, p.2-23 JBAT, p.2-24 - MSI rc410M2 | User Guide - Page 18
Hardware Setup Central Processing Unit: CPU This mainboard supports Intel® Pentium 4, Cedar Mill, and Celeron D processors in LGA 775 package. W hen you are installing the CPU, make sure to install the cooler to prevent overheating. If you do not have the CPU cooler, contact your dealer to purchase - MSI rc410M2 | User Guide - Page 19
MS-7173 Mainboard CPU & Cooler Installation W hen you are installing the CPU, make sure the CPU has a cooler triangle) in the right-bottom corner. 2. Take out the accompanying CPU Clip and rotate it for the same direction as the CPU (Pin 1 indicator is in the left-bottom corner). land side - MSI rc410M2 | User Guide - Page 20
on your system. 2. Do not touch the CPU socket pins to avoid damaging. 3. The availability of the CPU land side cover depends on your CPU packing. 5. The CPU has a plastic cap on it to protect the contact from damage. Before you have installed the CPU, always cover it to protect the socket pin - MSI rc410M2 | User Guide - Page 21
MS-7173 Mainboard 9. Use your thumb and the middle fingers to push the clips to release the CPU, then press down the CPU with your index finger to allow the whole module to be installed onto the CPU socket. 10. The CPU is installed well on the CPU socket. 11. Visually inspect if the CPU is seated - MSI rc410M2 | User Guide - Page 22
8 for details) again and push the clip to lift up the CPU. Important 1. Check the information in PC Health Status of H/W M onitor in BIOS (Chapter 3) for the CPU temperature. 2. Whenever CPU is not installed, always protect your CPU socket pin with the plastic cap covered (shown in Figure 1) to - MSI rc410M2 | User Guide - Page 23
MS-7173 Mainboard Memory The mainboard provides two 240-pin non-ECC DDR II 667 DIMMs and supports up to 2GB system memory. For more information on compatible components, please visit ht tp:/ /ww w.ms i.c om.t w/p rogr am/ prod uc t s /m ainb oar d/mb d/p ro_m bd_ trp_ lis t.ph p. DIMM1 (green) - MSI rc410M2 | User Guide - Page 24
Hardware Setup Important Make sure that you install memory modules of the same type and density on DDR II DIMMs. Installing DDR II Modules 1. The DDR II DIMM has only one notch on the center of module. The module will only fit in the right orientation. 2. Insert the DIMM memory module vertically - MSI rc410M2 | User Guide - Page 25
MS-7173 Mainboard Power Supply The mainboard supports ATX power supply for the power system. Before inserting the power supply connector, always make sure that all components are installed properly to ensure that - MSI rc410M2 | User Guide - Page 26
Hardware Setup ATX 12V Power Connector: JPW1 This 12V power connector is used to provide power to the CPU. 2 1 4 3 JPW1 Pin Definition PIN SIGNAL 1 GND 2 GND 3 12V 4 12V Important 1. These two connectors connect to the ATX power supply and have to work together to - MSI rc410M2 | User Guide - Page 27
MS-7173 Mainboard Rear Panel The Rear Panel provides the following connectors: Mouse (green) Parallel 1394 Port (Optional) LAN CS-Out Line-In RS-Out Line-Out - MSI rc410M2 | User Guide - Page 28
3- Mouse/Keyboard Connector The standard PS/2® mouse/keyboard DIN connector is for a PS/2® mouse/keyboard. Parallel Port Connector A parallel port is a standard printer port that supports Enhanced Parallel Port (EPP) and Extended Capabilities Parallel Port (ECP) mode. 2-13 - MSI rc410M2 | User Guide - Page 29
MS-7173 Mainboard Serial Ports The mainboard offers two 9-pins male DIN data rate is selected. Audio Port Connectors These audio connectors are used for audio devices. You can differentiate the color of the audio jacks for different audio sound effects. Orange audio jack - Center/ Subwoofer - MSI rc410M2 | User Guide - Page 30
types. FDD1 Fan Power Connectors: CPU_FAN1 / SYS_FAN The fan power connectors support system cooling fan with +12V. W hen connecting the wire to the use a specially designed fan with speed sensor to take advantage of the CPU fan c on tr ol . CONTROL SE NS OR +1 2V GND CPU_FAN1 SE NS - MSI rc410M2 | User Guide - Page 31
MS-7173 Mainboard Hard Disk Connector: IDE1 The mainboard provides a one-channel Ultra ATA 100 bus Master IDE controller that supports PIO mode 0~4, Bus Master, and Ultra DMA 33/66/100 function. You can the hard disk documentation supplied by hard disk vendors for jumper setting instructions. 2-16 - MSI rc410M2 | User Guide - Page 32
Hardware Setup Serial ATA Connectors: SATA1~SATA4 The ATI SB450 SouthBridge supports four serial ATA connectors SATA1~SATA4. SATA1~SATA4 are high-speed Serial ATA interface ports. Each supports 1st generation serial ATA data rates of 150MB/s and is fully compliant with Serial ATA 1.0 specifications - MSI rc410M2 | User Guide - Page 33
MS-7173 Mainboard Serial Port Connector: JCOM1 The mainboard provides one 9-pin header audio. R GND L JCD1 Front Panel Audio Connector: JAUD1 The JAUD1 front panel audio connector allows you to connect to the front panel audio and is compliant with Intel® Front Panel I/O Connectivity Design Guide - MSI rc410M2 | User Guide - Page 34
header, pins 5 & 6, 9 & 10 have to be jumpered in order to have signal output directed to the rear audio ports. Otherwise, the Line-Out connector on the back panel will not function. 6 10 5 9 IEEE 1394 Connectors: J1394_1 (Optional) The mainboard provides one 1394 pin - MSI rc410M2 | User Guide - Page 35
MS-7173 Mainboard Front Panel Connectors: JFP1 The mainboard provides one front panel connector for electrical connection to the front panel switches and LEDs. The JFP1 is compliant with Intel® Front Panel I/O Connectivity Design Guide. Power Power LED Switch 2 10 1 9 HDD Reset LED Switch - MSI rc410M2 | User Guide - Page 36
Hardware Setup Important Note that the pins of VCC and GND must be connected correctly to avoid possible damage. TV-Out Connector: JTV1 (Optional) The mainboard optionally provides a TV-Out connector for you to attach a TV-Out bracket that integrates HDTV-out. The TV-Out bracket offers two types - MSI rc410M2 | User Guide - Page 37
MS-7173 Mainboard Important 1. Please note that the TV-Out bracket can connect to one TV ) This connector is used to connect SPDIF (Sony & Philips Digital Interconnect Format) interface for digital audio transmission. VCC GND SPDIF SPDOUT SPDIF Bracket (Optional) Connect to SPDOUT 2-22 - MSI rc410M2 | User Guide - Page 38
Hardware Setup FWH/LPC Debugging Connector: JLPC1 The connector is for internal debugging only. 13 1 14 2 JLPC1 Pin Definition PIN SIGNAL PIN SIGNAL 1 LCLK 2 Key (no pin) 3 LRST# 4 VCC3 5 LAD0 6 FID0_LRST 7 LAD1 8 VCC5 9 LAD2 10 Key(no - MSI rc410M2 | User Guide - Page 39
provides the following jumpers for you to set the computer's function. This section will explain how to change your motherboard's function through the use of jumpers. Clear CMOS Jumper: JBAT1 There is a CMOS RAM onboard that has a power supply from external battery to keep the - MSI rc410M2 | User Guide - Page 40
motherboard provides one PCI Express x1 slot, one PCI Express x16 slot, and two 32-bit/33MHz PCI slots. PCI (Peripheral Component Interconnect) Express Slots The PCI Express slots support the expansion card, such as jumpers, switches or BIOS configuration. PCI Slot PCI Interrupt Request Routing The - MSI rc410M2 | User Guide - Page 41
This chapter provides the information on the BIOS Setup program and allows you to configure the system for optimum use. You may need to run the Setup program when: An error message appears - MSI rc410M2 | User Guide - Page 42
V2.0 060920 where: 1st digit refers to BIOS maker as A= AMI, W= AWARD, and P= PHOENIX. 2nd - 5th digit refers to the model number. 6th digit refers to the chipset as I= Intel, N= nVidia, and V= VIA, A= ATi. 7th - 8th digit refers to the customer as MS= all standard customers. V1.0 refers to the BIOS - MSI rc410M2 | User Guide - Page 43
BIOS Setup Control Keys Move to the previous item Move to the next item -menu. If you want to return to the main menu, just press the . General Help The BIOS setup program provides a General Help screen. You can call up this screen from any menu by simply pressing . - MSI rc410M2 | User Guide - Page 44
MS-7173 M ainboard The Main Menu Once you enter BIOS CMOS Setup Utility, the Main Menu (Figure 1) will appear on the screen. The Main Menu allows you to select Use this menu to specify your settings for power management. PNP/PCI Configurations This entry appears if your system supports PnP/PCI. 3-4 - MSI rc410M2 | User Guide - Page 45
Use this menu to load the default values set by the mainboard manufacturer specifically for optimal performance of the mainboard. BIOS Setting Password Use this menu to set the password for BIOS. Save & Exit Setup Save changes to CMOS and exit setup. Exit Without Saving Abandon all changes and exit - MSI rc410M2 | User Guide - Page 46
MS-7173 M ainboard Standard CMOS Features The items in Standard CMOS Features Menu are divided The format is . day Day of the week, from Sun to Sat, determined by BIOS. Read-only. month The month from Jan. through Dec. date The date from 1 to 31 can be keyed by - MSI rc410M2 | User Guide - Page 47
BIOS Setup Primary IDE Master/Slave, Secondary IDE Master/Slave, Third/Fourth/Fifth/ Sixth IDE Master Ty pe Press PgUp/ or PgDn/ to select [Manual], [None] or [Auto] type. Note that the specifications of your drive must match with the drive table. The hard disk will not work properly if - MSI rc410M2 | User Guide - Page 48
MS-7173 M ainboard LBA/Large M ode The setting specifies the access mode. [ Au to ] The BIOS automatically determines the optimal mode. [Nor m al ] Maximum number of cylinders, heads, and sec tors supported are 1024, 16, and 63. [Large] For drives that do not support LBA and have more - MSI rc410M2 | User Guide - Page 49
, you'll need to disable this Flash BIOS Protection function. Execute Disable Bit Intel's Execute Disable Bit functionality can prevent certain classes of malicious "buffer overflow" attacks when combined with a supporting operating system. This functionality allows the processor to classify areas - MSI rc410M2 | User Guide - Page 50
MS-7173 M ainboard Hyper-Threading Function The processor uses Hyper-Threading technology to increase transaction rates and reduces end-user response times. The technology treats the two cores inside the processor as two logical processors that can execute instructions simultaneously. In this way, - MSI rc410M2 | User Guide - Page 51
the sub-menu and the following screen appears: 1st/2nd/3rd Boot Device The items allow you to set the sequence of boot devices where BIOS attempts to load the disk operating system. Boot From Other Device Setting the option to [Enabled] allows the system to try to boot from other - MSI rc410M2 | User Guide - Page 52
MS-7173 M ainboard Advanced Chipset Features Important Change these settings only if you are familiar with the chipset. DRAM Timing This field has the capacity to automatically detect all of the DRAM timing. If you set this field to [Manual], the following fields will be selectable. The settings are - MSI rc410M2 | User Guide - Page 53
BIOS Setup RAS# Precharge Time (TRP) This item controls the number of cycles for Row the power and convenience of multi-adapter, multimonitor support for computers that use an AGP- or PCI Express®-based graphics card in conjunction with ATI integrated graphics processors (IGPs). Setting options: [ - MSI rc410M2 | User Guide - Page 54
MS-7173 M ainboard Integrated Peripherals USB Controller This setting disables/enables the onchip USB controller. Setting options: [Enabled], [Disabled]. USB Device Legacy Support Set to [Enabled] if your need to use any USB 1.1/2.0 device in the operating system that does not support or have any - MSI rc410M2 | User Guide - Page 55
BIOS Setup IDE Device Configuration Press to enter the sub-menu and the following screen appears: On-Chip IDE Controller The integrated peripheral controller contains an IDE interface with support for two IDE channels. Select [Disabled] to disable the integrated IDE controller, [Primary] to - MSI rc410M2 | User Guide - Page 56
MS-7173 M ainboard Parallel Port M ode [EPP] Enhanced Parallel Port [ECP + EPP] the onboard parallel port to support both the ECP and EPP modes simultaneously. Choose [Normal] to use Standard Parallel Port + Bi-Directional Mode simultaneously. SATA Device Configuration Press - MSI rc410M2 | User Guide - Page 57
in this section are available only when your BIOS supports S3 sleep mode. ACPI Function This item is to activate the ACPI (Advanced Configuration and Power Management Interface) Function. If your operating system is ACPI-aware, such as Windows 98SE/ 2000/ME, select [Enabled]. Settings: [Enabled] and - MSI rc410M2 | User Guide - Page 58
, if the AGP driver of the card does not support the initialization feature, the display may work abnormally or not function after resuming from S3. Suspend Time Out (Minute) If system activity is not detected for the length of time specified in this field, all devices except CPU will be shut off - MSI rc410M2 | User Guide - Page 59
BIOS Setup Wakeup Event Setup Press and the following sub-menu appears. Resume From S3 By USB Device This setting allows the activities of USB - MSI rc410M2 | User Guide - Page 60
MS-7173 M ainboard PNP/PCI Configurations This section describes configuring the PCI bus system and PnP (Plug & Play) feature. PCI, or Peripheral Component Interconnect, is a system which allows I/O devices to operate at speeds nearing the speed the CPU itself uses when communicating with its - MSI rc410M2 | User Guide - Page 61
H/W Monitor BIOS Setup This section shows the status of your CPU, fan, overall system status, etc. Monitor function is interference (EMI). Settings: [Enabled], [Disabled]. Spread Spectrum When the motherboard's clock generator pulses, the extreme values (spikes) of the pulses creates - MSI rc410M2 | User Guide - Page 62
MS-7173 M ainboard Important 1. If you do not have any EMI problem, leave the setting at [Disabled] for optimal of the CPU fan to cool down the overheated CPU. CPU Fan Failure Warning When enabled, the system will automatically monitor the CPU fan during boot-up. If it detects that the CPU fan - MSI rc410M2 | User Guide - Page 63
mainboard. When you select Load Optimized Defaults, a message as below appears: Pressing Y loads the default factory settings for optimal system performance. BIOS Setting Password When you select this function, a message as below will appear on the screen: Type the password, up to 8 characters in - MSI rc410M2 | User Guide - Page 64
Realtek ALC883 Audio Appendix A Realtek ALC883 Audio The Realtek ALC883 provides 10-channel DAC that simultaneously supports 7.1 sound playback and 2 channels of independent stereo sound output (multiple streaming) through the Front-Out-Left and Front-OutRight channels. A-1 - MSI rc410M2 | User Guide - Page 65
MS-7173 Mainboard Installing the Realtek HD Audio Driver You need to install the driver for Realtek ALC883 codec to function properly before you can get access to 2-, 4-, 6-, 8- channel or 7.1+2 channel audio operations. Follow the procedures described below to install the drivers for different - MSI rc410M2 | User Guide - Page 66
Realtek ALC883 Audio 3. Click Next to install the Realtek High Definition Audio Driver. 4. Click Finish to restart the system. Click here Select this option Click here A-3 - MSI rc410M2 | User Guide - Page 67
MS-7173 Mainboard Software Configuration After installing the audio driver, you are able to use the 2-, 4-, 6- or 8- channel audio feature now. Click the audio icon from the system tray at the lower-right corner of the screen to activate the HD Audio Configuration. It is also available to enable the - MSI rc410M2 | User Guide - Page 68
the arrow, totally 23 kinds of sound effect will be shown for selection. Realtek HD Audio Sound Manager also provides five popular settings "Stone Corridor", "Bathroom", "Sewer pipe", "Arena" and "Audio Corridor" for quick enjoyment. You may choose the provided sound effects, and the equalizer will - MSI rc410M2 | User Guide - Page 69
MS-7173 Mainboard Equalizer Selection Equalizer frees users from default settings; users may create their owned preferred settings by utilizing this tool. 10 bands of equalizer, ranging - MSI rc410M2 | User Guide - Page 70
Frequently Used Equalizer Setting Realtek recognizes the needs that you might have. By leveraging our long experience at audio field, Realtek HD Audio Sound Manager provides you certain optimized equalizer settings that are frequently used for your quick enjoyment. [How to Use It] Other than the - MSI rc410M2 | User Guide - Page 71
MS-7173 Mainboard Mixer In the Mixer part, you may adjust the volumes of the rear and front panels individually. 1. Adjust Volume You can adjust the volume of the speakers that you pluged in front or rear panel by select the Realtek HD Audio rear output or Realtek HD Audio front output items. - MSI rc410M2 | User Guide - Page 72
will be played from the rear panel, which is the default setting. Then you must to select the Realtek HD Audio front output from the scroll list first, and use a different program to play the second audio source (for example: use Winamp to play MP3 files). You will find that the second - MSI rc410M2 | User Guide - Page 73
MS-7173 Mainboard 3. Playback control Tool Mute Playback device This function is to let you freely decide which ports to output the sound. And this is essential when multistreamingplayback enabled. - Realtek HD Audio Rear Output - Realtek HD Audio Front Output Mute You may choose to mute single - MSI rc410M2 | User Guide - Page 74
Mute Recording device -Back Line in/Mic, Front Lin in -Realtek HD Audio Input Mute You may choose to mute single or multiple volume controls or to completely mute sound input. Tool - Show the following volume controls This - MSI rc410M2 | User Guide - Page 75
MS-7173 Mainboard Audio I/O In this tab, you can easily configure your multi-channel audio function and speakers. You can choose a desired multi-channel operation here. a. same as your device. - If not correct, Realtek HD Audio Manager will guide you to plug the device into the correct jack. A-12 - MSI rc410M2 | User Guide - Page 76
Realtek ALC883 Audio Connector Settings Click to access connector settings. Disable front panel jack detection (option) Find no function on front panel jacks? Please check if front jacks - MSI rc410M2 | User Guide - Page 77
MS-7173 Mainboard S/PDIF Short for Sony/Philips Digital Interface, a standard audio file transfer format. S/PDIF allows the transfer of digital audio signals from one device to another without having to be converted first to an analog format. Maintaining the viability of a digital signal prevents - MSI rc410M2 | User Guide - Page 78
Realtek ALC883 Audio Test Speakers You can select the speaker by clicking it to test its functionality. The one you select will light up and make testing sound. - MSI rc410M2 | User Guide - Page 79
MS-7173 Mainboard Microphone In this tab you may set the function of the microphone. Select the Noise Suppression to remove the possible noise during recording, or - MSI rc410M2 | User Guide - Page 80
Realtek ALC883 Audio 3D Audio Demo In this tab you may adjust your 3D positional audio before playing 3D audio applications like gaming. You may also select different environment to choose the most suitable environment you like. A-17 - MSI rc410M2 | User Guide - Page 81
MS-7173 Mainboard Information In this tab it provides some information about this HD Audio Configuration utility, including Audio Driver Version, DirectX Version, Audio Controller & Audio Codec. You may also select the language of this utility by choosing from the Language list. Also there is a - MSI rc410M2 | User Guide - Page 82
Hardware Setup Connecting the Speakers W hen you have set the Multi-Channel Audio Function mode properly in the software utility, connect your speakers to the correct phone jacks in accordance with the setting in software utility. n 2-Channel Mode - MSI rc410M2 | User Guide - Page 83
MS-7173 Mainboard n 4-Channel Mode for 4-Speaker Output Back Panel 1 4 2 5 3 6 Description: Connect two speakers to back panel's Line Out connector and two speakers to the real-channel Line Out connector. 4-Channel Analog Audio Output 1 Center / Subwoofer Out (in 5.1CH / 7.1CH) 2 Side-Surround - MSI rc410M2 | User Guide - Page 84
connector, two speakers to the rear-channel Line out connector and two speakers to the center/ subwoofer-channel Line Out c onn ec tor. 6-Channel Analog Audio Output 1 Center / Subwoofer Out (in 5.1CH / 7.1CH) 2 Side-Surround Out (in 5.1CH / 7.1CH) 3 Rear-Surround Out (in 5.1CH / 7.1CH) 4 Line-In - MSI rc410M2 | User Guide - Page 85
MS-7173 Mainboard n 8-Channel Mode for 8-Speaker Output Back Panel 1 4 2 5 3 6 8-Channel Analog Audio Output 1 Center / Subwoofer Out (in 5.1CH / 7.1CH) 2 Side-Surround Out (in 5.1CH / 7.1CH) 3 Rear-Surround Out (in 5.1CH / 7.1CH) 4 Line-In 5 Line-Out 6 Mic-In - MSI rc410M2 | User Guide - Page 86
SURROUND VIEWTM Appendix B ATI SURROUND VIEWTM ATI SURROUNDVIEW ™ is an integrated feature supported by the onboard ATI northbridge chipset. It provides the power and convenience of multi-adapter, multi-monitor support for computers that use an AGPor PCI Express®-based graphics card in conjunction - MSI rc410M2 | User Guide - Page 87
MS-7173 Mainboard Getting Started SURROUNDVIEW ™ provides the power and convenience of multi-adapter, multimonitor support for computers that use an AGP- or PCI Express®-based graphics card in conjunction with the following ATI Installing a graphics card in the motherboard's PCIe™ slot. 2. Enabling - MSI rc410M2 | User Guide - Page 88
Supported ATI Products Expansion Slot Operating System Integrated graphics processors (enabled by system BIOS): • RADEON® XPRESS 200 • RADEON® 9100 Pro • RADEON® 9100 IGP • RADEON® 9000 IGP AGP/PCIe™ graphics cards: • RADEON® X800 series • RADEON® X700 series • RADEON® X600 series • RADEON® X300 - MSI rc410M2 | User Guide - Page 89
MS-7173 Mainboard Installing a Graphics Card IImmppoorrttaanntt This section provides generic installation instructions only. In most cases a graphics card will come with specific installation instructions, in which case users should consult their graphics card manual and follow the instructions - MSI rc410M2 | User Guide - Page 90
ATI SURROUND VIEWTM Important WARNING - Remember to discharge your body's static electricity by are not available at this stage of the installation. Once you have installed the proper drivers and software, you can use the Display Properties control panel to adjust the video settings and configure multiple - MSI rc410M2 | User Guide - Page 91
MS-7173 Mainboard Enabling SURROUNDVIEWTM Enabling the Integrated Graphics Processor In order to use SURROUNDVIEW ™, the integrated graphics processor (IGP) on the motherboard must be enabled in addition to the graphics card in the PCIe™ slot. Make sure the IGP is enabled (using the BIOS setup - MSI rc410M2 | User Guide - Page 92
Asked Questions Using SURROUNDVIEW™ Question Answer Does the Windows® "Standby" function work when SURROUNDVIEW™ is enabled? Yes, Standby should work properly with SURROUNDVIEW™. Do all ATI cards support SURROUNDVIEW™? No, only the ATI graphics cards noted in System Requirements will - MSI rc410M2 | User Guide - Page 93
MS-7173 Mainboard Using Multiple Displays Setting Up Multiple Displays To use SURROUNDVIEW ™, connect display devices to settings. Once your monitors are connected, you can configure them for a multi-monitor display using SURROUNDVIEW™. Windows® Display Properties Dialog with Multiple Monitors B-8 - MSI rc410M2 | User Guide - Page 94
ATI SURROUND VIEWTM u To set up a multi-monitor display 1. Right-click on a clear area appropriate for the second monitor. Click Apply or OK to apply these new values. u Refer to your Windows® online help and documentation for further information on using the Settings tab. Note: Each display can use - MSI rc410M2 | User Guide - Page 95
MS-7173 Mainboard Using SURROUNDVIEWTM Business Applications Using SURROUNDVIEW ™, you can run multiple applications simultaneously - for example, a spreadsheet, a W eb browser and a stock trader could be run and - MSI rc410M2 | User Guide - Page 96
ATI SURROUND VIEWTM 3. Open your W eb browser, and then drag it to monitor 2. Web browser displayed on monitor 2 4. Launch another instance of your W eb browser, and then drag it to monitor 3. Another Web browser displayed on monitor 3 B-11 - MSI rc410M2 | User Guide - Page 97
MS-7173 Mainboard Games The following section uses Microsoft® Flight Simulator as an example of Flight Simulator 1. Start with Flight Simulator running in windowed mode, so that you can move windows off the primary display. To switch between full-screen and windowed mode, press Alt + Enter or, in the - MSI rc410M2 | User Guide - Page 98
ATI SURROUND VIEWTM 2. Click the FLY NOW! button to start Flight Simulator. Then click the "X" button to continue. You are now "flying". "Flying" in Microsoft® Flight Simulator using primary monitor only 3. From the Views menu, create a new window, and then drag it to monitor 2. Microsoft® Flight - MSI rc410M2 | User Guide - Page 99
MS-7173 Mainboard 4. From the Views menu, create another new window, and then drag it to monitor 3. Microsoft® Flight Simulator using all three monitors B-14 - MSI rc410M2 | User Guide - Page 100
Using TV-Out Function Appendix C Using TV-Out Function You need to install the TV-Out bracket before you can get access to the TV-out function. Follow the procedures described later to set up the TV-Out bracket and configure the display settings. Note that the TV-Out bracket works with the onboard - MSI rc410M2 | User Guide - Page 101
MS-7173 Mainboard Installing the TV-Out Bracket 1. Take out the TV-Out bracket. TV-Out Bracket Foolproof design TV-Out Connector (RCA Composite) TV-Out Connector (S- - MSI rc410M2 | User Guide - Page 102
Using TV-Out Function Connecting S-Video/RCA & HDTV Cables Connecting S-Video cable 1. Connect one end of the S-Video cable to the TV-Out(S) connector. S-Video cable 2. Connect the other end of the S-Video cable to the TV. C-3 - MSI rc410M2 | User Guide - Page 103
MS-7173 Mainboard Connecting RCA cable 1. Connect one end of the RCA cable to the blue connector of the TV-Out cable. The RCA cable usually comes with three connecotrs on both ends. The white or red connector is for audio while the yellow one is for video. RCA cable W hite (Audio) Red (Audio) - MSI rc410M2 | User Guide - Page 104
Using TV-Out Function Connecting HDTV cable 1. Connect one end of the HDTV cable to the TV-Out(C) connectors. The HDTV cable usually comes with three connecotrs on both ends. HDTV cable Red Blue Green Blue Green Red 2. Connect the other end of the HDTV cable to the HDTV. C-5 - MSI rc410M2 | User Guide - Page 105
you have to select the TV-out mode in BIOS (refer to the "TV NTSC/PAL Display Select" item of Advance Chipset Features for details.). To enable the TV-Out function, follow this procedure: 1. After install the "ATi System Drivers" that bundled in the driver CD for the mainboard. Restart the computer - MSI rc410M2 | User Guide - Page 106
access this step. If not, skip this step and go to the step5. On this step, select the HDTV fromat that your monitor supports, To determine the supported formats, refer to the monitor manufacturer's specifications. Then click "Next" . On the next screen, to select the proper format for your display - MSI rc410M2 | User Guide - Page 107
MS-7173 Mainboard 5. Finally, click the Yes to complete the configuration. C-8
-
 1
1 -
 2
2 -
 3
3 -
 4
4 -
 5
5 -
 6
6 -
 7
7 -
8
-
9
-
10
-
11
-
12
-
13
-
14
-
15
-
16
-
17
-
18
-
19
-
20
-
21
-
22
-
23
-
24
-
25
-
26
-
27
-
28
-
29
-
30
-
31
-
32
-
33
-
34
-
35
-
36
-
37
-
38
-
39
-
40
-
41
-
42
-
43
-
44
-
45
-
46
-
47
-
48
-
49
-
50
-
51
-
52
-
53
-
54
-
55
-
56
-
57
-
58
-
59
-
60
-
61
-
62
-
63
-
64
-
65
-
66
-
67
-
68
-
69
-
70
-
71
-
72
-
73
-
74
-
75
-
76
-
77
-
78
-
79
-
80
-
81
-
82
-
83
-
84
-
85
-
86
-
87
-
88
-
89
-
90
-
91
-
92
-
93
-
94
-
95
-
96
-
97
-
98
-
99
-
100
-
101
-
102
-
103
-
104
-
105
-
106
-
107
 |
 |
RC410M2 Series
MS-7173 (v2.X) Mainboard
G52-71731X1