MSI rc410M2 User Guide - Page 90
your graphics card, operating system messages will appear once the boot
 |
View all MSI rc410M2 manuals
Add to My Manuals
Save this manual to your list of manuals |
Page 90 highlights
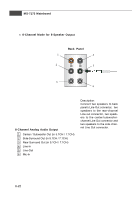
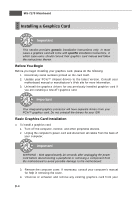
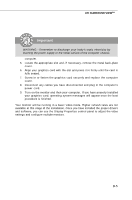
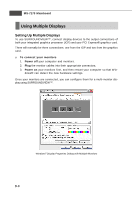
ATI SURROUND VIEWTM Important WARNING - Remember to discharge your body's static electricity by touching the power supply or the metal surface of the computer chassis. computer. 5. Locate the appropriate slot and, if necessary, remove the metal back-plate c over . 6. Align your graphics card with the slot and press it in firmly until the card is fully seated. 7. Screw in or fasten the graphics card securely and replace the computer c over . 8. Reconnect any cables you have disconnected and plug in the computer's pIomwperorctoarnd.t 9. Turn on the monitor and then your computer. If you have properly installed your graphics card, operating system messages will appear once the boot procedure is finished. Your monitor will be running in a basic video mode. Higher refresh rates are not available at this stage of the installation. Once you have installed the proper drivers and software, you can use the Display Properties control panel to adjust the video settings and configure multiple monitors. B-5
-
 1
1 -
2
-
3
-
4
-
5
-
6
-
7
-
8
-
9
-
10
-
11
-
12
-
13
-
14
-
15
-
16
-
17
-
18
-
19
-
20
-
21
-
22
-
23
-
24
-
25
-
26
-
27
-
28
-
29
-
30
-
31
-
32
-
33
-
34
-
35
-
36
-
37
-
38
-
39
-
40
-
41
-
42
-
43
-
44
-
45
-
46
-
47
-
48
-
49
-
50
-
51
-
52
-
53
-
54
-
55
-
56
-
57
-
58
-
59
-
60
-
61
-
62
-
63
-
64
-
65
-
66
-
67
-
68
-
69
-
70
-
71
-
72
-
73
-
74
-
75
-
76
-
77
-
78
-
79
-
80
-
81
-
82
-
83
-
84
-
 85
85 -
 86
86 -
 87
87 -
 88
88 -
 89
89 -
 90
90 -
 91
91 -
 92
92 -
 93
93 -
 94
94 -
 95
95 -
96
-
97
-
98
-
99
-
100
-
101
-
102
-
103
-
104
-
105
-
106
-
107
 |
 |