Marantz AV8003 AV8003 User Manua - Page 31
ENTER, Example], RETURN, STORE
 |
View all Marantz AV8003 manuals
Add to My Manuals
Save this manual to your list of manuals |
Page 31 highlights
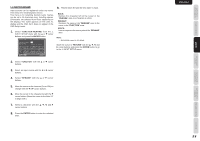
NAMES AND FUNCTION CONNECTIONS SETUP ENGLISH Note: • Less than 6 positions can be measured, but it is recommended to measure in all 6 positions in order to obtain the best results. • The time needed to complete calculations depends on the number of connected speakers and measured listening positions. The more speakers and listening positions, the more time is needed. 10. Checking Measurement Results When calculations for the measurement results end, a screen appears for confirming the calculation results. CHECK RESULT SPEAKERS CONFIG SPEAKERS SIZE DISTANCE CHANNEL LEVEL CROSSOVER FREQ STORE EXIT Select items to check with the 3/4 cursor buttons and press the ENTER button to enter them. Note: To check equalizer (MultEQ) parameters, see page 38. [Example] Confirmation screen for speaker detection SPEAKER CONFIG CHECK !! SPEAKER FRONT : YES CENTER : NON FRONT R : YES SURR.R : YES SURR.B R : NON SURR.B L : NON SURR.L : YES SUB W : YES RETURN NEXT [Example] Confirmation screen for speaker size and crossover frequency SPEAKER SIZE FRONT L CENTER FRONT R SURR.R SURR.B R SURR.B L SURR.L : AUTO : AUTO : AUTO : AUTO : AUTO : AUTO : AUTO RETURN NEXT CROSSOVER FREQ FRONT : AUTO CENTER : AUTO SURR : AUTO SURR.B : AUTO RETURN * AUTO is displayed to indicate that the speaker size and crossover frequency results were automatically measured. 11. Storing Measurement Results in Memory Once finished confirming the measurement results, select "RETURN" with the 3/4 cursor buttons and press the ENTER button to display the CHECK RESULT screen. CHANNEL LEVEL FRONT L CENTER FRONT R SURR.R SURR.B R SURR.B L SURR.L SUB W : 0.0dB : -6.5dB : -1.5dB : +1.0dB : +9.5dB : +12.0dB : -2.5dB : -12.5dB RETURN NEXT Note: Pressing "EXIT" prior to pressing "STORE" erases all measurement results and calculation results, therefore operate the remote controller with care. When storing operations end, the following OSD appears on the display. 2.SPKR SETUP AUTO SETUP MANUAL SETUP THX AUDIO SETUP RETURN EXIT Notes: • Do not turn the power to the unit off while storing parameters in memory. This may erase all data in the unit's memory and may damage the unit. • Please set any THX Certified speakers manually to "Small" and the crossover "80 Hz" after Auto setup operation. BASIC OPERATION ADVANCED OPERATION REMOTE CONTROLLER TROUBLESHOOTING [Example] Confirmation screen for the distance from speakers to the listening position DISTANCE UNIT : ft FRONT L : 30.00ft CENTER : 19.33ft FRONT R : 29.66ft SURR.R : 21.50ft SURR.B R : 12.33ft SURR.B L : 11.66ft SURR.L : 16.33ft SUB W : 12.50ft RETURN NEXT * The units can be changed by moving the cursor to [ft] of UNIT and pressing 1 / 2 the cursor buttons. Each time a 1 / 2 cursor button is pressed, the units alternate between [ft] (feet) and [m] (meters). 28 CHECK RESULT SPEAKERS CONFIG SPEAKERS SIZE DISTANCE CHANNEL LEVEL CROSSOVER FREQ STORE EXIT Place the cursor on "STORE" and press the ENTER button to store all parameters including the equalizer parameters in memory. If not wanting to store the calculation results in memory, place the cursor on "EXIT" and press the ENTER button. OTHERS
-
 1
1 -
2
-
3
-
4
-
5
-
6
-
7
-
8
-
9
-
10
-
11
-
12
-
13
-
14
-
15
-
16
-
17
-
18
-
19
-
20
-
21
-
22
-
23
-
24
-
25
-
 26
26 -
 27
27 -
 28
28 -
 29
29 -
 30
30 -
 31
31 -
 32
32 -
 33
33 -
 34
34 -
 35
35 -
 36
36 -
37
-
38
-
39
-
40
-
41
-
42
-
43
-
44
-
45
-
46
-
47
-
48
-
49
-
50
-
51
-
52
-
53
-
54
-
55
-
56
-
57
-
58
-
59
-
60
-
61
-
62
-
63
-
64
-
65
-
66
-
67
-
68
-
69
-
70
-
71
-
72
-
73
-
74
-
75
-
76
-
77
-
78
-
79
-
80
-
81
-
82
-
83
-
84
-
85
-
86
-
87
-
88
-
89
-
90
-
91
-
92
-
93
-
94
-
95
-
96
-
97
-
98
-
99
-
100
-
101
-
102
-
103
-
104
-
105
-
106
-
107
 |
 |
