Motorola i886 User Guide - Page 68
Message Groups, Going to a Website, Saving Attachments, Create Message Groups
 |
UPC - 723755834354
View all Motorola i886 manuals
Add to My Manuals
Save this manual to your list of manuals |
Page 68 highlights
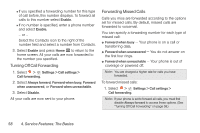
3. Select Create new contact to store the number in a new entry, or select an entry to store the information to an existing entry. 4. To change the contacts type (Mobile, Home, Work, etc.), press r to select the number, select Edit label, and select a type. 5. Press Menu h > Done when you have finished entering the information. Going to a Website If a message contains one or more Web addresses, you can go to the website. 1. Highlight the message and press r. 2. From the Select action menu, select the Web address. The Web page will open in your browser. Note: The entire Web address must appear in the message. Otherwise, you cannot go to the website. Saving Attachments 1. View a message. 2. Highlight the message body, press and hold r, and then select Copy attached to SD card. Message Groups A Message Group allows you to send messages to groups of up to 20 contacts. Create Message Groups 1. Select > Contacts > Menu h > New Message Group. 2. Select Add members and then select the contacts you want to add to the group. 3. When you are finished adding members to the group, select Save. 4. Select Phone, enter a group name, and select Done. Note: If you do not provide a name for the message group, the default name will be (Message Group). Manage Message Groups To view a Message Group: ᮣ Select > Contacts, highlight the message group and press r. 54 4. Service Features: The Basics
-
 1
1 -
2
-
3
-
4
-
5
-
6
-
7
-
8
-
9
-
10
-
11
-
12
-
13
-
14
-
15
-
16
-
17
-
18
-
19
-
20
-
21
-
22
-
23
-
24
-
25
-
26
-
27
-
28
-
29
-
30
-
31
-
32
-
33
-
34
-
35
-
36
-
37
-
38
-
39
-
40
-
41
-
42
-
43
-
44
-
45
-
46
-
47
-
48
-
49
-
50
-
51
-
52
-
53
-
54
-
55
-
56
-
57
-
58
-
59
-
60
-
61
-
62
-
 63
63 -
 64
64 -
 65
65 -
 66
66 -
 67
67 -
 68
68 -
 69
69 -
 70
70 -
 71
71 -
 72
72 -
 73
73 -
74
-
75
-
76
-
77
-
78
-
79
-
80
-
81
-
82
-
83
-
84
-
85
-
86
-
87
-
88
-
89
-
90
-
91
-
92
-
93
-
94
-
95
-
96
-
97
-
98
-
99
-
100
-
101
-
102
-
103
-
104
-
105
-
106
-
107
-
108
-
109
-
110
-
111
-
112
-
113
-
114
-
115
-
116
-
117
-
118
-
119
-
120
-
121
-
122
-
123
-
124
-
125
-
126
-
127
-
128
-
129
-
130
-
131
-
132
-
133
-
134
-
135
-
136
-
137
-
138
-
139
-
140
-
141
-
142
-
143
-
144
-
145
-
146
-
147
-
148
-
149
-
150
-
151
 |
 |