NEC V754Q Users Manual - English - Page 8
Handles for safety wire, ²rientation
 |
View all NEC V754Q manuals
Add to My Manuals
Save this manual to your list of manuals |
Page 8 highlights
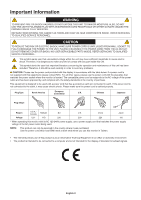
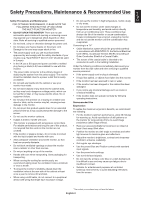
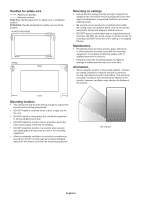
Handles for safety wire : Factory set position. : Alternate position. Solid line: Handle placement for safety wire in landscape position. Dotted line: Handle placement for safety wire in portrait position. V654Q/V754Q/V864Q V984Q Mounting on ceilings • Ensure that the ceiling is sturdy enough to support the weight of the unit and the mounting equipment over time, against earthquakes, unexpected vibrations, and other external forces. • Be sure the unit is mounted to a solid structure within the ceiling, such as a support beam. Secure the monitor using bolts, spring lock washers, washer and nut. • DO NOT mount to areas that have no supporting internal structure. DO NOT use wood screws or anchor screws for mounting. DO NOT mount the unit to ceiling or to hanging fixtures. Maintenance • Periodically check for loose screws, gaps, distortions, or other problems that may occur with the mounting equipment. If a problem is detected, please refer to qualified personnel for service. • Regularly check the mounting location for signs of damage or weakness that may occur over time. Orientation • When using the monitor in the portrait position, it should be rotated clockwise so that the left side is moved to the top, right side is moved to the bottom. This will allow for proper ventilation and will extend the lifetime of the monitor. Improper ventilation may shorten the lifetime of the monitor. Mounting location • The ceiling and wall must be strong enough to support the monitor and mounting accessories. • DO NOT install in locations where a door or gate can hit the unit. • DO NOT install in areas where the unit will be subjected to strong vibrations and dust. • DO NOT install the monitor next to a location where the main power supply is fed into the building. • DO NOT install the monitor in a location where people can easily grab and hang onto the unit or the mounting equipment. • Allow for adequate ventilation or provide air conditioning around the monitor, so that heat can properly dissipate away from the monitor and from the mounting equipment. LED Indicator English-6
-
 1
1 -
2
-
 3
3 -
 4
4 -
 5
5 -
 6
6 -
 7
7 -
 8
8 -
 9
9 -
 10
10 -
 11
11 -
 12
12 -
 13
13 -
14
-
15
-
16
-
17
-
18
-
19
-
20
-
21
-
22
-
23
-
24
-
25
-
26
-
27
-
28
-
29
-
30
-
31
-
32
-
33
-
34
-
35
-
36
-
37
-
38
-
39
-
40
-
41
-
42
-
43
-
44
-
45
-
46
-
47
-
48
-
49
-
50
-
51
-
52
-
53
-
54
-
55
-
56
-
57
-
58
-
59
-
60
-
61
-
62
-
63
-
64
-
65
-
66
-
67
-
68
-
69
-
70
-
71
-
72
-
73
-
74
-
75
-
76
-
77
-
78
-
79
-
80
 |
 |
