NEC VT695 VT49/490/491/590/595/695 UM - Page 12
Bottom, Attaching the supplied carrying handle(VT695, VT595, VT590 and VT490 only), CAUTION - projector lamp
 |
UPC - 050927253607
View all NEC VT695 manuals
Add to My Manuals
Save this manual to your list of manuals |
Page 12 highlights
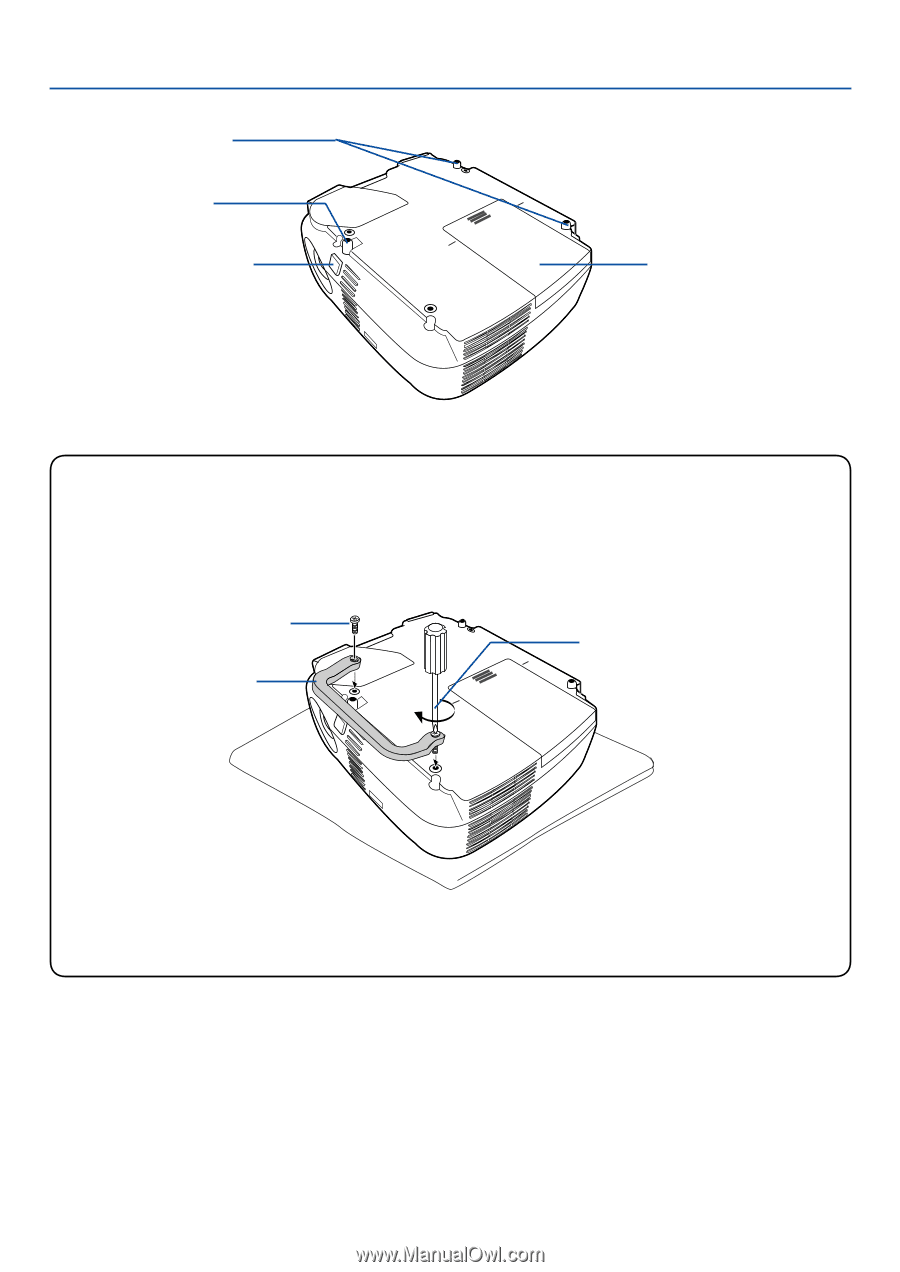
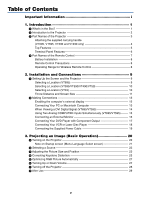
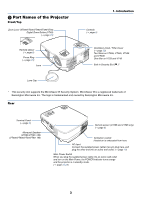
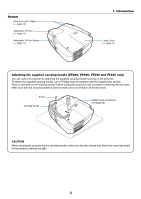
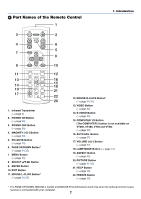
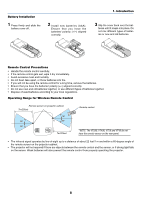
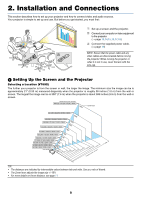
Bottom Rear Foot (Left / Right) (→ page 23) Adjustable Tilt Foot (→ page 23) Adjustable Tilt Foot Button (→ page 23) 1. Introduction Lamp Cover (→ page 52) Attaching the supplied carrying handle (VT695, VT595, VT590 and VT490 only) You can carry the projector by attaching the supplied carrying handle securely to the projector. To attach the supplied carrying handle, use a Phillips-head screwdriver and the supplied two screws. Place a soft cloth on the working surface before turning the projector over to prevent scratching the top cover. Make sure that the carrying handle is attached with correct orientation as shown below. Screw Carrying handle Phillips-head screwdriver (not supplied) CAUTION When carrying the projector by the carrying handle, make sure the two screws that attach the carrying handle to the projector cabinet are tight. 4
-
 1
1 -
2
-
3
-
4
-
5
-
6
-
 7
7 -
 8
8 -
 9
9 -
 10
10 -
 11
11 -
 12
12 -
 13
13 -
 14
14 -
 15
15 -
 16
16 -
 17
17 -
18
-
19
-
20
-
21
-
22
-
23
-
24
-
25
-
26
-
27
-
28
-
29
-
30
-
31
-
32
-
33
-
34
-
35
-
36
-
37
-
38
-
39
-
40
-
41
-
42
-
43
-
44
-
45
-
46
-
47
-
48
-
49
-
50
-
51
-
52
-
53
-
54
-
55
-
56
-
57
-
58
-
59
-
60
-
61
-
62
-
63
-
64
-
65
-
66
-
67
-
68
-
69
-
70
-
71
-
72
-
73
-
74
-
75
-
76
-
77
-
78
-
79
 |
 |