NEC VT695 VT49/490/491/590/595/695 UM - Page 30
(2) Selecting a Source, Selecting the computer or video source, Selecting from Source List
 |
UPC - 050927253607
View all NEC VT695 manuals
Add to My Manuals
Save this manual to your list of manuals |
Page 30 highlights
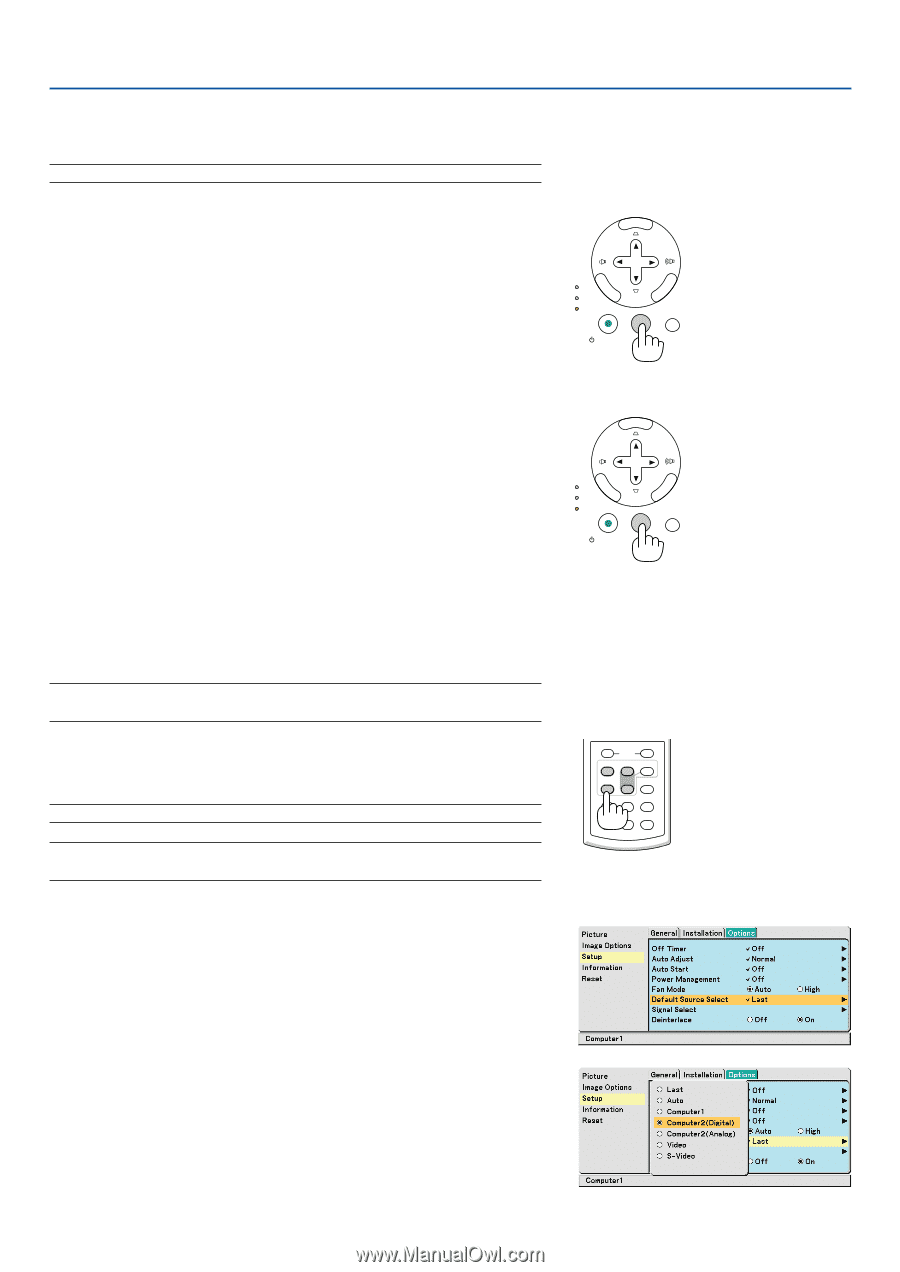
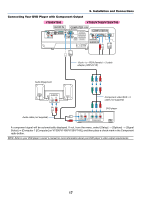
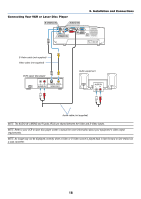
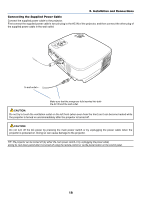
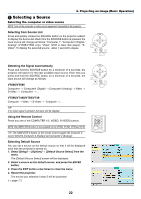
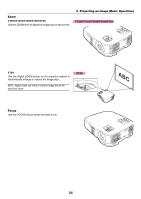
3. Projecting an Image (Basic Operation) ᕢ Selecting a Source Selecting the computer or video source NOTE: Turn on the computer or video source equipment connected to the projector. Selecting from Source List Press and quickly release the SOURCE button on the projector cabinet to display the Source list. Each time the SOURCE button is pressed, the input source will change as follows: "Computer 1", "Computer 2 (Digital / Analog)" (VT695/VT595 only), "Video" (VCR or laser disc player), "SVideo", To display the selected source, allow 1 second to elapse. MENU LAMP STATUS POWER ENTER SELECT EXIT ON/STAND BY SOURCE AUTO ADJ. Detecting the Signal Automatically Press and hold the SOURCE button for a minimum of 2 seconds, the projector will search for the next available input source. Each time you press and hold the SOURCE button for a minimum of 2 seconds, the input source will change as follows: VT695/VT595 Computer1 → Computer2 (Digital) → Computer2 (Analog) → Video → S-Video → Computer1 → ... VT590/VT490/VT59/VT49 Computer → Video → S-Video → Computer → ... TIP: If no input signal is present, the input will be skipped. Using the Remote Control Press any one of the COMPUTER 1/2, VIDEO, S-VIDEO buttons. NOTE: the COMPUTER 2 button is not available on the VT590, VT490, VT59 and VT49. TIP: The COMPUTER 2 button on the remote control toggles the Computer 2 source between [Computer 2 (Digital)] and [Computer 2 (Analog)]. Selecting Default Source You can set a source as the default source so that it will be displayed each time the projector is turned on. 1. Select [Setup] → [Options] → [Default Source Select] from the menu. The [Default Source Select] screen will be displayed. 2. Select a source as the default source, and press the ENTER button. 3. Press the EXIT button a few times to close the menu. 4. Restart the projector. The source you selected in step 2 will be projected. (→ page 47) MENU LAMP STATUS POWER ENTER SELECT EXIT ON/STAND BY SOURCE AUTO ADJ. L-CLICK R-CLICK MOUSE VIDEO COMPUTER AUTO ADJ. 1 S-VIDEO LAMP MODE 2 VOLUME ASPECT HELP PICTURE FREEZE 22
-
 1
1 -
2
-
3
-
4
-
5
-
6
-
7
-
8
-
9
-
10
-
11
-
12
-
13
-
14
-
15
-
16
-
17
-
18
-
19
-
20
-
21
-
22
-
23
-
24
-
 25
25 -
 26
26 -
 27
27 -
 28
28 -
 29
29 -
 30
30 -
 31
31 -
 32
32 -
 33
33 -
 34
34 -
 35
35 -
36
-
37
-
38
-
39
-
40
-
41
-
42
-
43
-
44
-
45
-
46
-
47
-
48
-
49
-
50
-
51
-
52
-
53
-
54
-
55
-
56
-
57
-
58
-
59
-
60
-
61
-
62
-
63
-
64
-
65
-
66
-
67
-
68
-
69
-
70
-
71
-
72
-
73
-
74
-
75
-
76
-
77
-
78
-
79
 |
 |