NEC VT695 VT49/490/491/590/595/695 UM - Page 33
(4) Correcting Keystone Distortion, Adjusting with buttons on the cabinet
 |
UPC - 050927253607
View all NEC VT695 manuals
Add to My Manuals
Save this manual to your list of manuals |
Page 33 highlights
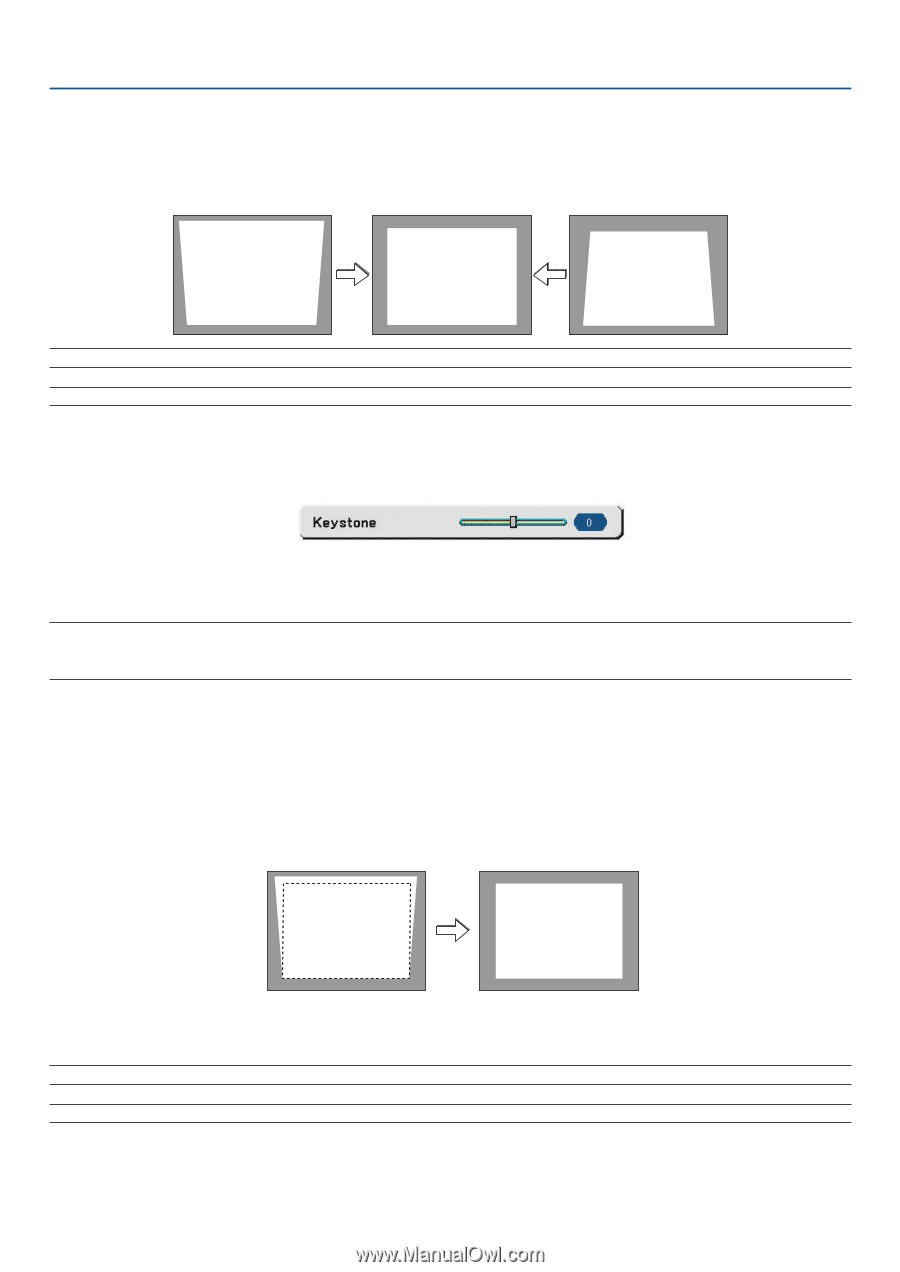
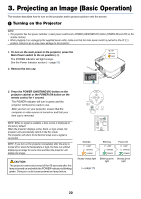
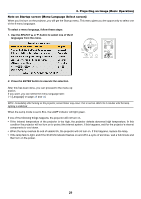
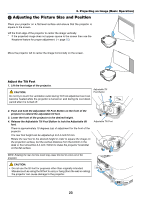
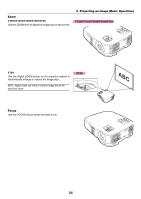
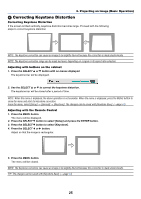
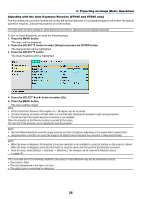
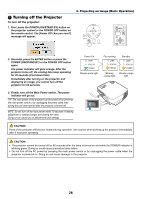
3. Projecting an Image (Basic Operation) ᕤ Correcting Keystone Distortion Correcting Keystone Distortion If the screen is tilted vertically, keystone distortion becomes large. Proceed with the following steps to correct keystone distortion NOTE: The Keystone correction can cause an image to be slightly blurred because the correction is made electronically. NOTE: The Keystone correction range can be made narrower, depending on a signal or its aspect ratio selection. Adjusting with buttons on the cabinet 1. Press the SELECT ̆ or ̄ button with no menus displayed The keystone bar will be displayed. 2. Use the SELECT ̆ or ̄ to correct the keystone distortion. The keystone bar will be closed after a period of time. NOTE: When the menu is displayed, the above operation is not available. When the menu is displayed, press the MENU button to close the menu and start the Keystone correction. From the menu, select [Setup] → [General] → [Keystone]. The changes can be saved with [Keystone Save]. (→page 44) Adjusting with the Remote Control 1. Press the MENU button. The menu will be displayed. 2. Press the SELECT ̄ button to select [Setup] and press the ENTER button. 3. Press the SELECT ̄ button to select [Keystone]. 4. Press the SELECT ̇ or ̈ button. Adjust so that the image is rectangular. 5. Press the MENU button. The menu will be closed. NOTE: The Keystone correction can cause an image to be slightly blurred because the correction is made electronically. TIP: The changes can be saved with [Keystone Save]. (→page 44) 25
-
 1
1 -
2
-
3
-
4
-
5
-
6
-
7
-
8
-
9
-
10
-
11
-
12
-
13
-
14
-
15
-
16
-
17
-
18
-
19
-
20
-
21
-
22
-
23
-
24
-
25
-
26
-
27
-
 28
28 -
 29
29 -
 30
30 -
 31
31 -
 32
32 -
 33
33 -
 34
34 -
 35
35 -
 36
36 -
 37
37 -
 38
38 -
39
-
40
-
41
-
42
-
43
-
44
-
45
-
46
-
47
-
48
-
49
-
50
-
51
-
52
-
53
-
54
-
55
-
56
-
57
-
58
-
59
-
60
-
61
-
62
-
63
-
64
-
65
-
66
-
67
-
68
-
69
-
70
-
71
-
72
-
73
-
74
-
75
-
76
-
77
-
78
-
79
 |
 |