Nikon COOLPIX P90 P90 User's Manual - Page 52
Shooting Suited for the Scenes, Shooting in Scene Mode - indoor settings
 |
View all Nikon COOLPIX P90 manuals
Add to My Manuals
Save this manual to your list of manuals |
Page 52 highlights
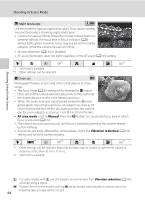
Shooting Suited for the Scenes Shooting in Scene Mode Camera settings are automatically optimized for the selected subject type. The following scene modes are available. b Portrait g Beach/snow c Landscape h Sunset e Night portrait i Dusk/dawn f Party/indoor j Night landscape * See "Voice Recordings" (A87). k Close-up u Food l Museum m Fireworks show n Copy o Backlight p Panorama assist E Voice recording* Setting the Scene Mode 1 Rotate the mode dial to y. Shooting Suited for the Scenes 2 Press the d button to display the scene menu screen, choose the desired scene with the multi selector and press the k button. • Choose the C tab when the scene menu is not displayed (A13). 3 Frame the subject and take the picture. • For scene modes that use the flash, be sure to press the m (flash pop-up) button to raise the built-in flash before shooting. Scene menu Portrait Landscape Night portrait Party/indoor Beach/snow Sunset 1/125 F2.8 D Image Quality and Image Size Image quality (A107) and Image size (A108) settings can be adjusted in the scene menu. Changes made to the image size setting apply to all shooting modes (except for sport continuous mode, E and F shooting modes, and movie mode). 40
-
 1
1 -
2
-
3
-
4
-
5
-
6
-
7
-
8
-
9
-
10
-
11
-
12
-
13
-
14
-
15
-
16
-
17
-
18
-
19
-
20
-
21
-
22
-
23
-
24
-
25
-
26
-
27
-
28
-
29
-
30
-
31
-
32
-
33
-
34
-
35
-
36
-
37
-
38
-
39
-
40
-
41
-
42
-
43
-
44
-
45
-
46
-
 47
47 -
 48
48 -
 49
49 -
 50
50 -
 51
51 -
 52
52 -
 53
53 -
 54
54 -
 55
55 -
 56
56 -
 57
57 -
58
-
59
-
60
-
61
-
62
-
63
-
64
-
65
-
66
-
67
-
68
-
69
-
70
-
71
-
72
-
73
-
74
-
75
-
76
-
77
-
78
-
79
-
80
-
81
-
82
-
83
-
84
-
85
-
86
-
87
-
88
-
89
-
90
-
91
-
92
-
93
-
94
-
95
-
96
-
97
-
98
-
99
-
100
-
101
-
102
-
103
-
104
-
105
-
106
-
107
-
108
-
109
-
110
-
111
-
112
-
113
-
114
-
115
-
116
-
117
-
118
-
119
-
120
-
121
-
122
-
123
-
124
-
125
-
126
-
127
-
128
-
129
-
130
-
131
-
132
-
133
-
134
-
135
-
136
-
137
-
138
-
139
-
140
-
141
-
142
-
143
-
144
-
145
-
146
-
147
-
148
-
149
-
150
-
151
-
152
-
153
-
154
-
155
-
156
-
157
-
158
-
159
-
160
-
161
-
162
-
163
-
164
-
165
-
166
-
167
-
168
-
169
-
170
-
171
-
172
-
173
-
174
-
175
-
176
-
177
-
178
-
179
-
180
-
181
-
182
-
183
-
184
-
185
-
186
-
187
-
188
-
189
-
190
-
191
-
192
 |
 |
