Olympus D-490 D-490 Zoom Instruction Manual (2.6 MB) - Page 32
Using the Flash
 |
UPC - 050332130517
View all Olympus D-490 manuals
Add to My Manuals
Save this manual to your list of manuals |
Page 32 highlights
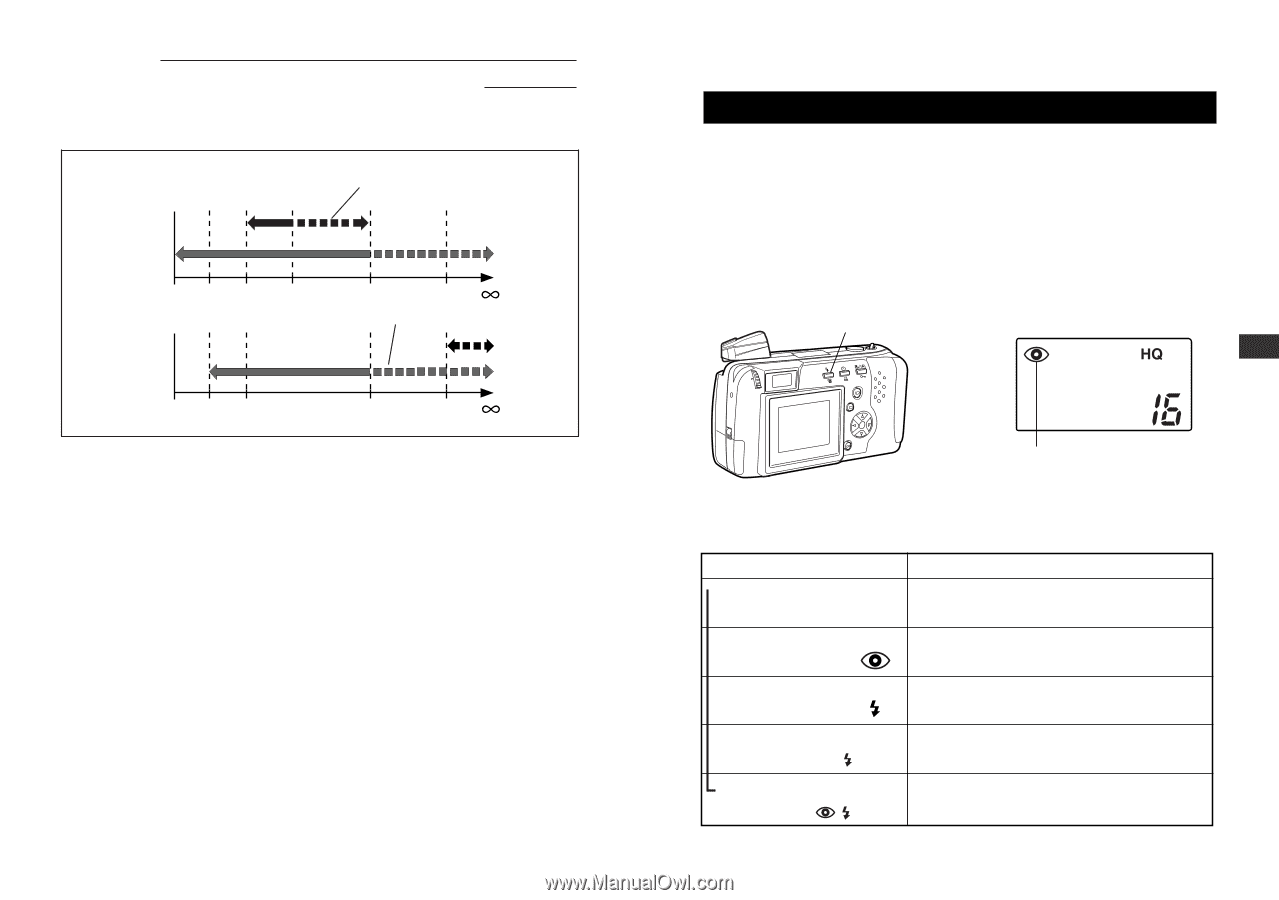
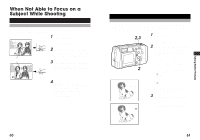
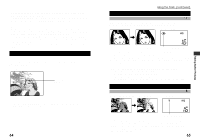
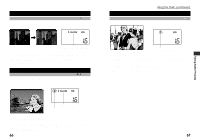
When Not Able to Focus on a Subject While Shooting (continued) Quick focus working range 8ft Quick focus Beyondf flash working range T W 2.8ft 4.3ft 5.9ft 8.2ft ∞ Quick focus T W 2.8ft 4.3ft 5.9ft 13ft 22ft Beyond flash working range 13ft 22ft 62 Using the Flash Switching Between Flash Modes To use the flash feature, push up the flash housing (located at the upper right corner of the camera) (p.45). Select the appropriate flash mode according to the shooting conditions. Note that the flash will not operate when shooting movie pictures (p.88). Also, the working range of the flash changes when you operate the zoom lever. When the power is turned on, the camera is automatically set to autoflash mode. Use the flash mode button to select different flash types. Flash mode button Control panel 4 Taking Better Pictures Flash mode Each time you press the flash mode switching button, the flash mode settings are displayed in order. Flash mode Function/purpose: Auto-flash d Automatically fires in lowlight and backlit (no Mark) conditions (p.64). Red-eye reduction d Significantly reduces the red-eye phenomenon (i.e. when the flash causes a subject's eyes to appear red in the photo) (p.65). Fill-in flash d Fires regardless of available light (p.65). Slow sync d Taking photographs of night views (p.66). SLOW Red-eye reduction + Slow sync Taking photographs of people at night (p.66). SLOW 63
-
 1
1 -
2
-
3
-
4
-
5
-
6
-
7
-
8
-
9
-
10
-
11
-
12
-
13
-
14
-
15
-
16
-
17
-
18
-
19
-
20
-
21
-
22
-
23
-
24
-
25
-
26
-
 27
27 -
 28
28 -
 29
29 -
 30
30 -
 31
31 -
 32
32 -
 33
33 -
 34
34 -
 35
35 -
 36
36 -
 37
37 -
38
-
39
-
40
-
41
-
42
-
43
-
44
-
45
-
46
-
47
-
48
-
49
-
50
-
51
-
52
-
53
-
54
-
55
-
56
-
57
-
58
-
59
-
60
-
61
-
62
-
63
-
64
-
65
-
66
-
67
-
68
-
69
-
70
-
71
-
72
-
73
 |
 |