Olympus E-PL2 E-PL2 Instruction Manual (English) - Page 68
Sending and receiving images, Sending images, Receiving images/adding a host - viewfinder
 |
View all Olympus E-PL2 manuals
Add to My Manuals
Save this manual to your list of manuals |
Page 68 highlights
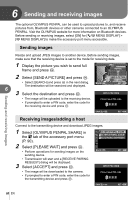
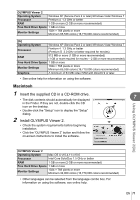
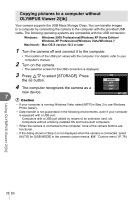
6 Sending and receiving images Sending and receiving images The optional OLYMPUS PENPAL can be used to upload pictures to, and receive pictures from, Bluetooth devices or other cameras connected to an OLYMPUS PENPAL. Visit the OLYMPUS website for more information on Bluetooth devices. Before sending or receiving images, select [ON] for [c/# MENU DISPLAY] > [# MENU DISPLAY] to make the accessory port menu accessible. Sending images Resize and upload JPEG images to another device. Before sending images, make sure that the receiving device is set to the mode for receiving data. 1 Display the picture you wish to send full JPEG frame and press Q. ROTATE m < 2 Select [SEND A PICTURE] and press Q. < SEND A PICTURE • Select [SEARCH] and press Q in the next dialog. BACK Z SET 6 The destination will be searched and displayed. 3 Select the destination and press Q. INPUT PIN CODE • The image will be uploaded to the receiving device. • If prompted to enter a PIN code, enter the code for the receiving device and press Q. Please input PIN code. 0000 CANCEL SET Receiving images/adding a host Connect to the transmitting device and download JPEG images. 1 Select [OLYMPUS PENPAL SHARE] in the A tab of the accessory port menu (P. 90). 2 Select [PLEASE WAIT] and press Q. • Perform operations for sending images on the sending device. • Transmission will start and a [RECEIVE PAIRING REQUEST] dialog will be displayed. 3 Select [ACCEPT] and press Q. AOLYMPUS PENPAL SHARE BOLYMPUS PENPAL ALBUM CELECTRONIC VIEWFINDER c # BACK SET INPUT PIN CODE • The image will be downloaded to the camera. • If prompted to enter a PIN code, enter the code for the transmitting device and press Q. Please input PIN code. 0000 CANCEL SET 68 EN
-
 1
1 -
2
-
3
-
4
-
5
-
6
-
7
-
8
-
9
-
10
-
11
-
12
-
13
-
14
-
15
-
16
-
17
-
18
-
19
-
20
-
21
-
22
-
23
-
24
-
25
-
26
-
27
-
28
-
29
-
30
-
31
-
32
-
33
-
34
-
35
-
36
-
37
-
38
-
39
-
40
-
41
-
42
-
43
-
44
-
45
-
46
-
47
-
48
-
49
-
50
-
51
-
52
-
53
-
54
-
55
-
56
-
57
-
58
-
59
-
60
-
61
-
62
-
 63
63 -
 64
64 -
 65
65 -
 66
66 -
 67
67 -
 68
68 -
 69
69 -
 70
70 -
 71
71 -
 72
72 -
 73
73 -
74
-
75
-
76
-
77
-
78
-
79
-
80
-
81
-
82
-
83
-
84
-
85
-
86
-
87
-
88
-
89
-
90
-
91
-
92
-
93
-
94
-
95
-
96
-
97
-
98
-
99
-
100
-
101
-
102
-
103
-
104
-
105
-
106
-
107
-
108
-
109
-
110
-
111
-
112
-
113
-
114
-
115
-
116
-
117
-
118
-
119
-
120
-
121
-
122
-
123
-
124
 |
 |
