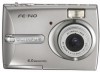
Olympus FE 140 FE-140 Advanced Manual (English) - Page 49
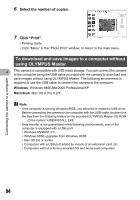
Start up the OLYMPUS Master software, Double-click the OLYMPUS Master icon, on the desktop.
 |
UPC - 050332157910
View all Olympus FE 140 manuals
Add to My Manuals
Save this manual to your list of manuals |
Page 49 highlights
Connecting the camera to a computer Start up the OLYMPUS Master software Windows 1 Double-click the "OLYMPUS Master" icon on the desktop. • The main menu is displayed. • When OLYMPUS Master is started up for the first time after installation, the "Registration" dialog box is displayed before the main menu. Follow the prompts and fill in the registration form. Macintosh 1 Double-click the "OLYMPUS Master" icon in the "OLYMPUS Master" folder. • The main menu is displayed. • When OLYMPUS Master is started up for the 4 first time, the "User Information" dialog box is displayed before the main menu. Enter your "Name" and "OLYMPUS Master Serial Number", and select your region. • After the "User Information" dialog box, the "Registration" dialog box is displayed. Follow the prompts and fill in the registration form. OLYMPUS Master main menu 1 2 3 4 1 "Transfer Images" button Downloads images from the camera or other media. 2 "Browse Images" button The "Browse" window is displayed. 3 "Online Print" button The online print window is displayed. 7 6 5 4 "Print Images at Home" button The print menu is displayed. 5 "Create and Share" button The editing menu is displayed. 6 "Backup Images" button Creates backup images. 7 "Upgrade" button Displays window for optional upgrade to OLYMPUS Master Plus. 49
-
 1
1 -
2
-
3
-
4
-
5
-
6
-
7
-
8
-
9
-
10
-
11
-
12
-
13
-
14
-
15
-
16
-
17
-
18
-
19
-
20
-
21
-
22
-
23
-
24
-
25
-
26
-
27
-
28
-
29
-
30
-
31
-
32
-
33
-
34
-
35
-
36
-
37
-
38
-
39
-
40
-
41
-
42
-
43
-
 44
44 -
 45
45 -
 46
46 -
 47
47 -
 48
48 -
 49
49 -
 50
50 -
 51
51 -
 52
52 -
 53
53 -
 54
54 -
55
-
56
-
57
-
58
-
59
-
60
-
61
-
62
-
63
-
64
-
65
-
66
-
67
-
68
-
69
-
70
-
71
-
72
-
73
-
74
-
75
-
76
-
77
-
78
-
79
-
80
 |
 |
