Panasonic PT-AE1000U Hd Home Cinema Projector
Panasonic PT-AE1000U - LCD Projector - HD 1080p Manual
 |
UPC - 791871111390
View all Panasonic PT-AE1000U manuals
Add to My Manuals
Save this manual to your list of manuals |
Panasonic PT-AE1000U manual content summary:
- Panasonic PT-AE1000U | Hd Home Cinema Projector - Page 1
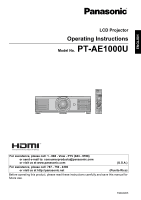
LCD Projector Operating Instructions Model No. PT-AE1000U For assistance, please call: 1 - 888 - View - PTV (843 - 9788) or send e-mail to: [email protected] or visit us at www.panasonic.com (U.S.A.) For assistance, please call: 787 - 750 - 4300 or visit us at http://panasonic - Panasonic PT-AE1000U | Hd Home Cinema Projector - Page 2
Panasonic LCD projector.The serial number of your product may be found on its bottom. You should note it in the space provided below and retain this booklet in case service is required. Model number: PT-AE1000U operating and maintenance (servicing) instructions in the literature accompanying - Panasonic PT-AE1000U | Hd Home Cinema Projector - Page 3
/EC (Article 5); Panasonic Marketing Europe GmbH Hagenauer Str. 43 65203 Wiesbaden F.R.GERMANY WARNING: Not for use in a computer room as defined in the Standard for the Protection of Electronic Computer/Data Processing Equipment, ANSI/NFPA 75. Declaration of Conformity Model Number: PT-AE1000U - Panasonic PT-AE1000U | Hd Home Cinema Projector - Page 4
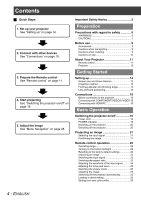
Notice 2 Preparation Precautions with regard to safety 6 WARNINGS 6 CAUTIONS 7 Before use 9 Accessories 9 Cautions when transporting 9 Cautions when installing 9 Cautions on use 10 About Your Projector 11 Remote control 11 Projector 12 Getting Started Setting up 14 Screen size and throw - Panasonic PT-AE1000U | Hd Home Cinema Projector - Page 5
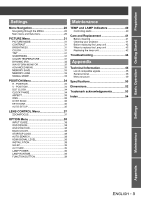
Menu 38 INPUT GUIDE 38 OSD DESIGN projector 41 Before replacing the Lamp unit 42 When to replace the Lamp unit 42 Replacing the lamp unit 42 Troubleshooting 44 Appendix Technical Information 45 List of compatible signals 45 Serial terminal 46 Menu structure 49 Specifications 50 Dimensions - Panasonic PT-AE1000U | Hd Home Cinema Projector - Page 6
Do not use other than an authorized ceiling mount bracket. If foreign objects or water get inside the projector, or if the projector is dropped or . If the power cord is used while damaged, electric shocks, short-circuits or fire may result. Ask an Authorized Service Center to carry out any repairs - Panasonic PT-AE1000U | Hd Home Cinema Projector - Page 7
Before replacing the lamp, be sure to disconnect the power cord plug from the wall outlet. Electric shocks or explosions can result if this is not done. Do not allow infants or pets to touch the remote control unit. The accessory remote control unit can be used to operate not only the projector but - Panasonic PT-AE1000U | Hd Home Cinema Projector - Page 8
projector. If not using the projector replacement of the lamp unit and check the inside of the projector. Ask an Authorized Service Center to clean inside the projector at least once a year. If dust is left to build up inside the projector without being cleaned out, it can result in fire or problems - Panasonic PT-AE1000U | Hd Home Cinema Projector - Page 9
to the ceiling, ask a qualified technician to carry out all installation work. You will need to purchase the separate installation kit (Model No. ET-PKX100, ET-PKE1000S). Furthermore, all installation work is recommended to be carried out by a qualified technician. If using this projector at high - Panasonic PT-AE1000U | Hd Home Cinema Projector - Page 10
, and do not let it become dirty or damaged. Lamp The lamp may need to be replaced earlier due to variables such as individual lamp characteristics, usage conditions and the installation environment, especially when the projector is subjected to continuous use for more than 10 hours or the power is - Panasonic PT-AE1000U | Hd Home Cinema Projector - Page 11
Preparation About Your Projector Remote control J Front, back and top view While the MAIN Assign the frequently used functions from the option for shortcut. (page 39) Learning Remote control buttons and LCD Program and operate other devices. See "Remote Control Operating Guide". Return to the - Panasonic PT-AE1000U | Hd Home Cinema Projector - Page 12
filter (page 41) MAIN POWER Switch the projector on/off (page 20) Lens cover Protects the Projection lens from dust or dirt. Remote control signal receptor (page 22) Air exhaust port damage or injury. While the projector is not in use, attach the Lens cover to protect the lens. 12 - ENGLISH - Panasonic PT-AE1000U | Hd Home Cinema Projector - Page 13
hole SERIAL Connect a compatible cable for controlling the projector remotely via your PC. PC IN Connect an RGB signal projector should only be used with the attached Power cord to ensure optimum performance and avoid damage to the projector. Do not open the Top cover other than replacing the lamp - Panasonic PT-AE1000U | Hd Home Cinema Projector - Page 14
can calculate more detailed screen dimensions from the screen diagonal. SW = SD x 0.872 SH = SD x 0.490 LW = 1.189 x SD - 0.04 LT = 2.378 x SD - 0.05 Unit: m * The results above are approximate and may differ slightly from the actual measurements. NOTE: Do not use the projector at a raised or - Panasonic PT-AE1000U | Hd Home Cinema Projector - Page 15
from front INSTALLATION: REAR/DESK J Mounting in the ceiling and projecting from rear INSTALLATION: FRONT/CEILING INSTALLATION: REAR/CEILING NOTE: A translucent screen is required for REAR projection. When mounting the projector in the ceiling, the optional ceiling mount bracket (ET-PKX100, ET - Panasonic PT-AE1000U | Hd Home Cinema Projector - Page 16
moving the Lens shift dials within the shift range of the lens. J Adjusting the Lens shift dials Q Horizontal shift You can place the projector where the projector lens is up to 40% horizontally off-center from the screen and then adjust the image position with the Lens shift dial • Horizontal. Up - Panasonic PT-AE1000U | Hd Home Cinema Projector - Page 17
cannot move horizontally, likewise when the projecting position is fully moved to the horizontal limit of the shift range, you cannot move vertically. When the projector is tilted and you adjust KEYSTONE, the center of the screen and the lens need to be realigned. Do not force the Lens shift dials - Panasonic PT-AE1000U | Hd Home Cinema Projector - Page 18
connection to the projector Read and follow the operating and connecting instructions of each peripheral device. The peripheral devices must be turned off. Use cables that match may not project the image properly or other problems could be encountered. See "Serial terminal" on page 46. 18 - ENGLISH - Panasonic PT-AE1000U | Hd Home Cinema Projector - Page 19
. Switch off the power to the projector when not in use. POWER indicator POWER indicator Indicator status projector is cooling the lamp. The POWER is switched on again when cooling the lamp and recovering to projection mode. Recovery may take a while. NOTE: While the projector is cooling the lamp - Panasonic PT-AE1000U | Hd Home Cinema Projector - Page 20
press POWER or ENTER. The power indicator lights up in ORANGE while cooling the lamp, then illuminates RED when it is ready to switch off the MAIN POWER. 3. Switch off the MAIN POWER on the back of the projector. NOTE: Press the POWER twice or for a long duration to switch the power - Panasonic PT-AE1000U | Hd Home Cinema Projector - Page 21
+/- of the FOCUS and ZOOM buttons to adjust. Press the LENS button to adjust the focus and zoom by Remote control. see "LENS CONTROL Menu" on page 37 3. Adjust the angle of the projector. Screw down the Front leg adjuster and adjust the angle vertically. NOTE: Do not touch the Air exhaust - Panasonic PT-AE1000U | Hd Home Cinema Projector - Page 22
projector with the Remote control within the remote range 7 m. Q Facing to the projector Ensure the Remote control emitter is facing to the Remote control signal receptor on front of the projector the DEFAULT button. Adjust each menu items manually. Capturing an image When projecting an image, - Panasonic PT-AE1000U | Hd Home Cinema Projector - Page 23
Remote control operation Switching the input signal You can switch the input method manually is highlighted in yellow. See "INPUT GUIDE" on page 38. COMPONENT1 IN Connected project a copyrighted image enlarged or distorted by using ASPECT function in commercial use in a public place, such as a - Panasonic PT-AE1000U | Hd Home Cinema Projector - Page 24
Remote control operation Basic Operation Adjusting the waveform of the input signal You can monitor if the brightness and contrast level of the input signal is - Panasonic PT-AE1000U | Hd Home Cinema Projector - Page 25
Basic Operation Remote control operation Adjusting the focus and zoom You can adjust the page 31. The screen will be cleared after 7 seconds without any operation. Switching off the projector automatically You can switch off the POWER automatically by setting the SLEEP feature. Press the SLEEP - Panasonic PT-AE1000U | Hd Home Cinema Projector - Page 26
Basic Operation Remote control operation Setting your own color profile You can adjust a selected color individually and save and retrieve under the PICTURE MODE setting. Press the COLOR - Panasonic PT-AE1000U | Hd Home Cinema Projector - Page 27
Basic Operation Remote control operation Q Managing stored logs You can edit or delete the stored logs of the selected PICTURE MODE. 1. Select LOG and press ENTER. The LOG - Panasonic PT-AE1000U | Hd Home Cinema Projector - Page 28
access functions which do not have their own dedicated buttons on the Remote control. The menu options are structured and categorized. You can navigate settings 3. Press I H to adjust or set the selected item. For items using a bar scale, the current settings are displayed on the left of the bar - Panasonic PT-AE1000U | Hd Home Cinema Projector - Page 29
Menu Navigation Main menu and Sub-menu The Main menu has 5 options. Select the required menu item and press ENTER to display the Sub-menu. NOTE: Some default settings vary by the selected input signal. J PICTURE See "PICTURE Menu" on page 31. Sub-menu items Default setting Sub-menu items - Panasonic PT-AE1000U | Hd Home Cinema Projector - Page 30
Menu Navigation J LANGUAGE Press F G to select the required language and press ENTER. J OPTION See "OPTION Menu" on page 38. Sub-menu items INPUT GUIDE OSD DESIGN OSD POSITION BACK COLOR STARTUP LOGO AUTO SEARCH HDMI SIGNAL LEVEL Default setting DETAILED TYPE1 CENTER BLUE ON ON NORMAL Sub-menu - Panasonic PT-AE1000U | Hd Home Cinema Projector - Page 31
the projected image. See "Navigating through the MENU" on page 28. Lighter Darker PICTURE MODE Depending on the projection environment, you can use these preset parameter settings to optimise image projection. Press I H to cycle through the options. NORMAL Setting for a general image, such as - Panasonic PT-AE1000U | Hd Home Cinema Projector - Page 32
automatic adjustment of the lamp and the lens iris the waveform is not in the range, adjust it for the best quality. See "Adjusting the waveform of the input signal" on the ADVANCED MENU, you can perform more detailed image adjustment manually. J GAMMA You can adjust linear intensity at 3 levels. - Panasonic PT-AE1000U | Hd Home Cinema Projector - Page 33
signal is changed, the setting switches automatically. You can switch the setting manually to match the video data. Press I H to cycle through the to save and press ENTER. The confirmation screen is displayed. : In use : Not in use Select ALL DELETE to clear all the saved settings. 4. Select OK and - Panasonic PT-AE1000U | Hd Home Cinema Projector - Page 34
POSITION Menu See "Navigating through the MENU" on page 28. DOT CLOCK If you have interference patterns on the projected image, which is sometimes referred to as moire or noise, you can minimize it by pressing I H to adjust the clock frequency. H - POSITION You can move the projected image - Panasonic PT-AE1000U | Hd Home Cinema Projector - Page 35
POSITION Menu ASPECT You can switch the aspect ratio manually when needed. J Aspect ratio options and projection example If you apply the aspect ratio options to the projected image, the result will be as follows. - Panasonic PT-AE1000U | Hd Home Cinema Projector - Page 36
can switch the system off manually. OVER SCAN If the 4 edges of an image is partly dropped, you can use this function to adjust and degrees from the vertical plane. For a better quality image, installing the projector with a minimum of distortion is recommended. Some distortion may be retained - Panasonic PT-AE1000U | Hd Home Cinema Projector - Page 37
LENS CONTROL Menu ZOOM/FOCUS You can use the 2 different test patterns to adjust the focus and zoom of the to return to the previous menu, or press repeatedly to escape the menu mode. NOTE: When the projector and/or the screen is tilted, adjust the focus at the center of the image. The upper and - Panasonic PT-AE1000U | Hd Home Cinema Projector - Page 38
CENTER UPPER RIGHT INPUT GUIDE When you press projector is turned on, the input terminals are detected and an input signal is selected automatically. You can switch the system on/off. Press I H to select an option. • ON: Active • OFF: Deactive NOTE: When no signal is detected, the last used - Panasonic PT-AE1000U | Hd Home Cinema Projector - Page 39
front Setting on a desk/floor and projecting from rear Mounting in the ceiling and projecting from rear SLEEP You can check how long the lamp has been used. NOTE: LAMP RUNTIME is a relevant matter for lamp replacement timing. See "Care and Replacement" on page 41. FUNCTION BUTTON You can assign - Panasonic PT-AE1000U | Hd Home Cinema Projector - Page 40
LAMP is damaged. Lamp unit will run out soon and needs to be replaced. The projector is switched off incorrectly. Replace the Lamp unit. See "Before replacing the Lamp unit" on page 42. Let the LAMP cool down and turn on the projector. If the POWER does not turn on, contact an Authorized Service - Panasonic PT-AE1000U | Hd Home Cinema Projector - Page 41
Do not use the projector without attaching the Air filter. J Replacing the Air filter The Air filter should be replaced when cleaning is ineffective and when replacing the Lamp unit. An replacement Air filter is provided with a replacement lamp unit, ET-LAE1000. Contact an Authorized Service Center - Panasonic PT-AE1000U | Hd Home Cinema Projector - Page 42
page 39. For more information about the Lamp unit, such as guaranteed time, see the "Replacement Instructions" provided with the Lamp unit. Replacing the lamp unit J Opening the top cover 1. Turn off the MAIN POWER switch according to the procedure "Switching the projector on/off" on page 19 and - Panasonic PT-AE1000U | Hd Home Cinema Projector - Page 43
Removing and replacing the lamp unit 1. Use a Phillips screw driver to loosen the 3 lamp unit fixing screws until the screws turn freely. 2. Hold the handle of the lamp unit and release the lamp unit lock. 3. Pull out the lamp unit gently from the projector. Lamp unit fixing screws Lamp unit lock - Panasonic PT-AE1000U | Hd Home Cinema Projector - Page 44
Troubleshooting Should any problem persist, contact your dealer. Problem Cause Power does not turn on. No picture appears. The picture is fuzzy. The color is pale or greyish. The Remote control does not operate. The picture does not display correctly. Picture from a computer does not appear. - Panasonic PT-AE1000U | Hd Home Cinema Projector - Page 45
PC A PC A PC A PC A PC A PC A PC *1. The "i" appearing after the resolution indicates an interlaced signal. *2. The following symbols are used to indicate picture quality. AA Maximum picture quality can be obtained. A Signals are converted by the image processing circuit before picture - Panasonic PT-AE1000U | Hd Home Cinema Projector - Page 46
conforms to the RS-232C interface specification, so that the projector can be controlled by a personal computer which is connected to this connecter. J Connection D-sub 9 pin (male) Serial terminal PC (male) NOTE: You must use only an RS-232C Serial Interface Cable with a ferrite core, type - Panasonic PT-AE1000U | Hd Home Cinema Projector - Page 47
control. If a PON command is received while the cooling fan is operating after the lamp has switched off, the lamp is not turned back on again straight away in order to protect the lamp. Parameter: (page 23) VID = VIDEO IN RG1 = PC IN CP2 = COMPONENT1 IN SVD = S-VIDEO IN HD1 = HDMI1 IN HD2 - Panasonic PT-AE1000U | Hd Home Cinema Projector - Page 48
start with STX, and proceed to Command, Parameter and end with ETX. You can add the required parameter. The projector can not receive any command for 10 seconds after the lamp is switched on. Wait 10 seconds before sending the command. If sending multiple commands, check that a response has been - Panasonic PT-AE1000U | Hd Home Cinema Projector - Page 49
Noise Reduction) MPEG NR CINEMA REALITY TV-SYSTEM Appendix OPTION Menu 38 H INPUT GUIDE 38 H OSD DESIGN 38 H OSD POSITION 38 H BACK COLOR 38 H LEVEL 38 H INSTALLATION 39 H SLEEP 39 H ALTITUDE 39 H LAMP POWER 39 H LAMP RUNTIME 39 H FUNCTION BUTTON 39 H TYPE1 TYPE2 TYPE3 UPPER LEFT - Panasonic PT-AE1000U | Hd Home Cinema Projector - Page 50
mm) Aspect ratio 16 : 9 LCD panel Display method 3 transparent LCD panels (RGB) Drive method Active matrix method Lens Lamp Pixels 2 073 600 (1 980 x " - 39'4") Screen aspect ratio 16 : 9 Installation Front/Rear/Ceiling/Desk (Menu selection method) *1. See "List of compatible signals" - Panasonic PT-AE1000U | Hd Home Cinema Projector - Page 51
Weight COMPONENT1 IN COMPONENT2 IN HDMI1 IN/HDMI2 IN SERIAL Operating environment Certifications Remote control Power supply Operating range Weight Dimensions Options Ceiling bracket Projection screen Cable cover Single - line, Mini DIN 4p Y: 1.0 V [p-p], C: 0.286 V [p-p], 75 Ω Single - Panasonic PT-AE1000U | Hd Home Cinema Projector - Page 52
300 (11-25/32) 60 (2-11/32) 147 (5-25/32) 110 (4-5/16) 130 (5-3/32) Dimensions 15 (9/16) 230 (9-1/32) 460 (18-3/32) Units: mm (inch) Appendix 52 - ENGLISH - Panasonic PT-AE1000U | Hd Home Cinema Projector - Page 53
-Definition Multimedia Interface are trademarks or registered trademarks of HDMI Licensing LLC. The font used in the on-screen displays is a Ricoh bitmap font, which is manufactured and the correct method of disposal. These Operating Instructions are printed on recycled paper. ENGLISH - 53 Appendix - Panasonic PT-AE1000U | Hd Home Cinema Projector - Page 54
LEVEL 38 I INPUT INPUT GUIDE 38 Remote control 23 Remote control button 11 Selecting signal 21 INSTALLATION 39 Projection method 15 K KEYSTONE 36 L LAMP Indicator status 40, 42 LAMP POWER 39 LAMP RUNTIME 39 Replacing 42 LCD, Remote control 11 Learning Remote control buttons 11 LENS - Panasonic PT-AE1000U | Hd Home Cinema Projector - Page 55
46 Connection 46 Control commands 47 Inquiry commands 48 Pin assignments 46 Terminal 13 SHARPNESS 31 SIGNAL MODE 33 SLEEP 39 Remote control 25 Remote control button 11 Specifications 50 STARTUP LOGO 38 S-VIDEO IN Connecting 18 Terminal 13 T TEMP indicator 40 Throw distance 14 - Panasonic PT-AE1000U | Hd Home Cinema Projector - Page 56
-
 1
1 -
 2
2 -
 3
3 -
 4
4 -
 5
5 -
 6
6 -
 7
7 -
8
-
9
-
10
-
11
-
12
-
13
-
14
-
15
-
16
-
17
-
18
-
19
-
20
-
21
-
22
-
23
-
24
-
25
-
26
-
27
-
28
-
29
-
30
-
31
-
32
-
33
-
34
-
35
-
36
-
37
-
38
-
39
-
40
-
41
-
42
-
43
-
44
-
45
-
46
-
47
-
48
-
49
-
50
-
51
-
52
-
53
-
54
-
55
-
56
 |
 |
TQBJ0205
ENGLISH
LCD Projector
Operating Instructions
Model No.
PT-AE1000U
Before operating this product, please read these instructions carefully and save this manual for
future use.
For assistance, please call: 1 - 888 - View - PTV (843 - 9788)
or send e-mail to: [email protected]
or visit us at www.panasonic.com
(U.S.A.)
For assistance, please call: 787 - 750 - 4300
or visit us at http://panasonic.net
(Puerto Rico)