Panasonic PT-AE1000U Hd Home Cinema Projector - Page 39
Installation, Sleep, Altitude, Lamp Power, Lamp Runtime, Function Button, Shutter Function, Disabled - remote learn
 |
UPC - 791871111390
View all Panasonic PT-AE1000U manuals
Add to My Manuals
Save this manual to your list of manuals |
Page 39 highlights
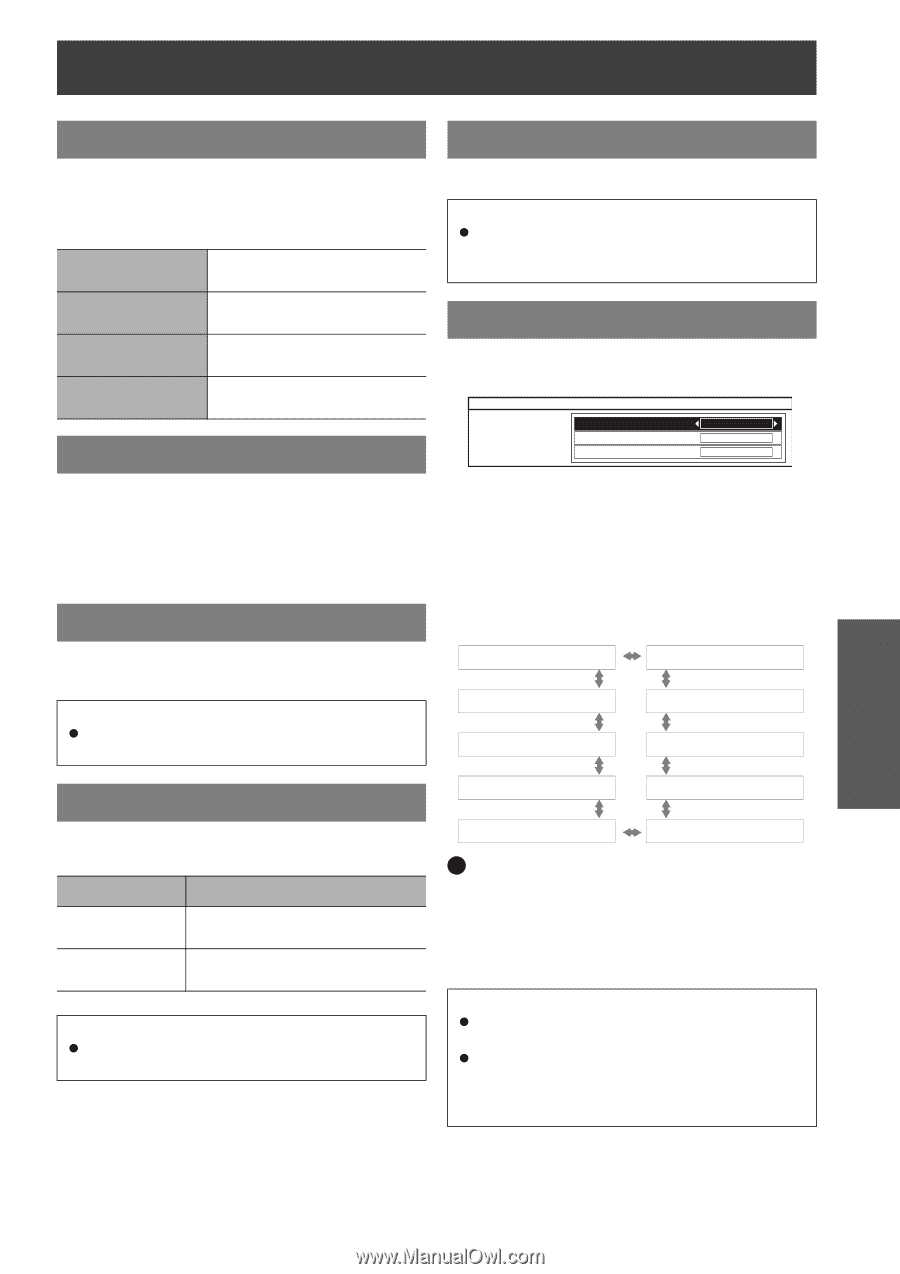
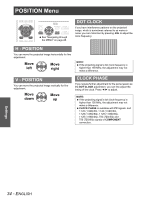
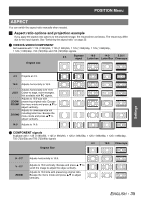
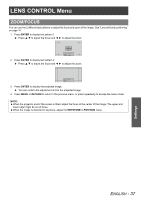
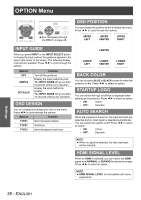
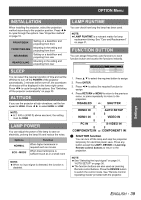
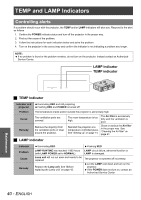
OPTION Menu INSTALLATION LAMP RUNTIME When installing the projector, select the projection method according to the projector position. Press I H to cycle through the options. See "Projection method" on page 15. FRONT/DESK FRONT/CEILING REAR/DESK REAR/CEILING Setting on a desk/floor and projecting from front Mounting in the ceiling and projecting from front Setting on a desk/floor and projecting from rear Mounting in the ceiling and projecting from rear SLEEP You can check how long the lamp has been used. NOTE: LAMP RUNTIME is a relevant matter for lamp replacement timing. See "Care and Replacement" on page 41. FUNCTION BUTTON You can assign frequently used functions to each function button and access the functions instantly. FUNCTION BUTTON FUNCTION BUTTON1 FUNCTION BUTTON2 FUNCTION BUTTON3 OFF OFF OFF You can select the required duration of time and set the off timer to turn off the POWER of the projector automatically. 3 minutes before turn-off, the countdown of minutes will be displayed in the lower right corner. Press I H to cycle through the options. See "Switching off the projector automatically" on page 25. ALTITUDE If you use the projector at high elevations, set the fan speed to HIGH. Press I H to select HIGH or LOW. NOTE: At 1 400 m (4593 ft) above sea level, the setting must be HIGH. 1. Press F G to select the required button to assign. 2. Press ENTER. 3. Press I H to select the required function to assign. 4. Press RETURN or MENU to return to the previous menu, or press repeatedly to return to the projection. DISABLED SHUTTER HDMI2 IN AUTO SETUP HDMI1 IN VIDEO IN LAMP POWER You can adjust the power of the lamp to save on electricity, prolong the lamp life and reduce the noise. Options NORMAL ECO - MODE Function When higher luminance is required such as movies When lower luminance is sufficient such as in a small room NOTE: When no input signal is detected, the function is disabled. PC IN S-VIDEO IN COMPONENT2 IN COMPONENT1 IN Q SHUTTER function You can turn off the lamp and stop the projection temporary for electrical power save. Press any button except the LIGHT, DEVICE or Learning Remote control buttons to return to the projection. NOTE: See "Selecting the input signal" on page 21, "AUTO SETUP" on page 36. The function buttons are also used as Learning Remote control buttons. Press the DEVICE button to switch the control mode. See "Remote Control Operating Guide" provided with the projector. Settings ENGLISH - 39
-
 1
1 -
2
-
3
-
4
-
5
-
6
-
7
-
8
-
9
-
10
-
11
-
12
-
13
-
14
-
15
-
16
-
17
-
18
-
19
-
20
-
21
-
22
-
23
-
24
-
25
-
26
-
27
-
28
-
29
-
30
-
31
-
32
-
33
-
 34
34 -
 35
35 -
 36
36 -
 37
37 -
 38
38 -
 39
39 -
 40
40 -
 41
41 -
 42
42 -
 43
43 -
 44
44 -
45
-
46
-
47
-
48
-
49
-
50
-
51
-
52
-
53
-
54
-
55
-
56
 |
 |