Panasonic PT-LB30 Lcd Projector - Multi-lang - Page 24
Basic Operation, Turning On The Power
 |
UPC - 791871111154
View all Panasonic PT-LB30 manuals
Add to My Manuals
Save this manual to your list of manuals |
Page 24 highlights
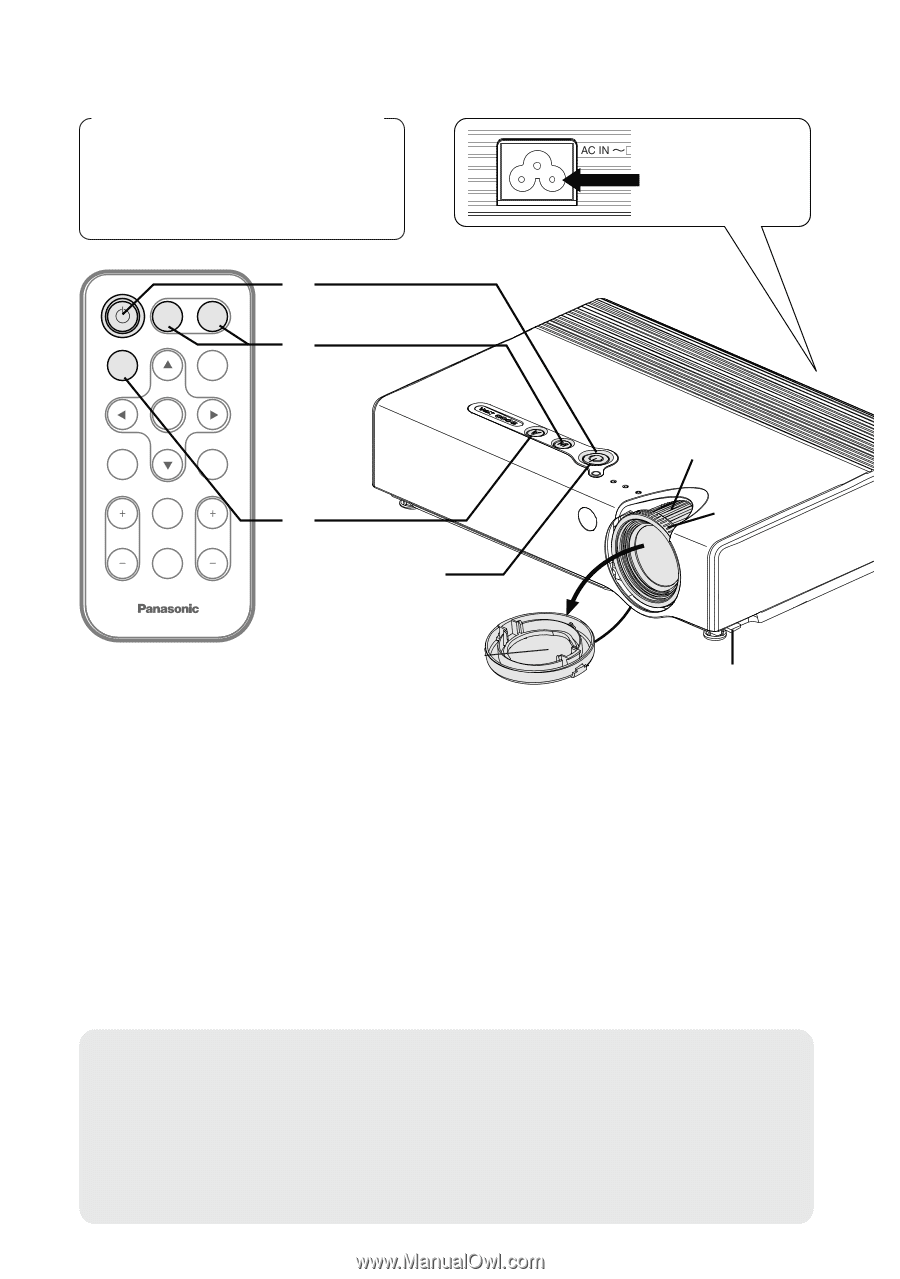
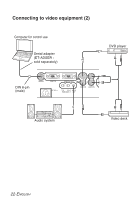
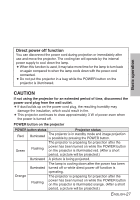
Turning on the power Before turning on the power 1. Ensure that all peripheral devices are connected properly. 2. Remove the lens cover. POWER INPUT VIDEO RGB AUTO SETUP MENU $ & ENTER FREEZE SHUTTER STD VOLUME INDEX WINDOW D.ZOOM ( POWER button # Power cord ) * PROJECTOR Lens cover ' #Connect the accessory power cord to the AC IN socket. BThe POWER button on the projector will illuminate red. $Press the POWER button. BThe POWER button on the projector will flash green. After a short period, it will illuminate green, and a picture will be projected. %Turn on the power of all connected devices. BStart the play function of a device such as a DVD player. NOTE: B If the power cord was disconnected during projection when the projector was used the last time, projection will start after the power cord is connected (when "POWER MEMORY" in the "OPTION" menu is set to "ON"). Refer to page 48 for details. B A tinkling sound may be heard when the lamp unit is turned on, but this is not a sign of a malfunction. 24-ENGLISH
-
 1
1 -
2
-
3
-
4
-
5
-
6
-
7
-
8
-
9
-
10
-
11
-
12
-
13
-
14
-
15
-
16
-
17
-
18
-
 19
19 -
 20
20 -
 21
21 -
 22
22 -
 23
23 -
 24
24 -
 25
25 -
 26
26 -
 27
27 -
 28
28 -
 29
29 -
30
-
31
-
32
-
33
-
34
-
35
-
36
-
37
-
38
-
39
-
40
-
41
-
42
-
43
-
44
-
45
-
46
-
47
-
48
-
49
-
50
-
51
-
52
-
53
-
54
-
55
-
56
-
57
-
58
-
59
-
60
-
61
-
62
-
63
-
64
-
65
-
66
-
67
-
68
-
69
-
70
-
71
-
72
-
73
-
74
-
75
-
76
-
77
-
78
-
79
-
80
-
81
-
82
-
83
-
84
-
85
-
86
-
87
-
88
-
89
-
90
-
91
-
92
-
93
-
94
-
95
-
96
-
97
-
98
-
99
-
100
-
101
-
102
-
103
-
104
-
105
-
106
-
107
-
108
-
109
-
110
-
111
-
112
-
113
-
114
-
115
-
116
-
117
-
118
-
119
-
120
-
121
-
122
-
123
-
124
-
125
-
126
-
127
-
128
-
129
-
130
-
131
-
132
-
133
-
134
-
135
-
136
-
137
-
138
-
139
-
140
-
141
-
142
-
143
-
144
 |
 |