Panasonic TG6500B KXTG6500B User Guide - Page 12
Installation - kx battery
 |
UPC - 037988474813
View all Panasonic TG6500B manuals
Add to My Manuals
Save this manual to your list of manuals |
Page 12 highlights
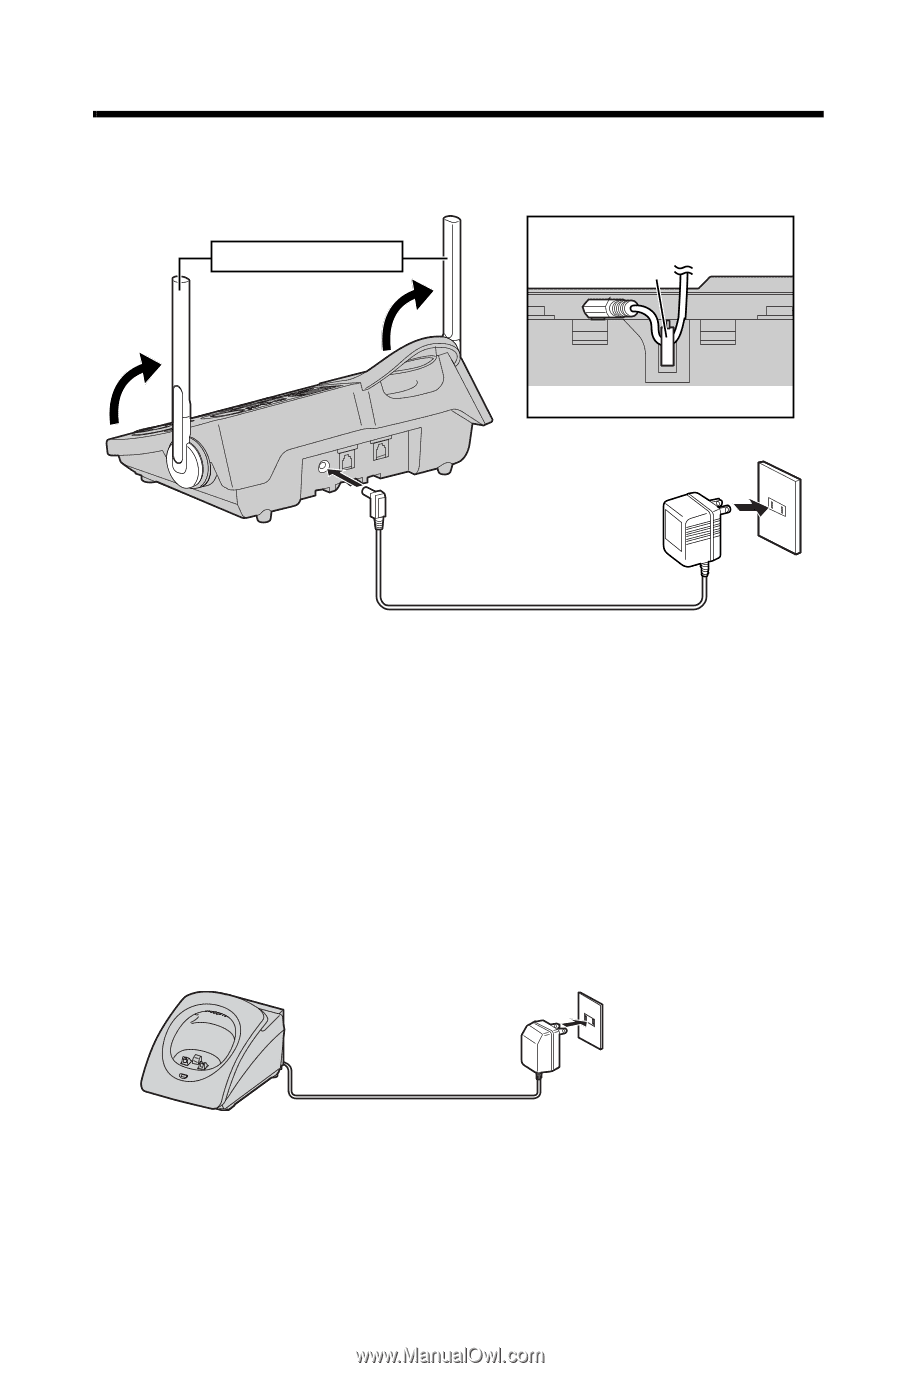
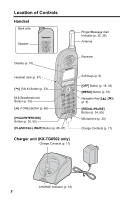
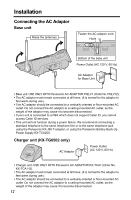
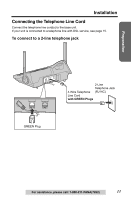
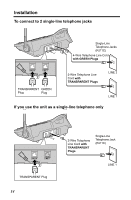
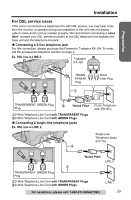
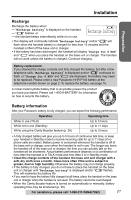
Installation Connecting the AC Adaptor Base unit Raise the antennas. Fasten the AC adaptor cord. Hook Bottom of the base unit Power Outlet (AC 120 V, 60 Hz) AC Adaptor for Base Unit • Base unit: USE ONLY WITH Panasonic AC ADAPTOR PQLV1 (Order No. PQLV1Z). • The AC adaptor must remain connected at all times. (It is normal for the adaptor to feel warm during use.) • The AC adaptor should be connected to a vertically oriented or floor-mounted AC outlet. Do not connect the AC adaptor to a ceiling-mounted AC outlet, as the weight of the adaptor may cause it to become disconnected. • If your unit is connected to a PBX which does not support Caller ID, you cannot access Caller ID services. • This unit will not function during a power failure. We recommend connecting a standard telephone to the same telephone line or to the same telephone jack using the Panasonic KX-J66 T-adaptor, or using the Panasonic Battery Back-Up Power Supply KX-TCA200. Charger unit (KX-TG6502 only) AC Adaptor Power Outlet (AC 120 V, 60 Hz) • Charger unit: USE ONLY WITH Panasonic AC ADAPTOR KX-TCA1 (Order No. KX-TCA1-G). • The AC adaptor must remain connected at all times. (It is normal for the adaptor to feel warm during use.) • The AC adaptor should be connected to a vertically oriented or floor-mounted AC outlet. Do not connect the AC adaptor to a ceiling-mounted AC outlet, as the weight of the adaptor may cause it to become disconnected. 12
-
 1
1 -
2
-
3
-
4
-
5
-
6
-
 7
7 -
 8
8 -
 9
9 -
 10
10 -
 11
11 -
 12
12 -
 13
13 -
 14
14 -
 15
15 -
 16
16 -
 17
17 -
18
-
19
-
20
-
21
-
22
-
23
-
24
-
25
-
26
-
27
-
28
-
29
-
30
-
31
-
32
-
33
-
34
-
35
-
36
-
37
-
38
-
39
-
40
-
41
-
42
-
43
-
44
-
45
-
46
-
47
-
48
-
49
-
50
-
51
-
52
-
53
-
54
-
55
-
56
-
57
-
58
-
59
-
60
-
61
-
62
-
63
-
64
-
65
-
66
-
67
-
68
-
69
-
70
-
71
-
72
-
73
-
74
-
75
-
76
-
77
-
78
-
79
-
80
-
81
-
82
-
83
-
84
-
85
-
86
-
87
-
88
-
89
-
90
-
91
-
92
-
93
-
94
-
95
-
96
-
97
-
98
-
99
-
100
-
101
-
102
-
103
-
104
-
105
-
106
-
107
-
108
 |
 |