Panasonic WJHD500A WJHD500A User Guide - Page 29
Enables formatting all Hard Disks., matting another Hard Disk.
 |
View all Panasonic WJHD500A manuals
Add to My Manuals
Save this manual to your list of manuals |
Page 29 highlights
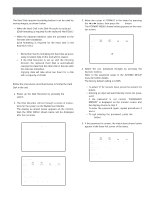
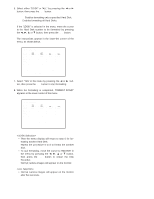
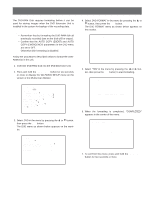
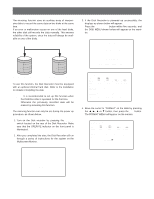
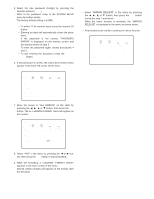
6. Select either "1DISK" or "ALL" by pressing the A or B button, then press the SET button. 1DISK: Enables formatting only a specified Hard Disk. ALL: Enables formatting all Hard Disks. If the "1DISK" is selected in the menu, move the cursor to the Hard Disk number to be formatted by pressing the A, B, D or C button, then press the SET button. The instructions appear in the lower-left corner of the menu, as shown below. 1DISK FORMAT MAIN 1:¢¢GB EXT5 1:¢¢GB EXT4 1:ADD EXT3 1:EXT2 1:EXT1 1:EXT0 1:EXT DVD:- 2:¢¢GB 2:¢¢GB 2:ADD 2:2:2:2:- 3:¢¢GB 3:ADD 3:3:3:3:- 4:¢¢GB 4:ADD 4:4:4:4:- EXECUTE? YES NO SELECT YES/NO AND PRESS [SET] KEY 7. Select "YES" in the menu by pressing the A or B button, then press the SET button to start formatting. 8. When the formatting is completed, "FORMAT DONE!" appears in the lower center of the menu. 1DISK FORMAT MAIN 1:¢¢GB EXT5 1:¢¢GB EXT4 1:ADD EXT3 1:EXT2 1:EXT1 1:EXT0 1:EXT DVD:- 2:¢¢GB 2:¢¢GB 2:ADD 2:2:2:2:- 3:¢¢GB 3:ADD 3:3:3:3:- 4:¢¢GB 4:ADD 4:4:4:4:- FORMAT DONE! • Then the menu display will return to step 6 for formatting another Hard Disk. Repeat the procedure 6 to 8 to format the another disk. • To quit formatting, move the cursor to RESTART in the menu by pressing the A, B, D or C button, then press the SET button to restart the Disk Recorder. Normal camera images will appear on the monitor. • Normal camera images will appear on the monitor after five seconds. 30
-
 1
1 -
2
-
3
-
4
-
5
-
6
-
7
-
8
-
9
-
10
-
11
-
12
-
13
-
14
-
15
-
16
-
17
-
18
-
19
-
20
-
21
-
22
-
23
-
 24
24 -
 25
25 -
 26
26 -
 27
27 -
 28
28 -
 29
29 -
 30
30 -
 31
31 -
 32
32 -
 33
33 -
 34
34 -
35
-
36
-
37
-
38
-
39
-
40
-
41
-
42
-
43
-
44
-
45
-
46
-
47
-
48
-
49
-
50
-
51
-
52
-
53
-
54
-
55
-
56
-
57
-
58
-
59
-
60
-
61
-
62
-
63
-
64
-
65
-
66
-
67
-
68
-
69
-
70
-
71
-
72
-
73
-
74
-
75
-
76
-
77
-
78
-
79
-
80
-
81
-
82
-
83
-
84
-
85
-
86
-
87
-
88
-
89
-
90
-
91
-
92
-
93
-
94
-
95
-
96
-
97
-
98
-
99
-
100
-
101
-
102
 |
 |
