Panasonic WVCS574 WVCS574 User Guide - Page 15
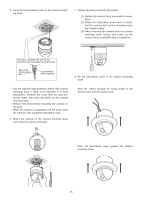
Cautions, Notes, Sideway Cable Exit, Top Cable Exit, When removing the camera from the camera
 |
View all Panasonic WVCS574 manuals
Add to My Manuals
Save this manual to your list of manuals |
Page 15 highlights
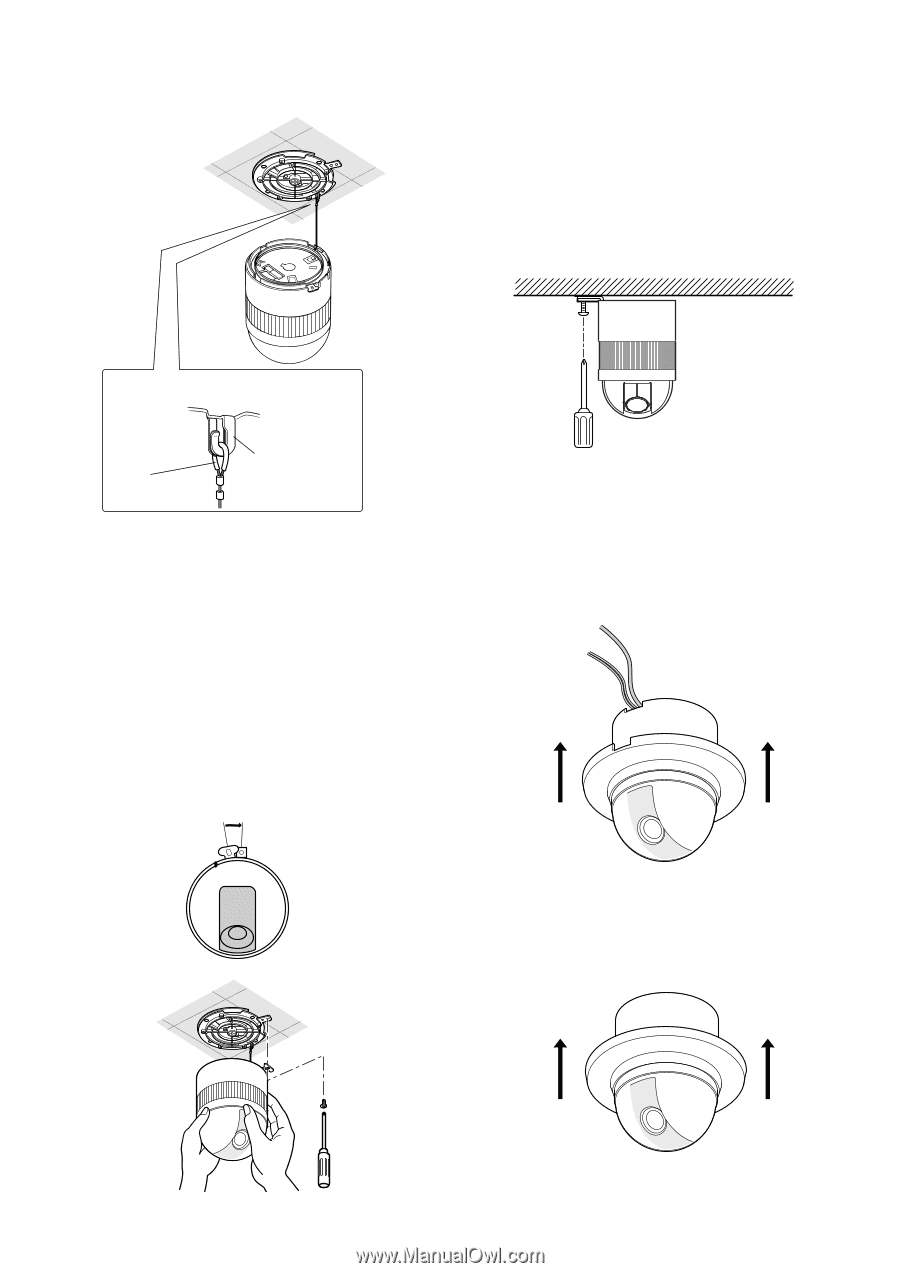
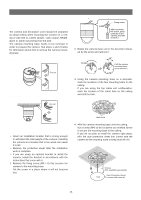
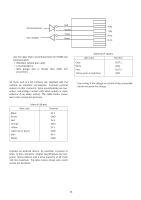
5. Hook the fall prevention wire on the camera mounting base. 7. Tighten the fixing screw M3 (provided). Notes: (1) Tighten the camera fixing screw with a screwdriver. (2) Follow the instructions given here to ensure that the camera and camera mounting base are installed safely. (3) When removing the camera from the camera mounting base, loosen and press up the camera fixing screw (M3) with a screwdriver. Be sure to match the wire with the fall prevention wire fixing angle as shown below. Ring of the fall prevention wire Fall prevention wire fixing angle Cautions: • Use the supplied dust protection sheet if the camera mounting base is liable to be exposed to a dusty atmosphere. Remove the cover from the dust protection sheet, then stick the sheet on the camera mounting base. • Remove the sheet before mounting the camera on the base. • While the camera is separated from the base, keep the camera in the supplied polyethylene sack. 6. Mount the camera on the camera mounting base and rotate the camera clockwise. 15° 8. Fix the decoration cover to the camera mounting base. a. Sideway Cable Exit Pass the cables through the cutout made in the diecast case and decoration cover. b. Top Cable Exit Push the decoration cover against the camera mounting base. -15-
-
 1
1 -
2
-
3
-
4
-
5
-
6
-
7
-
8
-
9
-
 10
10 -
 11
11 -
 12
12 -
 13
13 -
 14
14 -
 15
15 -
 16
16 -
 17
17 -
 18
18 -
 19
19 -
 20
20 -
21
-
22
-
23
-
24
-
25
-
26
-
27
-
28
-
29
-
30
-
31
-
32
-
33
-
34
-
35
-
36
-
37
-
38
-
39
-
40
-
41
-
42
-
43
-
44
-
45
-
46
-
47
-
48
-
49
-
50
-
51
-
52
-
53
-
54
-
55
-
56
-
57
-
58
-
59
-
60
 |
 |