Panasonic WVCS574 WVCS574 User Guide - Page 42
Camera Setting, To Display the Camera Setting Menu, Camera Identification CAMERA ID
 |
View all Panasonic WVCS574 manuals
Add to My Manuals
Save this manual to your list of manuals |
Page 42 highlights
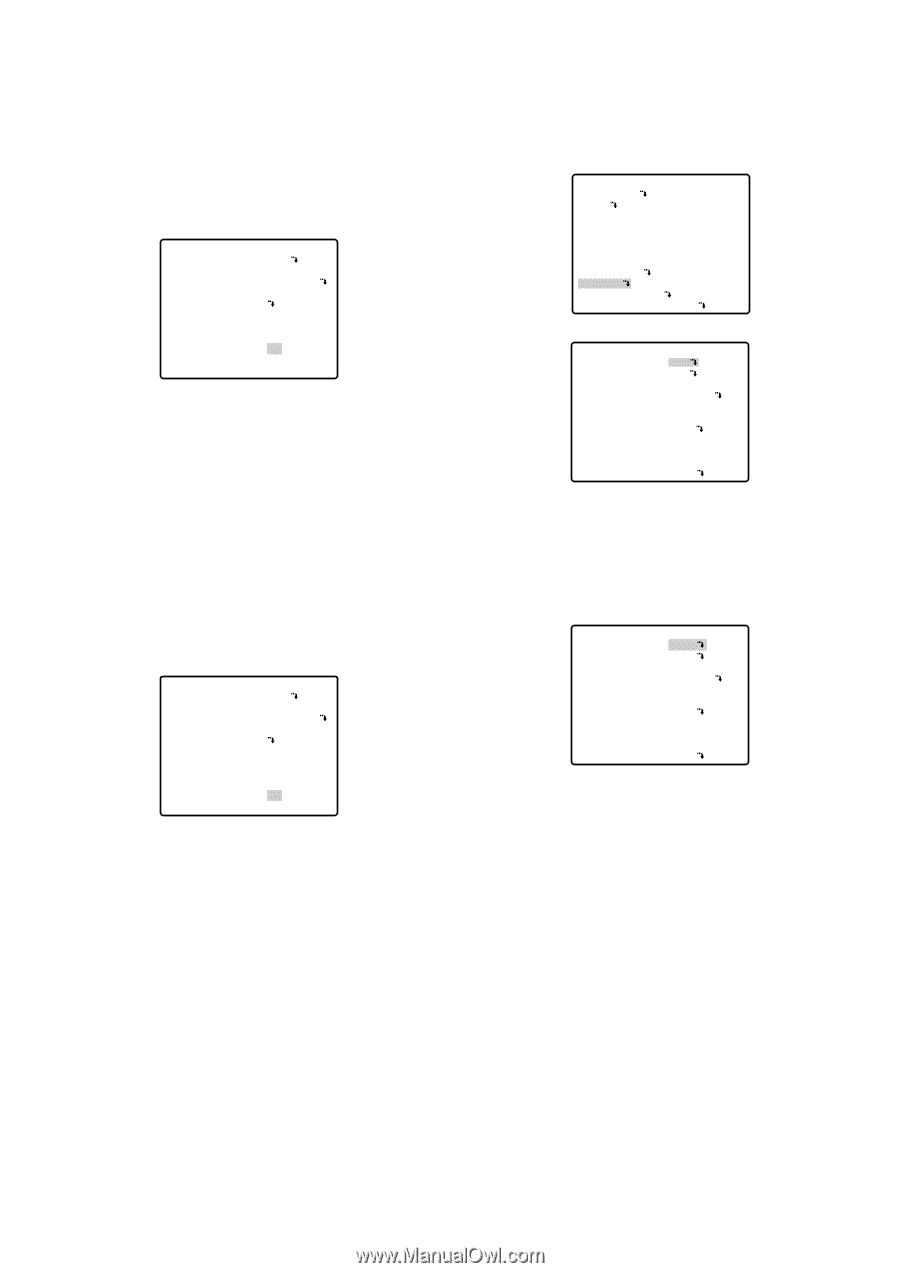
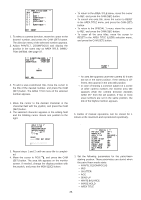
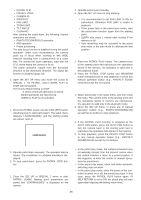
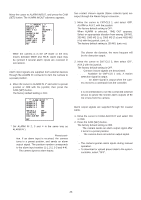
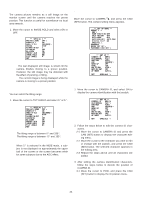
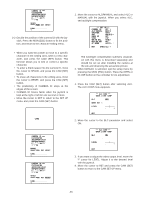
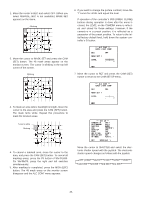
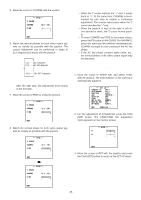
● Image Hold (IMAGE HOLD) The camera picture remains as a still image on the monitor screen until the camera reaches the preset position. This function is useful for surveillance via local area network. 1. Move the cursor to IMAGE HOLD and select ON or OFF. ** SPECIAL 1 ** PRIVACY ZONE OFF PROPO.P/T ON AREA TITLE ON(USER) PATROL STOP ALARM IN/OUT CLEANING OFF EL-ZOOM ON PRESET ALM OFF IMAGE HOLD ON TILT ANGLE 0° RET ON: The last displayed still image is shown till the camera finishes moving to a preset position. However, the still image may be distorted with the effect of panning or tilting. OFF: The current image is being displayed while the camera is moving to a preset position. ● Tilt Angle (TILT ANGLE 0 °/5 °) You can select the tilting range. 1. Move the cursor to TILT ANGLE and select 0 ° or 5 °. ** SPECIAL 1 ** PRIVACY ZONE OFF PROPO.P/T ON AREA TITLE ON(USER) PATROL STOP ALARM IN/OUT CLEANING OFF EL-ZOOM ON PRESET ALM OFF IMAGE HOLD ON TILT ANGLE 0° RET 0 °: The tilting range is between 0 ° and 180 °. 5 °: The tilting range is between -5 ° and 185 °. Note: When 5 ° is selected in the WIDE mode, a subject is not displayed on approximately the upper half of the screen or the screen becomes white for some subjects due to the AGC effect. ■ Camera Setting ● To Display the Camera Setting Menu Move the cursor to CAMERA O, and press the CAM (SET) button. The camera setting menu appears. ** SET UP MENU ** PRESET 1 MAP HOME POSITION OFF SELF RETURN OFF AUTO MODE OFF AUTO PAN KEY AUTO PAN DIGITAL FLIP ON SPECIAL1 CAMERA RS485 SET UP PASSWORD LOCK OFF ** SET UP ** CAMERA ID OFF ALC/MANUAL ALC SHUTTER AUTO AGC ON(MID) SENS UP OFF SYNC INT WHITE BAL ATW1 MOTION DET OFF AF MODE AUTO L RET SPECIAL2 ● Camera Identification (CAMERA ID) 1. Move the cursor to CAMERA ID, and select ON to display the camera identification with the joystick. ** SET UP ** CAMERA ID ON ALC/MANUAL ALC SHUTTER AUTO AGC ON(MID) SENS UP OFF SYNC INT WHITE BAL ATW1 MOTION DET OFF AF MODE AUTO L RET SPECIAL2 2. Follow the steps below to edit the camera ID characters. 2-1 Move the cursor to CAMERA ID and press the CAM (SET) button to display the character editing menu. 2-2 Move the cursor to the character you want to edit or change with the joystick, and press the CAM (SET) button. The selected character appears in the editing area. 2-3 Repeat the steps above until all characters are edited. 3. After editing the camera identification characters, follow the steps below to decide the position of CAMERA ID. 3-1 Move the cursor to POSI, and press the CAM (SET) button to display the ID position menu. -42-
-
 1
1 -
2
-
3
-
4
-
5
-
6
-
7
-
8
-
9
-
10
-
11
-
12
-
13
-
14
-
15
-
16
-
17
-
18
-
19
-
20
-
21
-
22
-
23
-
24
-
25
-
26
-
27
-
28
-
29
-
30
-
31
-
32
-
33
-
34
-
35
-
36
-
 37
37 -
 38
38 -
 39
39 -
 40
40 -
 41
41 -
 42
42 -
 43
43 -
 44
44 -
 45
45 -
 46
46 -
 47
47 -
48
-
49
-
50
-
51
-
52
-
53
-
54
-
55
-
56
-
57
-
58
-
59
-
60
 |
 |