Panasonic WVCS574 WVCS574 User Guide - Page 50
Refresh, Pan, Patrol Special 1, Pix Off Special 2
 |
View all Panasonic WVCS574 manuals
Add to My Manuals
Save this manual to your list of manuals |
Page 50 highlights
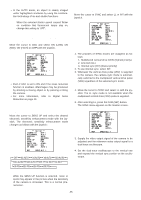
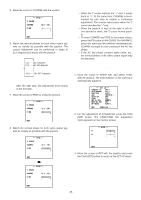
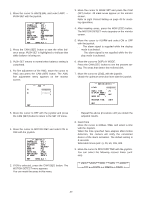
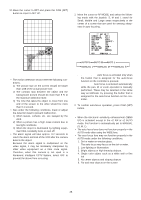
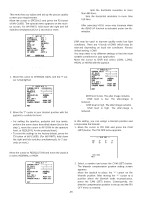
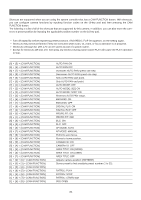
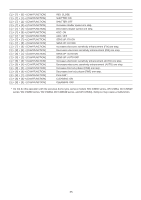
After a blemish compensation position is set up, (*) is attached at the right of the number. 3. If you would like to delete a blemish compensation position, move the cursor to the applicable number and press the CAM (SET) button. + The blemish compensation position setting screen appears. Press the F3 button of WV-CU650 when the setting screen is active. For WV-RM70, hold down the right and left buttons simultaneously for 2 seconds or more. For WV-CU161C, hold down the [4] and [6] keys simultaneously for 2 seconds or more. The screen is restored to the PIX OFF menu, the blemish compensation position is deleted and (*) is also deleted from the right of the number. • To Restore the Camera Default Position (REFRESH) Move the cursor to REFRESH with the joystick and press the F3 button of WV-CU650. ** SPECIAL2 ** CHROMA GAIN AP GAIN PEDESTAL HUE RESOLUTION NORMAL DNR LOW2 PIX OFF REFRESH →PUSH SET CAMERA RESET →PUSH SET RET For WV-RM70, hold down the right and left buttons simultaneously for 2 seconds or more. For WV-CU161C, hold down the [4] and [6] keys simultaneously for 2 seconds or more. • Camera Resetting (CAMERA RESET) Move the cursor to CAMERA RESET with the joystick and press the F4 button of WV-CU650. ** SPECIAL2 ** CHROMA GAIN AP GAIN PEDESTAL HUE RESOLUTION NORMAL DNR LOW2 PIX OFF REFRESH →PUSH SET CAMERA RESET →PUSH SET RET The camera is reset to the factory default settings. (However, the edited settings for PRESET MENU, AUTO PAN, PATROL (SPECIAL 1), PIX OFF (SPECIAL 2) and the registered password will not be reset.) For WV-RM70, hold down the right, left and set switches simultaneously for 2 seconds or more. For WV-CU161C, hold down the [4], [5] and [6] keys simultaneously for 2 seconds or more. The ALL RESET indication will be displayed. Note: In case of performing this operation on the condition that the cursor is positioned on other than CAMERA RESET, you cannot perform the operations on the menu thereafter. In that event, set the camera menu to ON again with the controller referring to page 26. • To Close the SPECIAL2 Menu Move the cursor to RET and press the CAM (SET) button. The setup menu appears on the monitor screen. ** SPECIAL2 ** CHROMA GAIN AP GAIN PEDESTAL HUE RESOLUTION NORMAL DNR LOW2 PIX OFF REFRESH →PUSH SET CAMERA RESET →PUSH SET RET Reset to the Factory Default Settings Any of the above settings plus the ALC/MANUAL level control and phase adjustments can be reset to the factory default settings by placing the cursor over the desired mode and then pressing the F3 button of WVCU650. For WV-RM70, hold down the right and left switches simultaneously for 2 seconds or more. For WV-CU161C, hold down the [4] and [6] keys simultaneously for 2 seconds or more. -50-
-
 1
1 -
2
-
3
-
4
-
5
-
6
-
7
-
8
-
9
-
10
-
11
-
12
-
13
-
14
-
15
-
16
-
17
-
18
-
19
-
20
-
21
-
22
-
23
-
24
-
25
-
26
-
27
-
28
-
29
-
30
-
31
-
32
-
33
-
34
-
35
-
36
-
37
-
38
-
39
-
40
-
41
-
42
-
43
-
44
-
 45
45 -
 46
46 -
 47
47 -
 48
48 -
 49
49 -
 50
50 -
 51
51 -
 52
52 -
 53
53 -
 54
54 -
 55
55 -
56
-
57
-
58
-
59
-
60
 |
 |