Pioneer HTD-540DV Operating Instructions
Pioneer HTD-540DV Manual
 |
View all Pioneer HTD-540DV manuals
Add to My Manuals
Save this manual to your list of manuals |
Pioneer HTD-540DV manual content summary:
- Pioneer HTD-540DV | Operating Instructions - Page 1
. • Receive free tips, updates and service bulletins on your new product • Improve product development Your input helps us continue to design products that meet your needs. • Receive a free Pioneer newsletter Registered customers can opt in to receive a monthly newsletter. Operating Instructions - Pioneer HTD-540DV | Operating Instructions - Page 2
PERSONNEL. The exclamation point within an equilateral triangle is intended to alert the user to the presence of important operating and maintenance (servicing) instructions in the literature accompanying the appliance. D1-4-2-3_En IMPORTANT NOTICE - THE SERIAL NUMBER FOR THIS EQUIPMENT IS LOCATED - Pioneer HTD-540DV | Operating Instructions - Page 3
instructions home, system is grounded so as to provide some protection against voltage surges and built-up static charges. Article 810 of the National Electrical Code, ANSI/NFPA 70, provides information with regard to proper grounding of the mast and supporting SERVICING - Do not attempt to service - Pioneer HTD-540DV | Operating Instructions - Page 4
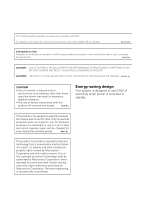
to User Alteration or modifications carried out without appropriate authorization may invalidate the user's . H013_En Energy-saving design This system is designed to use 0.5W owners. Use of this copyright protection technology must be authorized by Macrovision Corporation, and is intended for home - Pioneer HTD-540DV | Operating Instructions - Page 5
instructions, put them in a safe place for future reference. Contents 01 Before you start Features 7 What's in the box 7 Putting the batteries in the remote control. . 7 Using the remote this system 16 Using this unit with a Pioneer plasma display 17 Using the SR+ mode with a Pioneer plasma - Pioneer HTD-540DV | Operating Instructions - Page 6
73 Hints on installation 73 Cleaning the pickup lens 73 Problems with condensation 73 Moving the system unit 73 Power cord caution 73 Connecting external antennas 74 Connecting auxiliary components 74 Recording mode 75 Troubleshooting 76 General 76 DVD/CD/Video CD player 77 MP3/JPEG - Pioneer HTD-540DV | Operating Instructions - Page 7
sound entertainment with home theater system is made easy using the graphical onscreen displays. • Energy saving design This system is designed to use 0.5 W of power when in standby. What's in the box Please confirm that the following accessories are in the main system box when you open it. • Remote - Pioneer HTD-540DV | Operating Instructions - Page 8
comply with governmental regulations or environmental public instruction's rules that apply in your country or remote control Keep in mind the following when using the remote control: • Make sure that there are no obstacles between the remote and the remote sensor on the system unit. • The remote - Pioneer HTD-540DV | Operating Instructions - Page 9
additional compatibility information. JPEG file compatibility • Compatible formats: Baseline JPEG and EXIF 2.1* still image files up to 8 megapixels are supported (maximum vertical and horizontal resolution is 5120 pixels). *File format used by digital still cameras • File extensions: .jpg (must - Pioneer HTD-540DV | Operating Instructions - Page 10
components are switched off and unplugged from the power supply. Surround right XV-HTD540 Surround left VIDEO OUT S-VIDEO Y OUT VIDEO IN CONTROL Gray SPEAKERS FRONT White Connect each speaker using the color-coded speaker cable. Match them to the colored labels above the speaker terminals. 10 - Pioneer HTD-540DV | Operating Instructions - Page 11
of each satellite speaker. Actual speakers supplied may differ from those shown. 2 Connect to the speaker terminals on the rear of the system unit. Match the colored wire with the color-coded label (above the tabs), then insert the colored wire into the red (+) tab and the other wire with the black - Pioneer HTD-540DV | Operating Instructions - Page 12
: • Standard surround 5-spot setup - This is a standard multichannel surround sound speaker setup for optimal 5.1 channel home theatre sound. Front left System unit Subwoofer Front right Center Surround left Surround right Front left Center Front right Subwoofer listening area. Use this - Pioneer HTD-540DV | Operating Instructions - Page 13
mount the speakers on is strong enough to support them. Do not mount on plywood or soft front, center and surround speakers supplied with this system are magnetically shielded. However, placing them extremely consult a professional for advice. • Pioneer is not responsible for any accidents or damage - Pioneer HTD-540DV | Operating Instructions - Page 14
three different kinds of video output that you can use to connect up your TV. Check the available inputs on your TV to see which you can use. • Do not connect a VCR between this system and your TV as DVD playback will be affected. • Use the supplied video cable to connect the - Pioneer HTD-540DV | Operating Instructions - Page 15
inputs, you can use these instead of the standard video output to connect this system this case, press STANDBY/ON to put the system in standby, then press and hold the front to interlace and switch the system back on. Compatibility of progressive video Macro Vision System Copy Guard. Consumers - Pioneer HTD-540DV | Operating Instructions - Page 16
model, please contact our customer service center. This system is compatible with the following Pioneer displays and monitors: Plasma distorting when played through this system, you can set the input attenuator to reduce the input signal level. See Optional system settings on page 70 to do this. - Pioneer HTD-540DV | Operating Instructions - Page 17
there is a communication problem between the unit and the instructions. • The 3-ringed SR+ cable from Pioneer is commercially available under the part number ADE7095. Contact the Pioneer Customer Support division for more information on obtaining an SR+ cable. • You won't be able to use the remote - Pioneer HTD-540DV | Operating Instructions - Page 18
Pioneer plasma displays on page 61. (You can also use the System Setup menu to switch the SR+ mode of this unit.) • If you disconnect the SR+ cable or switch the plasma display off while SR+ is on, the setting automatically reverts to SR+ OFF. This displays an error if you switch the input - Pioneer HTD-540DV | Operating Instructions - Page 19
Connecting up 02 Connecting the supplied antennas The supplied antennas provide a simple way to listen to AM and FM radio. If you find that reception quality is poor, an outdoor antenna should give you better sound quality-see Connecting external antennas on page 74 for more on how to do this. - Pioneer HTD-540DV | Operating Instructions - Page 20
. 2 Plug the other end into a household power outlet. • See Connecting auxiliary components on page 74 for details of other connections you can make with this system. 20 En - Pioneer HTD-540DV | Operating Instructions - Page 21
EXCHANGE OPEN/CLOSE CD MODE TIMER DOWN VOLUME UP 19 18 17 16 15 14 13 12 1 STANDBY/ON (page 27) Press to switch the system on or into standby. 2 DIRECT PLAY buttons (page 31) Press to start playback of any disc in the player. 3 DVD/CD (page 30) Press to - Pioneer HTD-540DV | Operating Instructions - Page 22
on a DVD recorder in Video Recording (VR) mode. 16 CD MODE indicator (page 44) Lights when the CD Mode is on. In this mode, the system only plays audio CDs and MP3 discs. 17 Display See Display on page 22 for detailed information. 18 DISC indicators Shows which disc spaces are - Pioneer HTD-540DV | Operating Instructions - Page 23
47) Lights during random play. 9 V.PART Lights when playing a video part of a DVD disc. 10 ATT (page 70) Lights when the input attenuator is active for the currently selected analog input. 11 REC MODE (page 75) Lights when Rec Mode is on. 12 Timer indicators (page 57) Lights when the timer is - Pioneer HTD-540DV | Operating Instructions - Page 24
HOME MENU ST - QUIET/ MIDNIGHT TUNE + ENTER TUNE - DVD MENU ST + RETURN FOLDER FOLDER PROGRAM REPEAT RANDOM CLEAR TEST TONE CH LEVEL TIMER ENTER SR + DISPLAY DIMMER TV CONTROL SHIFT INPUT CHANNEL VOLUME 5.1ch DVD SURROUND SYSTEM 2 5 7 9 12 15 18 • Functions printed in green on the remote - Pioneer HTD-540DV | Operating Instructions - Page 25
. (page 44) 9 MUTE Press to mute all sound from the speakers and headphones (press again to cancel). 10 VOLUME Use to adjust the volume. 11 HOME MENU / SYSTEM SETUP • Press to display (or exit) the on-screen menu for Initial Settings, Play Mode functions, etc. • Use with SHIFT for - Pioneer HTD-540DV | Operating Instructions - Page 26
select menu options, etc. (works exactly the same as the ENTER button in 13 above). Use to turn on/off the power of the TV. INPUT Use to select the TV function. TV CHANNEL +/- Use to select channels. TV VOLUME +/- Use to adjust the volume on your TV. 19 SHIFT Use - Pioneer HTD-540DV | Operating Instructions - Page 27
STANDBY/ON (on the remote or on the front panel) to switch the system on. Also make sure that your TV is switched on and that the video input is set to this system. You should see the welcome screen displayed. Welcome to Pioneer DVD! Thank you for purchasing this Pioneer DVD player. Before using - Pioneer HTD-540DV | Operating Instructions - Page 28
TV is set to the correct video input (not a TV channel). For example, if you connected this system to the VIDEO 1 input on your TV, switch your TV to sound setup, see Surround sound and other settings on page 60. 1 If the system isn't already on, press STANDBY/ON to switch it on. 2 Press ROOM SETUP - Pioneer HTD-540DV | Operating Instructions - Page 29
1 Switch on your TV. 2 Find the name of the manufacturer of your TV in the Preset Code List on page 83. Next to each manufacturer is one or more three digit codes. These tell the remote what kind of TV you have. If the name of the manufacturer of your TV does not - Pioneer HTD-540DV | Operating Instructions - Page 30
setting up the system, using some of HOME MENU ENTER RETURN • Throughout this manual, 'Select' means use the cursor buttons to highlight an item on-screen, then press ENTER. • The button guide /CLOSE Button HOME MENU ENTER DISCSKIP VOLUME ENTER 1 If the system isn't already on, press STANDBY/ - Pioneer HTD-540DV | Operating Instructions - Page 31
label side facing up in the front-most disc space, using the disc tray guide to align the disc. (If you're loading a double-sided DVD disc, when the disc tray mechanism is moving, the controls are inoperative. 4 Press (remote) or (front panel) to start playback of the disc loaded in the front-most - Pioneer HTD-540DV | Operating Instructions - Page 32
. This is not a malfunction. Using the front panel controls The OPEN/CLOSE and (stop) buttons on the front panel work the same way as the remote control equivalents. The front panel scan and skip buttons ( and ) are combined. Press once for chapter/track skip, or press and hold for scanning - Pioneer HTD-540DV | Operating Instructions - Page 33
facing up, using the disc tray guide to align the disc. • When a Video CD is loaded, the Resume point is lost if the system is switched off, or switched to any of the other spaces; they may not load correctly and cause the system to malfunction. • Do not rotate the disc tray by hand. Always use - Pioneer HTD-540DV | Operating Instructions - Page 34
bars top and bottom with some discs? Some discs override the display preferences of the system, so even if you have 4:3 (Pan & Scan) selected, those discs will Audio discs feature a 'bonus group'. To access this group you have to input a password, which you can find on the disc's packaging. See page - Pioneer HTD-540DV | Operating Instructions - Page 35
Getting started 04 Button What it does TOP MENU Displays the 'top menu' of a DVD (SHIFT + disc-this varies with the disc. DVD MENU) DVD MENU Displays a DVD disc menu-this varies with the disc and may be the same as the 'top menu'. Moves the cursor around the screen. ENTER Selects the - Pioneer HTD-540DV | Operating Instructions - Page 36
stations so you don't have to manually tune in every time you want to listen. STANDBY/ON FM/AM TUNER SYSTEM SETUP TUNE + ST - ST + weak, you can improve the sound quality by switching to mono. 1 Press SYSTEM SETUP (SHIFT + HOME MENU). 2 Use the / (cursor left/right) buttons to choose 'FM Mode - Pioneer HTD-540DV | Operating Instructions - Page 37
manually Press SYSTEM SETUP (SHIFT + HOME MENU system isn't already on, press STANDBY/ON to switch on. Also make sure that the external source (TV, satellite receiver, etc.) is switched on. 2 Select the source you want to listen to. • If you're using the remote control, press TV to select the TV input - Pioneer HTD-540DV | Operating Instructions - Page 38
with this speaker setup. Make sure you have completed Using the Room Setup on page 28. For a more detailed surround sound setup, see Using the System Setup menu on page 60. • Certain features explained in this section may not be possible depending on the source (for example, 88.2 / 96 kHz sources - Pioneer HTD-540DV | Operating Instructions - Page 39
Listening to your system 05 Listening in surround sound You can listen to any When listening in Dolby Pro Logic II Music mode, there are three further parameters you can adjust: Center Width, Dimension, and Panorama. 1 With Dolby Pro Logic II Music mode active, press SOUND MODE. 2 Use the / ( - Pioneer HTD-540DV | Operating Instructions - Page 40
05 Listening to your system Using the Advanced Surround effects Advanced Surround effects can the / (cursor up/down) buttons). Press repeatedly to select from: • Adv. Movie - Gives a movie theater-type sound • Adv. Music - Gives a concert hall-type sound • Expanded - Creates an extra wide surround - Pioneer HTD-540DV | Operating Instructions - Page 41
Listening to your system 05 If you have selected Frt. Movie or Frt. Music, you will achieve best results by turning each surround speaker about 60º towards the closest - Pioneer HTD-540DV | Operating Instructions - Page 42
05 Listening to your system Enhancing dialogue • Default setting: Dialog Off The Dialogue Enhancement the speakers on page 12) to simulate an added surround back channel. In a real theater the surround back speaker would be directly behind you, creating more cohesive and realistic surround sound - Pioneer HTD-540DV | Operating Instructions - Page 43
Listening to your system 05 Adjusting the bass and treble Use the bass and treble controls to adjust the overall tone. SOUND MODE ENTER • Press BASS MODE (SHIFT + FRONT - Pioneer HTD-540DV | Operating Instructions - Page 44
06 Playing discs Chapter 6 Playing discs • Some DVD discs restrict the use of some functions (random or repeat, for example). This is not a malfunction. • When playing Video CDs, some of the functions are not available during PBC playback. If you want to use them, start the disc playing using a - Pioneer HTD-540DV | Operating Instructions - Page 45
to find the part you want to play. You can use the Disc Navigator when a disc is playing or stopped (a disc must be loaded). 1 Press HOME MENU and select 'Disc Navigator' from the on-screen display. Disc Navigator For DVD-Audio discs select a group, or a track within a group. Disc Navigator DVD - Pioneer HTD-540DV | Operating Instructions - Page 46
CD) or title (DVD) that form a loop which is played over and over. • You can't use A-B Repeat with MP3 discs. 1 During playback, press HOME MENU and select 'Play Mode'. 2 Select 'A-B Repeat' from the list of functions on the left. Play Mode A-B Repeat Repeat Random Program Search Mode A(Start - Pioneer HTD-540DV | Operating Instructions - Page 47
Off). • You can also use the REPEAT (SHIFT + 2) button on the remote to select a repeat play mode. The repeat mode is indicated in the front panel DVD-RW discs, or while a DVD disc menu is being displayed. 1 Press HOME MENU and select 'Play Mode'. 2 Select 'Random' from the list of functions on - Pioneer HTD-540DV | Operating Instructions - Page 48
• You can also use the RANDOM (SHIFT + 3) button on the remote to select a random play mode. The random mode is indicated in the . Use the DISC select buttons on the remote, or the DIRECT PLAY buttons on the front panel to select the disc. 2 Press HOME MENU and select 'Play Mode'. • Alternatively - Pioneer HTD-540DV | Operating Instructions - Page 49
press (play). • Program play remains active until you turn off program play (see below), erase the program list (see below), or switch off the system. • When this screen first appears, the first title on the disc is highlighted. From here you can select a title, or a chapter within a title. • Some - Pioneer HTD-540DV | Operating Instructions - Page 50
the DIRECT PLAY buttons on the front panel to select a disc. 2 Press HOME MENU and select 'Play Mode'. • Alternatively, press PROGRAM (SHIFT + 1) and Any DVDs loaded are shown grayed out and can't be selected. • If the system has not yet determined the type of disc in a tray position, '???' is - Pioneer HTD-540DV | Operating Instructions - Page 51
remains active until you turn off program play (see below), erase the program list (see below), or switch off the system. • Use the following controls during program play: Button HOME MENU What it does Save the program list and exit the program edit screen without starting playback. Skip to the - Pioneer HTD-540DV | Operating Instructions - Page 52
enter a title, chapter, folder or track number, or a time. Play Mode A-B Repeat Repeat Random Program Search Mode Title Search Chapter Search Time Search Input Chapter 0 0 1 • For a time search, enter the number of minutes and seconds into the currently playing title (DVD-Video/DVD-RW) or track - Pioneer HTD-540DV | Operating Instructions - Page 53
Playing discs 06 Zooming the screen Using the zoom feature you can magnify a part of the screen by a factor of 2 or 4, while watching a DVD-Video, DVD-Audio or Video CD. 1 During playback, use the ZOOM button to select the zoom factor (Normal, 2x or 4x). • Since DVD-Video, DVD-Audio and Video CD - Pioneer HTD-540DV | Operating Instructions - Page 54
06 Playing discs • SACD, CD and Video CD displays 14 1 16 Disc no. Track no. Elapsed track time 14 3 20 Disc no. Track no. Remaining track time 1 D s c 5 3 1 5 Disc no. Remaining disc time • MP3 disc displays 42 0 35 Disc no. Track no. Elapsed track time 4 E V E R Y B O D Disc no. Track - Pioneer HTD-540DV | Operating Instructions - Page 55
Viewing JPEG discs 07 Chapter 7 Viewing JPEG discs Playing a JPEG slideshow After loading a CD/CD-R/RW containing JPEG pictures, press (play) to start a slideshow from the first folder/picture on the disc. The pictures in each folder are displayed in alphabetical order. Pictures are automatically - Pioneer HTD-540DV | Operating Instructions - Page 56
07 Viewing JPEG discs 2 Use the cursor buttons ( / / / ) to navigate. When a file is highlighted, a thumbnail image is displayed. • When a folder is highlighted you can press ENTER to open the Photo Browser screen for that folder. See below for more on using the Photo Browser. 3 To resume the - Pioneer HTD-540DV | Operating Instructions - Page 57
Using the timer 08 Chapter 8 Using the timer Setting the wake-up timer Use the wake-up timer to set the system to switch on at any time and start playing whatever source you want. • The clock must be set to the correct time for the wake- - Pioneer HTD-540DV | Operating Instructions - Page 58
standby by pressing TIMER (SHIFT + 6) twice. (Press TIMER (SHIFT + 6) once to display the current time.) Setting the sleep timer The sleep timer switches off the system after a specified time so you can fall asleep without worrying about it. Turning the wake-up timer on/off If the wake-up timer is - Pioneer HTD-540DV | Operating Instructions - Page 59
automatically after the currently playing disc has finished (not possible during repeat play). • Sleep 90 - System switches off after 90 minutes • Sleep 60 - System switches off after an hour • Sleep 30 - System switches off after 30 minutes • Off - cancels the sleep timer 4 To check how much time - Pioneer HTD-540DV | Operating Instructions - Page 60
System Setup menu All the available settings in the setup menu are listed in Surround and sound setup options and SR+ control options for Pioneer that the first setting in each section is the default. SHIFT 1 Press SYSTEM SETUP (SHIFT + HOME MENU). 2 Use the / (cursor left/right) buttons to choose - Pioneer HTD-540DV | Operating Instructions - Page 61
to this unit using an SR+ cable (not supplied). Note that in the function settings below, the number of video inputs may change depending on your display. See also Using this unit with a Pioneer plasma display on page 17. Control mode setting • SR+ Off - Switches SR+ off (this unit and the plasma - Pioneer HTD-540DV | Operating Instructions - Page 62
• LINE2 -> OFF/PDP1-5/PDPTV - Matches the LINE (L2) function of this unit with a numbered video input on the plasma display. For example, LINE2 -> PDP3 matches the LINE2 input with video input 3 on the plasma display. TEST TONE CH LEVEL SHIFT 1 Select a listening mode. Press SURROUND, ADVANCED or - Pioneer HTD-540DV | Operating Instructions - Page 63
Surround sound and other settings 09 • RS - Right surround speaker • LS - Left surround speaker • SW - Subwoofer 3 Use the VOLUME +/- button to adjust the volume to an appropriate level. Turn down the volume to 40 or less to ensure you have adequate headroom. 4 Use the / (cursor up/down) buttons - Pioneer HTD-540DV | Operating Instructions - Page 64
Adjust • Default setting: Standard From the Video Adjust screen you can select the standard video presentation or define presets of your own. 1 Press HOME MENU and select 'Video Adjust' from the on-screen display. 2 Press (cursor down) to select 'Detailed Settings' then press ENTER. Video Adjust - Pioneer HTD-540DV | Operating Instructions - Page 65
complete control in setting up your DVD system, including video output settings and parental the disc, then change the setting. 1 Press HOME MENU and select 'Initial Settings' from the on- with progressive scan video (see your TV's instruction manual for details). Press ENTER once more to confirm - Pioneer HTD-540DV | Operating Instructions - Page 66
on the disc, then it will be displayed. Other Language Select to choose a language other than the ones displayed (see Selecting languages using the language code list on page 81). DVD Menu Language w/Subtitle Lang. DVD disc menus will be displayed in the same language as your selected subtitle - Pioneer HTD-540DV | Operating Instructions - Page 67
Initial Settings menu 11 Setting Option On Screen Display On Off Angle Indicator On Off Options Setting Parental Lock Bonus Group Auto Disc Menu Option See below See below On Off Group Playback (For DVD-Audio discs separated into groups) Single All DVD Playback Mode DVD-Audio DVD- - Pioneer HTD-540DV | Operating Instructions - Page 68
. Some discs also support the Country Code feature. The player does not play certain scenes on these discs, depending on the Country Code you set. • Not system on page 71) Registering a new password You must register a password before you can change the Parental Lock level or enter a Country code - Pioneer HTD-540DV | Operating Instructions - Page 69
automatically. Select Bonus Group to access the same screen. Initial Settings Video Output Language Display Options Bonus Group : Key Number Input 2*** • If you eject the disc, change the input function, switch the power off, or unplug the system, you will need to re-enter the key number. 69 En - Pioneer HTD-540DV | Operating Instructions - Page 70
panel buttons and controls. SHIFT 1 Switch the system into standby. 2 Press SYSTEM SETUP (SHIFT + HOME MENU). 3 Use the / (cursor left display. TV attenuator setting If the source connected to the TV analog input is producing distortion through the speakers, the attenuator will reduce the signal - Pioneer HTD-540DV | Operating Instructions - Page 71
each contain a number of tracks. Group 1 Group 2 Group 3 • After setting the clock, the demo mode switches off automatically. However, if you unplug the system from the wall outlet, the demo mode will revert to Demo On (and the clock will be reset). Track 1 Track 2 Track 3 Track 1 Track 1 Track - Pioneer HTD-540DV | Operating Instructions - Page 72
from incompatible regions will not play in this system. Discs marked ALL will play in any system. The diagram below shows the various DVD regions These could all damage the disc. For more detailed care information see the instructions that come with discs. Do not load more than one disc into the - Pioneer HTD-540DV | Operating Instructions - Page 73
due to dust or dirt, consult your nearest Pioneer authorized service center. Although lens cleaners are commercially available, we do not recommend using them since some may damage the lens. Problems with condensation Condensation may form inside the system unit if it is brought into a warm room - Pioneer HTD-540DV | Operating Instructions - Page 74
a while. If you find it damaged, ask your nearest Pioneer authorized service center or your dealer for a replacement. Connecting auxiliary components This system has both stereo analog inputs and outputs, as well as a coaxial digital input. Use these to connect external components, such as your VCR - Pioneer HTD-540DV | Operating Instructions - Page 75
digital cable (not supplied). • If you find that the LINE 1 audio is distorting when played through this system, you can set the input attenuator to reduce the input signal level. See Optional system settings on page 70 to do this. Recording mode The Recording mode allows you to make surround - Pioneer HTD-540DV | Operating Instructions - Page 76
other components and electrical appliances being used. If the trouble cannot be rectified even after exercising the checks listed below, ask your nearest Pioneer authorized service center or your dealer to carry out repair work. • If the system is not operating normally due to external effects such - Pioneer HTD-540DV | Operating Instructions - Page 77
Pioneer authorized service center or your dealer for servicing. DVD/CD/Video CD player Problem Remedy The disc is ejected automatically after loading. • Clean the disc. • Align the disc properly in the disc guide are inserted fully. • Check the instruction manual of the TV/monitor to make sure - Pioneer HTD-540DV | Operating Instructions - Page 78
on a VCR or passed through an AV selector, there is disturbance in the playback picture. • This system uses copy-protection technology which may prevent recording or cause picture problems when connected through a VCR or AV selector. This is not a malfunction. Picture disturbance during playback - Pioneer HTD-540DV | Operating Instructions - Page 79
Additional information 12 Problem Sound is mono only. Considerable noise in radio broadcasts. ). • Turn off any other equipment that may be causing the noise or move it away from the system unit. • The tuning interval is incorrect for your country or region. Try switching the tuning interval ( - Pioneer HTD-540DV | Operating Instructions - Page 80
the MUTE button to turn the sound on). • Appears briefly when a menu is automatically exited after a set period of inactivity. • Appears when there is a communication problem between the unit and the plasma display. Check all connections and retry. 80 En - Pioneer HTD-540DV | Operating Instructions - Page 81
see the whole picture. Widescreen TV users If you have a widescreen TV, the TV Screen setting (page 65) of this system should be set to 16:9 (Wide , will result in a distorted picture. Selecting languages using the language code list Some of the language options allow you to set your preferred - Pioneer HTD-540DV | Operating Instructions - Page 82
Sangho (sg), 1907 Xhosa (xh), 2408 Serbo-Croatian (sh), 1908 Yoruba (yo), 2515 Sinhalese (si), 1909 Zulu (zu), 2621 Country code list Country, Country code, Country code letter Argentina, 0118, ar Australia, 0121, au Austria, 0120, at Belgium, 0205, be Brazil, 0218, br Canada, 0301, ca Chile - Pioneer HTD-540DV | Operating Instructions - Page 83
assigning the proper preset code, or the codes for the manufacturer in TTER 607 RCA 601, 610, 615, 616, 617, 618, WATT RADIO 632, 642, 649 LOEWE 607 661, 662, 609 ZENITH 603, 620 MAGNADYNE 632, 649 SABA 631, 636, 642, 651 PIONEER 600, 631, 632, 607, MAGNAFON 649 SAISHO 639, 644, 646 636, - Pioneer HTD-540DV | Operating Instructions - Page 84
user instruction manuals or help files that came with your PC and/or software. DTS A multichannel audio encoding system developed by Digital Theater Systems system of navigating a Video CD through on-screen menus recorded onto the disc. PCM (Pulse Code Modulation) Digital audio encoding system - Pioneer HTD-540DV | Operating Instructions - Page 85
cone type Nominal impedance 6 Ω Frequency range 75 Hz to 20 kHz Maximum Input Power 100 W Dimensions . . . . 155 (W) x 110 (H) x 110 (D) mm/ 6 1/8 (W) x 4 9/16 (H) x 4 3/8 (D) in. Weight 0.8 kg / 1 lb 13 oz Speaker System (Front speakers x2, surround speakers x2, center speaker x1, subwoofer x1 - Pioneer HTD-540DV | Operating Instructions - Page 86
12 Additional information Subwoofer Enclosure Bass-reflex floor type System 16 cm 1-way system Speaker 16 cm cone type Nominal impedance 6 Ω Frequency range 35 Hz to 2 kHz Maximum Input Power 100 W Dimensions . . . . 190 (W) x 360 (H) x 327 (D) mm/ 7 1/2 (W) x 14 3/16 (H) x 12 7/8 (D) in. - Pioneer HTD-540DV | Operating Instructions - Page 87
Additional information 12 87 En - Pioneer HTD-540DV | Operating Instructions - Page 88
ELECTRONICS OF CANADA, INC. 300 Allstate Parkway, Markham, Ontario L3R OP2, Canada TEL: (905) 479-4411 PIONEER EUROPE NV Haven 1087, Keetberglaan 1, B-9120 Melsele, Belgium TEL: 03/570.05.11 PIONEER ELECTRONICS ASIACENTRE PTE. LTD. 253 Alexandra Road, #04-01, Singapore 159936 TEL: 656-472-1111
-
 1
1 -
 2
2 -
 3
3 -
 4
4 -
 5
5 -
 6
6 -
 7
7 -
8
-
9
-
10
-
11
-
12
-
13
-
14
-
15
-
16
-
17
-
18
-
19
-
20
-
21
-
22
-
23
-
24
-
25
-
26
-
27
-
28
-
29
-
30
-
31
-
32
-
33
-
34
-
35
-
36
-
37
-
38
-
39
-
40
-
41
-
42
-
43
-
44
-
45
-
46
-
47
-
48
-
49
-
50
-
51
-
52
-
53
-
54
-
55
-
56
-
57
-
58
-
59
-
60
-
61
-
62
-
63
-
64
-
65
-
66
-
67
-
68
-
69
-
70
-
71
-
72
-
73
-
74
-
75
-
76
-
77
-
78
-
79
-
80
-
81
-
82
-
83
-
84
-
85
-
86
-
87
-
88
 |
 |

Register your product at:
www.pioneerelectronics.com
• Protect your new investment
The details of your purchase will be on file for reference in the event of an
insurance claim such as loss or theft.
• Improve product development
Your input helps us continue to design products that meet your needs.
• Receive a free Pioneer newsletter
Registered customers can opt in to receive a monthly newsletter.
• Receive free tips, updates and service bulletins on
your new product
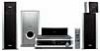
DVD/CD Receiver
XV-HTD540
Speaker System
S-HTD540
Operating Instructions