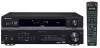
Pioneer VSX-816-S Operating Instructions
Pioneer VSX-816-S Manual
 |
View all Pioneer VSX-816-S manuals
Add to My Manuals
Save this manual to your list of manuals |
Pioneer VSX-816-S manual content summary:
- Pioneer VSX-816-S | Operating Instructions - Page 1
AUDIO/VIDEO MULTI-CHANNEL RECEIVER VSX-816-S/-K Operating Instructions - Pioneer VSX-816-S | Operating Instructions - Page 2
used in accordance with the instructions, may cause harmful interference to receiver is connected. - Consult the dealer or an experienced radio/TV technician for help. D8-10-1-2_En Information to User shock if the cut off plug is inserted into any 13 amp socket. If a new plug is to be fitted, - Pioneer VSX-816-S | Operating Instructions - Page 3
one fitted. Replacement and mounting of an AC plug on the power supply cord of this unit should be performed only by qualified service personnel. If connected to an AC outlet, the cut-off plug can cause severe electrical shock. Make sure it is properly disposed of after removal. The - Pioneer VSX-816-S | Operating Instructions - Page 4
36 Manual MCACC speaker setup 37 Fine Channel Level 38 Fine Speaker Distance 38 Acoustic Calibration EQ 39 Manual speaker setup 41 Speaker Setting 42 Crossover Network 43 Channel Level 43 Speaker Distance 44 09 Using the tuner Listening to the radio 45 Improving FM stereo sound 45 - Pioneer VSX-816-S | Operating Instructions - Page 5
50 Controls for other components 52 12 Other connections Second Zone speaker B setup 54 Switching the speaker system 54 Bi-amping your front speakers 55 Bi-wiring your speakers 55 Connecting additional amplifiers 56 Using this receiver with a Pioneer plasma display 56 Using the SR+ mode with - Pioneer VSX-816-S | Operating Instructions - Page 6
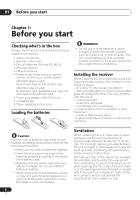
Please check that you've received the following supplied accessories: • Setup microphone • Remote control unit • Dry cell batteries (AA size IEC R6) x2 • AM loop antenna • FM wire antenna • Power cords (make sure you use the correct cord for your country/region): VSX-816-K (black model) Round 2-pin - Pioneer VSX-816-S | Operating Instructions - Page 7
. See Connecting the speakers on page 19. Where you place the speakers will have a big effect on the sound. Place your speakers as shown below for the best surround sound effect. Also see Hints on speaker placement on page 20 for more on this. Center (C) Front Right (R) Front Left (L) Subwoofer - Pioneer VSX-816-S | Operating Instructions - Page 8
LD TV/ SAT DVR / VCR STANDBY/ON PHONES DIMMER ANALOG MIDNIGHT/ ATT LOUDNESS SPEAKERS TUNING / STATION TUNER EDIT TONE QUICK SETUP SETUP MULTI JOG AUDIO/VIDEO MULTI-CHANNEL RECEIVER VSX-816 ENTER MULTI JOG DIGITAL PRECISION PROCESSING AUX SIGNAL SB ch ACOUSTIC SELECT PROCESSING - Pioneer VSX-816-S | Operating Instructions - Page 9
PRE-PROGRAMMED REMOTE CONTROL UNIT DVD CD TV CD-R/TAPE FM DVR TVCTRL USB AM RECEIVER D.ACCESS +10 CLASS DISC ENTER TOP MENU TUNE DTV MENU ST SETUP ENTER MENU ST T.EDIT RETURN GUIDE TUNE TV CONTROL TV VOL INPUT SELECT TV CH VOL REC 1 Switch on the receiver and your TV. 2 Connect the - Pioneer VSX-816-S | Operating Instructions - Page 10
fix the problem, turn off the power and check the speaker connections. 9 Make sure 'OK' is selected, then press ENTER. A progress report is displayed on-screen while the receiver outputs more test tones to determine the optimum receiver settings for speaker setting, channel level, speaker distance - Pioneer VSX-816-S | Operating Instructions - Page 11
Nederlands Español Quick surround sound setup 03 • Speaker Setting - The size and number of speakers you've connected (see page 42 for more on this) • Speaker Distance - The distance of your speakers from the listening position (see page 44 for more on this) • Channel Level - The overall balance - Pioneer VSX-816-S | Operating Instructions - Page 12
audio cables or optical cables should be used to connect digital components to this receiver.1 Video cables Standard RCA video cables These cables are the most common type of video connection and are used to connect to the composite video terminals. The yellow plugs distinguish them from cables for - Pioneer VSX-816-S | Operating Instructions - Page 13
coaxial digital audio cable for the connection.1 2 Connect the composite video output and the stereo analog audio outputs2 on your DVD player to the DVD/LD inputs on this receiver. Use a standard RCA video cable3 and a stereo RCA phono cable for the connection. • If your DVD player has multichannel - Pioneer VSX-816-S | Operating Instructions - Page 14
RL FRONT OUTPUT CENTER OUTPUT RL SURROUND OUTPUT SUB WOOFER OUTPUT VIDEO OUTPUT 1 Connect a set of audio/video outputs on the set-top box component to the TV/SAT AUDIO and VIDEO inputs on this receiver.2 Use a stereo RCA phono cable for the audio connection and a standard RCA video cable for - Pioneer VSX-816-S | Operating Instructions - Page 15
stereo RCA phono cable. 4 If your recorder has a digital input, connect it to the digital output on the receiver as shown. Use an optical cable to make this connection. This receiver VIDEO OUT CONTROL IN OUT OUT MONITOR OUT DVR / VCR IN TV / SAT IN SUB WOOFER DVD / LD PREOUT IN S-VIDEO - Pioneer VSX-816-S | Operating Instructions - Page 16
DVR/VCR AUDIO and VIDEO inputs on this receiver. Use a stereo RCA phono cable for the audio connection and a standard RCA video cable for the video connection.1 2 Connect a set of audio/video inputs on the recorder to the DVR/VCR AUDIO and VIDEO outputs on this receiver. Use a stereo RCA phono cable - Pioneer VSX-816-S | Operating Instructions - Page 17
page 58 for more on this. 3 Connect the COMPONENT VIDEO MONITOR OUT jacks on this receiver to the component video inputs on your TV or monitor. Use a three-way component video cable. S - VIDEO VIDEO INPUT VIDEO L AUDIO R DIGITAL IN USB MCACC SETUP MIC PUSH OPEN PROCESSING CD CD-R / TAPE - Pioneer VSX-816-S | Operating Instructions - Page 18
and the FM wire antenna as shown below. To improve reception and sound quality, connect external antennas (see Using external antennas below). fig. a fig. b fig. c Using external antennas To improve FM reception Connect an external FM antenna as shown below. 3 5 FM UNBAL AM 75 Ω LOOP - Pioneer VSX-816-S | Operating Instructions - Page 19
ñol Connecting up 04 Connecting the speakers A complete setup of eight speakers (including the subwoofer) is shown here but everyone's home setup will vary. Simply connect the speakers you have in the manner shown below.1 The receiver will work with just two stereo speakers (the front speakers in - Pioneer VSX-816-S | Operating Instructions - Page 20
of the TV picture, move the speakers farther away from the TV. • If you're using a center speaker, place the front speakers at a wider angle. If not, place them at a narrower angle. • Place the center speaker above or below the TV so that the sound of the center channel is localized at the TV screen - Pioneer VSX-816-S | Operating Instructions - Page 21
English Deutsch Français Italiano Nederlands Español Connecting up 04 Overhead view of speaker setup You can also refer to the 3-D speaker setup illustration on page 7. Front left Center Front right Surround left Subwoofer Surround right Listening position Surround back left Surround back - Pioneer VSX-816-S | Operating Instructions - Page 22
-CHANNEL RECEIVER VSX-816 ENTER MULTI JOG DVD / LD TV / SAT DVR / VCR VIDEO DIGITAL PRECISION PROCESSING CD CD-R / TAPE / MD FM AM USB AUX SIGNAL SB ch ACOUSTIC SELECT PROCESSING EQ DIMMER ANALOG MIDNIGHT/ ATT LOUDNESS SPEAKERS TUNING / STATION TUNER EDIT TONE QUICK SETUP - Pioneer VSX-816-S | Operating Instructions - Page 23
is no sound output from the speakers). 9 STANDBY/ON Switches the receiver between on and standby. 10 VIDEO INPUT See Connecting to the front panel video terminal on page 17. 11 USB interface Connect a USB audio device for playback (see Using the USB interface on page 34). 12 MCACC SETUP MIC jack - Pioneer VSX-816-S | Operating Instructions - Page 24
sleep mode is active (see Remote control below). 10 Tuner indicators - Lights when the mono mode is set using the MPX button. - Lights when a stereo FM broadcast is being received in auto stereo mode. - Lights when a broadcast is being received. 11 Speaker indicators Lights to indicate the current - Pioneer VSX-816-S | Operating Instructions - Page 25
11 AUDIO/VIDEO PRE-PROGRAMMED REMOTE CONTROL UNIT 12 DVD TV DVR TVCTRL 2 CD-R/TAPE USB CD FM AM RECEIVER 13 SLEEP SB ch ANALOG ATT SR+ DIMMER MIDNIGHT/ LOUDNESS 3 D.ACCESS +10 CLASS DISC ENTER TOP MENU 4 TUNE MENU 5 DTV MENU ST ENTER ST T.EDIT SETUP RETURN GUIDE TUNE - Pioneer VSX-816-S | Operating Instructions - Page 26
SETUP (Press RECEIVER first to access) Use to access the System Setup menu (see page 36). GUIDE - Displays the guides on stereo and mono reception of FM broadcasts. If the signal is weak then switching to mono will improve the sound quality (page 45). AUDIO - Changes the audio language or channel - Pioneer VSX-816-S | Operating Instructions - Page 27
(page 29). You can then use the +/- buttons to make these adjustments. Operating range of remote control The remote control may not work properly if: • There are obstacles between the remote control and the receiver's remote sensor. • Direct sunlight or fluorescent light is shining onto the - Pioneer VSX-816-S | Operating Instructions - Page 28
in surround sound Using this receiver, you can listen to any source in surround sound. However, the options available will depend on your speaker setup and the type of source you're listening to. If you connected surround back speakers, see also Using surround back channel processing on page - Pioneer VSX-816-S | Operating Instructions - Page 29
to create a wider stereo effect with vocals. Adjust the effect from 0 (all center channel sent to front right and left speakers) to 10 (center channel sent to the center speaker only). 0 to 10 Default: 3 Note 1 • If you press ADVANCED SURROUND when the headphones are connected, the PHONES SURROUND - Pioneer VSX-816-S | Operating Instructions - Page 30
one channel. • F. ALIGN - All speakers are heard in accordance with the front speaker Setup or EQ Auto Setting) Note 1 If you switch on Midnight listening, Loudness, Dialog Enhancement, the Sound Retriever, or the Tone controls when DIRECT is selected, the receiver automatically switches to STEREO - Pioneer VSX-816-S | Operating Instructions - Page 31
which it was originally encoded, you can have the receiver only apply this effect to 6.1 encoded sources like Dolby Digital EX or DTS-ES.2 The table indicates when you will hear the virtual surround back channel (ì=Sound plays through surround speakers). • Press SB ch (SB ch PROCESSING) to select - Pioneer VSX-816-S | Operating Instructions - Page 32
feature localizes dialog in the center channel to make it stand out from other background sounds in a TV or movie soundtrack. • Press DIALOG E to switch dialog enhancement on or off. Using the tone controls Depending on what you are listening to, you may want to adjust the bass or treble using - Pioneer VSX-816-S | Operating Instructions - Page 33
channel you want to watch, otherwise make sure that the TV's video input is set to this receiver (For example, if you connected this receiver to the VIDEO jacks on your TV, make sure that the VIDEO input is selected). Turn down the volume of your TV so that all the sound is coming from the speakers - Pioneer VSX-816-S | Operating Instructions - Page 34
7: USB playback Using the USB interface It is possible to listen to two-channel audio1 using the USB interface on the front of this receiver. Connect a USB mass storage device2 as shown below. 1 Press USB (SHIFT+AM). 2 Connect your USB device. The USB terminal is located on the front panel. 3 Press - Pioneer VSX-816-S | Operating Instructions - Page 35
with the device) for USB power. If this doesn't remedy the problem, it is likely your USB device is incompatible. Compressed audio compatibility Note The Windows Media® logo printed on the box indicates that this receiver can playback Windows Media Audio content. WMA is an acronym for Windows - Pioneer VSX-816-S | Operating Instructions - Page 36
balance of the speakers you've connected (see Manual speaker setup on page 41). • Input Assign - Specify what you've connected to the digital and component video inputs (see The Input Assign menu on page 58). • Other Setup - Make customized settings to reflect how you are using the receiver (see The - Pioneer VSX-816-S | Operating Instructions - Page 37
setting if you're bi-amping your front speakers (see Biamping your front speakers on page 55). 3 When you're finished, press RETURN. You return to the System Setup menu. Manual MCACC speaker setup You can use the settings in the Manual MCACC setup menu to make detailed adjustments when you're more - Pioneer VSX-816-S | Operating Instructions - Page 38
you select. • If you want to go back and adjust a channel, simply use / to select it. 38 En 3 When you're finished, press RETURN. You return to the Manual MCACC setup menu. Fine Speaker Distance • Default setting: 3.0 m (all channels) For proper sound depth and separation with your system, it is - Pioneer VSX-816-S | Operating Instructions - Page 39
from the Manual MCACC setup menu. When it sounds like the delay settings are matched up, press ENTER to confirm and continue to the next channel. • For comparison purposes, the reference speaker will change depending on which speaker you select. • If you want to go back and adjust a channel, simply - Pioneer VSX-816-S | Operating Instructions - Page 40
with the front speaker settings (no equalization is applied to the front left and right channels). You return to the Acoustic Cal EQ setup menu after the Acoustic Calibration Equalization is set. Copying your Acoustic Calibration EQ settings If you want to manually adjust the Acoustic Calibration - Pioneer VSX-816-S | Operating Instructions - Page 41
. 3 Select the channels you want, pressing ENTER when you're finished checking each one. 4 When you're finished, press RETURN. You return to the Manual MCACC setup menu. Manual speaker setup This receiver allows you to make detailed settings to optimize the surround sound performance. You only - Pioneer VSX-816-S | Operating Instructions - Page 42
Automatically setting up for surround sound (MCACC) on page 9 are correct. 4.Manual SP Setup a.Speaker Setting b.Crossover Network c.Channel Level d.Speaker Distance 4a.Speaker Setting Front SMALL Center [ SMALL ] Surr [ SMALL ] SB [ SMALL x2 ] SUB W. : YES ] :Return :Finish 2 Choose the - Pioneer VSX-816-S | Operating Instructions - Page 43
the other speakers or subwoofer. If you didn't connect surround back speakers choose NO.1 • SUB W. - LFE signals and bass frequencies of channels set to SMALL are output from the subwoofer when YES is selected (see notes below). Choose the PLUS setting if you want the subwoofer to output bass sound - Pioneer VSX-816-S | Operating Instructions - Page 44
distance of your speakers from the listening position. The receiver can then add the proper delay needed for effective surround sound. 1 Select 'Speaker Distance' from the Manual SP Setup menu. 4.Manual SP Setup a.Speaker Setting b.Crossover Network c.Channel Level d.Speaker Distance :Return 4d - Pioneer VSX-816-S | Operating Instructions - Page 45
ST SETUP ENTER MENU ST T.EDIT RETURN GUIDE TUNE TV CONTROL TV VOL INPUT SELECT TV CH VOL DTV ON/OFF MPX REC DTV INFO MUTE REC STOP JUKEBOX AUDIO SUBTITLE HDD DVD DISP CH CH STANDARD ADV.SURR STEREO AUTO SURR DIALOG E S.RETRIEVER ACOUSTIC EQ SIGNAL SEL SHIFT EFFECT/CHSEL RECEIVER - Pioneer VSX-816-S | Operating Instructions - Page 46
receiver store the frequency for easy recall whenever you want to listen to that station. This saves the effort of manually number buttons on the remote control to recall the receiver into standby. 2 On the front panel, press STANDBY/ ON while you press and hold the TUNER EDIT button. The channel - Pioneer VSX-816-S | Operating Instructions - Page 47
(see page 16 for more on video connections). TV VOL INPUT SELECT TV CH VOL RECEIVER INPUT SELECT SOURCE AUDIO/VIDEO PRE-PROGRAMMED REMOTE CONTROL UNIT DTV ON/OFF MPX REC DTV INFO MUTE REC STOP JUKEBOX AUDIO SUBTITLE HDD DVD DISP CH CH STANDARD ADV.SURR STEREO AUTO SURR DVD CD TV CD - Pioneer VSX-816-S | Operating Instructions - Page 48
feature, make sure that you also have at least one set of analog audio or video jacks connected to another component for grounding purposes. OUT CONTROL IN Receiver CONTROL IN OUT Setting the remote to control other components Most components can be assigned to one of the MULTI CONTROL buttons - Pioneer VSX-816-S | Operating Instructions - Page 49
SELECT SOURCE AUDIO/VIDEO PRE-PROGRAMMED REMOTE CONTROL UNIT SR+ DIMMER MIDNIGHT/ LOUDNESS DVD CD TV CD-R/TAPE FM SLEEP DVR TVCTRL USB AM RECEIVER SB ch ANALOG ATT D.ACCESS +10 CLASS DISC ENTER TOP MENU TUNE DTV MENU ST SETUP ENTER MENU ST T.EDIT RETURN GUIDE TUNE TV CONTROL - Pioneer VSX-816-S | Operating Instructions - Page 50
the RECEIVER button, press the SETUP button. The remote LCD display shows SETUP. 2 remote control can control components after entering the proper codes or teaching the receiver the commands (see Operating other Pioneer +/- Selects channels. Cable TV/Satellite TV/TV/ DTV TV VOL +/- Adjust the TV - Pioneer VSX-816-S | Operating Instructions - Page 51
DTV audio tracks. DTV GUIDE Use as the GUIDE button for navigating. Cable channel. ENTER/ DISC Use to enter a channel. Cable TV/Satellite TV/TV/ DTV MENU Select different menus from the DTV functions. DTV Select the menu screen. Cable TV/Satellite TV/TV & Press to select or adjust - Pioneer VSX-816-S | Operating Instructions - Page 52
remote control can control these components after entering the proper codes or teaching the receiver the commands (see Operating other Pioneer the start of following tracks. CD/MD/CD-R/DVD/LD player Go forward channels (channel +). VCR Pause playback or recording. CD/MD/CD-R/VCR/DVD/LD/ DVR - Pioneer VSX-816-S | Operating Instructions - Page 53
Fast rewinds/fast forwards the tape. Cassette deck & Navigates DVD menu/options. ENTER DVD/DVR Player GUIDE Press to access the DVD player setup screen. DVD/DVR Player CH +/- Selects channels. VCR/DVD/DVR Player Selects tracks. CD/MD/CD-R/Cassette deck AUDIO Changes the audio language or - Pioneer VSX-816-S | Operating Instructions - Page 54
is output from the two speakers connected to speaker system B (only stereo playback is possible). Note 1 • The subwoofer output depends on the settings you made in Speaker Setting on page 42. However, if SP B is selected above, no sound is heard from the subwoofer (the LFE channel is not downmixed - Pioneer VSX-816-S | Operating Instructions - Page 55
Other connections 12 • SP AB - Sound is output from speaker system A (up to 5 channels, depending on the source), the two speakers in speaker system B, and the subwoofer. Multichannel sources (heard through speaker system A) are downmixed for stereo output from speaker system B. Bi-amping your - Pioneer VSX-816-S | Operating Instructions - Page 56
INPUT L R ANALOG INPUT Center channel amplifier (mono) Surround back channel amplifier Surround channel amplifier Front channel amplifier Powered subwoofer Using this receiver with a Pioneer plasma display If you have a Pioneer plasma display2, you can use an SR+ cable to connect it to this - Pioneer VSX-816-S | Operating Instructions - Page 57
page 60 for detailed instructions. VIDEO INPUT 1 Pioneer plasma display VIDEO INPUT 2 DVD player Satellite receiver, etc DVD AUDIO IN TV/SAT AUDIO IN ADVANCED ST/DIRECT/ STANDARD SURR AUTO SURR LISTENING MODE STANDBY/ON PHONES AUDIO/VIDEO MULTI-CHANNEL RECEIVER VSX-816 ENTER MULTI JOG - Pioneer VSX-816-S | Operating Instructions - Page 58
't hook up your digital equipment according to the default settings for the digital inputs, or if you have connected equipment using component video cables. 1 Press RECEIVER on the remote control, then press the SETUP button. An on-screen display (OSD) appears on your TV. Use / / / and ENTER on the - Pioneer VSX-816-S | Operating Instructions - Page 59
TV connected to this receiver's component video MONITOR output. 4 When you're finished, press RETURN. You return to the Input Assign menu. The Other Setup menu The Other Setup menu is where you can make customized settings to reflect how you are using the receiver. 1 Press RECEIVER on the remote - Pioneer VSX-816-S | Operating Instructions - Page 60
- 10 dB of limiting • LFE ** - No sound from LFE channel 60 En 3 When you're finished, press RETURN. You return to the Other Setup menu. SR+ Setup for Pioneer plasma displays Make the following settings if you have connected a Pioneer plasma display to this receiver using an SR+ cable. Note that - Pioneer VSX-816-S | Operating Instructions - Page 61
listening to may not have an LFE channel. • Switch the subwoofer setting in Speaker Setting on page 42 to YES or PLUS. • Switch the LFE Attenuator Setup on page 60 to LFEATT 0 or LFEATT 10. No sound from surround or center speakers. • Connect the speakers properly (refer to page 19). • Refer to - Pioneer VSX-816-S | Operating Instructions - Page 62
43 to check the speaker levels. • Refer to Using surround back channel processing on page 31 to make sure surround back processing and the sound mode are set for surround back sound. Considerable noise in radio broadcasts. • Connect the antenna (page 18) and adjust the position for best reception - Pioneer VSX-816-S | Operating Instructions - Page 63
sure an analog connection has been made between the units. remote. • This feature only works with Pioneer products. The display is dark or off. • Press DIMMER on the control repeatedly to return to the default. The System Setup screen doesn't appear. • When the receiver is in standby, switch - Pioneer VSX-816-S | Operating Instructions - Page 64
Specifications Amplifier section • Continuous power output (stereo) Front 100 W (DIN 1kHz, THD 1.0 %, 8 Ω) • Maximum Power output (surround) Front . . . . . 130 W per channel (1 kHz, THD 10 %, 8 Ω) Center 130 W (1 kHz, THD 10 %, 8 Ω) Surround 130 W per channel /SAT 79 dB Video Section • Input - Pioneer VSX-816-S | Operating Instructions - Page 65
setup 1 Dry cell batteries (AA size IEC R6 2 Remote control 1 AM loop antenna 1 FM wire antenna 1 Power cords: VSX-816-K (black model 2 (Round 2-pin type and Australian type) VSX-816 you find it damaged, ask your nearest Pioneer authorized service center or your dealer for a replacement. 65 En - Pioneer VSX-816-S | Operating Instructions - Page 66
ELECTRONICS OF CANADA, INC. 300 Allstate Parkway, Markham, Ontario L3R OP2, Canada TEL: 1-877-283-5901 PIONEER EUROPE NV Haven 1087, Keetberglaan 1, B-9120 Melsele, Belgium TEL: 03/570.05.11 PIONEER ELECTRONICS ASIACENTRE PTE. LTD. 253 Alexandra Road, #04-01, Singapore 159936 TEL: 65-6472-7555
-
 1
1 -
 2
2 -
 3
3 -
 4
4 -
 5
5 -
 6
6 -
 7
7 -
8
-
9
-
10
-
11
-
12
-
13
-
14
-
15
-
16
-
17
-
18
-
19
-
20
-
21
-
22
-
23
-
24
-
25
-
26
-
27
-
28
-
29
-
30
-
31
-
32
-
33
-
34
-
35
-
36
-
37
-
38
-
39
-
40
-
41
-
42
-
43
-
44
-
45
-
46
-
47
-
48
-
49
-
50
-
51
-
52
-
53
-
54
-
55
-
56
-
57
-
58
-
59
-
60
-
61
-
62
-
63
-
64
-
65
-
66
 |
 |

AUDIO/VIDEO MULTI-CHANNEL
RECEIVER
VSX-816
-S/-K
Operating Instructions