Pioneer VSX-816-S Operating Instructions - Page 37
The System Setup menu, Manual MCACC speaker setup - specification
 |
View all Pioneer VSX-816-S manuals
Add to My Manuals
Save this manual to your list of manuals |
Page 37 highlights
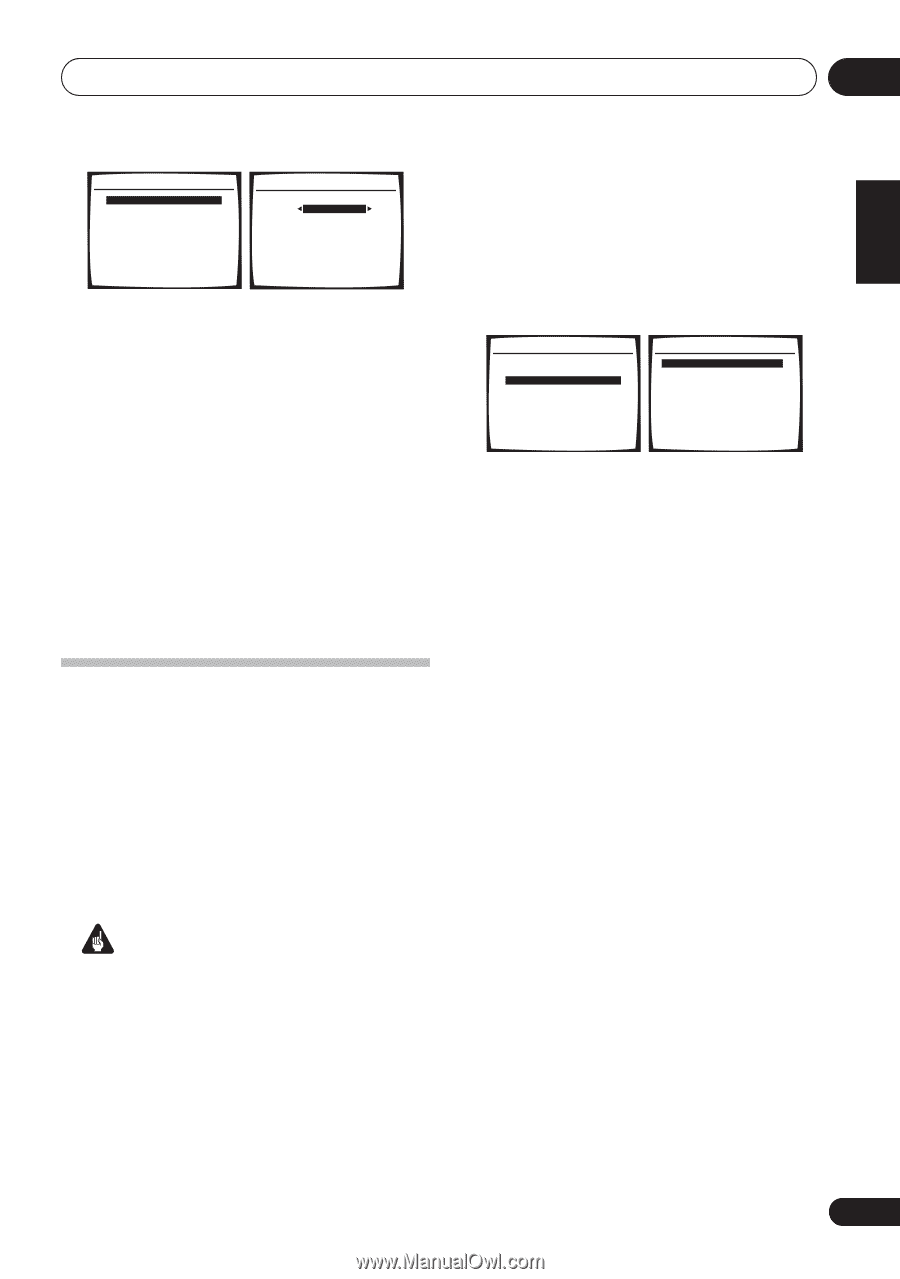
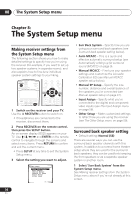
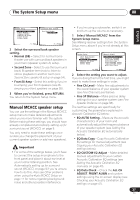
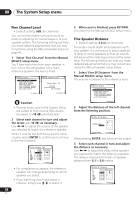
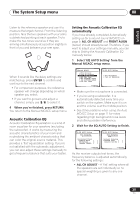
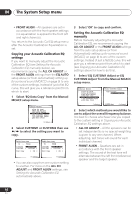
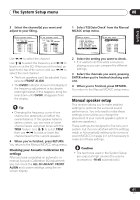
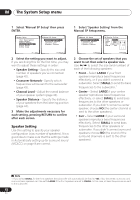
The System Setup menu 08 English Deutsch Français Italiano Nederlands Español System Setup 1.Surr Back System 2.Auto MCACC 3.Manual MCACC 4.Manual SP Setup 5.Input Assign 6.Other Setup 1.Surround Back System Surr Back System Normal (SB) ] : Exit : Finish 2 Select the surround back speaker setting. • Normal (SB) - Select for normal home theater use with surround back speakers in your main (speaker system A) setup. • Second Zone - Select to use the (surround back) B speaker terminals to listen to stereo playback in another room (see Second Zone speaker B setup on page 54). • Front Bi-Amp - Select this setting if you're bi-amping your front speakers (see Biamping your front speakers on page 55). 3 When you're finished, press RETURN. You return to the System Setup menu. Manual MCACC speaker setup You can use the settings in the Manual MCACC setup menu to make detailed adjustments when you're more familiar with the system. Before making these settings, you should have already completed Automatically setting up for surround sound (MCACC) on page 9. You only need to make these settings once (unless you change the placement of your current speaker system or add new speakers). Important • For some of the settings below, you'll have to connect the setup microphone to the front panel and place it about ear level at your normal listening position. See Automatically setting up for surround sound (MCACC) on page 9 if you're unsure how to do this. Also see Other problems when using the Auto MCACC Setup on page 11 for notes regarding background noise and other possible interference. • If you're using a subwoofer, switch it on and turn up the volume as necessary. 1 Select 'Manual MCACC' from the System Setup menu. See Making receiver settings from the System Setup menu above if you're not already at this screen. System Setup 1.Surr Back System 2.Auto MCACC 3.Manual MCACC 4.Manual SP Setup 5.Input Assign 6.Other Setup : Exit 3.Manual MCACC a.Fine Ch Level b.Fine SP Distance c.EQ AUTO Setting d.EQ Data Copy e.EQ CUSTOM1 Adjust f .EQ CUSTOM2 Adjust g.EQ Data Check :Return 2 Select the setting you want to adjust. If you're doing this for the first time, you might want to make these settings in order. • Fine Ch Level - Make fine adjustments to the overall balance of your speaker system (see Fine Channel Level below). • Fine SP Distance - Make precise delay settings for your speaker system (see Fine Speaker Distance on page 38). The last five settings are specifically for customizing the parameters explained in Acoustic Calibration EQ below: • EQ AUTO Setting - Measure the acoustic characteristics of your room and automatically adjust the frequency balance of your speaker system (see Setting the Acoustic Calibration EQ automatically below). • EQ Data Copy - Copy Acoustic Calibration EQ settings for manual adjustment (see Copying your Acoustic Calibration EQ settings below). • EQ CUSTOM1/2 Adjust - Make detailed manual adjustments to your custom Acoustic Calibration EQ settings (see Setting the Acoustic Calibration EQ manually on page 40). • EQ Data Check - Check the ALL CH ADJUST, FRONT ALIGN and custom settings using the on-screen display (see Checking your Acoustic Calibration EQ settings on page 41). 37 En
-
 1
1 -
2
-
3
-
4
-
5
-
6
-
7
-
8
-
9
-
10
-
11
-
12
-
13
-
14
-
15
-
16
-
17
-
18
-
19
-
20
-
21
-
22
-
23
-
24
-
25
-
26
-
27
-
28
-
29
-
30
-
31
-
 32
32 -
 33
33 -
 34
34 -
 35
35 -
 36
36 -
 37
37 -
 38
38 -
 39
39 -
 40
40 -
 41
41 -
 42
42 -
43
-
44
-
45
-
46
-
47
-
48
-
49
-
50
-
51
-
52
-
53
-
54
-
55
-
56
-
57
-
58
-
59
-
60
-
61
-
62
-
63
-
64
-
65
-
66
 |
 |