Pioneer VSX-816-S Operating Instructions - Page 41
The System Setup menu, Manual speaker setup - receiver manual
 |
View all Pioneer VSX-816-S manuals
Add to My Manuals
Save this manual to your list of manuals |
Page 41 highlights
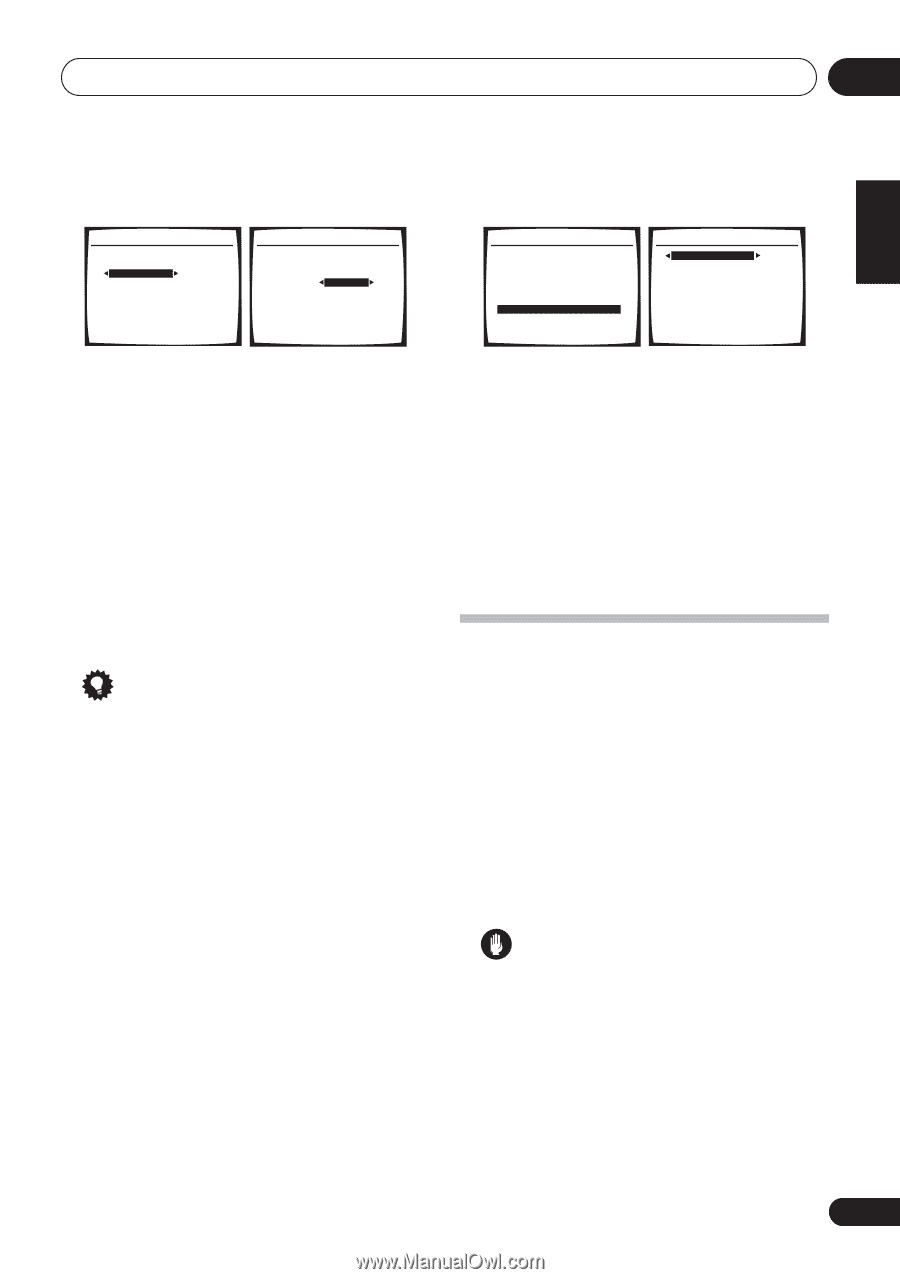
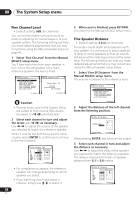
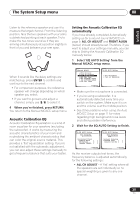
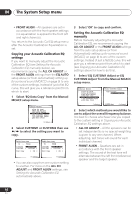
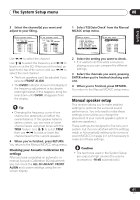
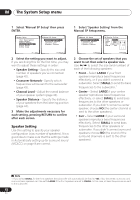
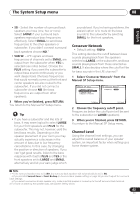
English Deutsch Français Italiano Nederlands Español The System Setup menu 08 3 Select the channel(s) you want and adjust to your liking. 1 Select 'EQ Data Check' from the Manual MCACC setup menu. 3e.EQ CUSTOM1 Adjust Test Tone Type: "ALL CH ADJUST" Left 40Hz : [+ 1.0dB ] 125Hz : [ 0.0dB ] 250Hz : [ 0.0dB ] 4kHz : [ 0.0dB ] 13kHz : [ 0.0dB ] TRIM : [ 0.0dB ] :Finish 3e. EQ CUSTOM1 Adjust Test Tone Type: "ALL CH ADJUST" [ Left ] 40Hz : + 1.0dB 125Hz : [ 0.0dB ] 250Hz : [ 0.0dB ] 4kHz : [ 0.0dB ] 13kHz : [ 0.0dB ] TRIM : [ 0.0dB ] :Finish Use / to select the channel. Use / to select the frequency and / to boost or cut the EQ. When you're finished, go back to the top of the screen and use / to select the next channel. • The front speakers can't be adjusted if you selected FRONT ALIGN. • The OVER! indicator shows in the display if the frequency adjustment is too drastic and might distort. If this happens, bring the level down until OVER! disappears from the display. Tip • Changing the frequency curve of one channel too drastically will affect the overall balance. If the speaker balance seems uneven, you can raise or lower channel levels using test tones with the TRIM feature. Use / to select TRIM then use / to raise or lower the channel level for the current speaker. 4 When you're finished, press RETURN. You return to the Manual MCACC setup menu. Checking your Acoustic Calibration EQ settings After you have completed an automatic or manual Acoustic Calibration EQ adjustment, you can check the ALL CH ADJUST, FRONT ALIGN and custom settings using the onscreen display. 3.Manual MCACC a.Fine Ch Level b.Fine SP Distance c.EQ AUTO Setting d.EQ Data Copy e.EQ CUSTOM1 Adjust f .EQ CUSTOM2 Adjust g.EQ Data Check :Return 3g.EQ Data Check ALL CH ADJUST [ Left ] 40Hz : + 1.0dB 125Hz : 0.0dB 250Hz : 0.0dB 4kHz : 0.0dB 13kHz : 0.0dB TRIM : 0.0dB :Return 2 Select the setting you want to check. • It is useful to do this while a source is playing so you can compare the different settings. 3 Select the channels you want, pressing ENTER when you're finished checking each one. 4 When you're finished, press RETURN. You return to the Manual MCACC setup menu. Manual speaker setup This receiver allows you to make detailed settings to optimize the surround sound performance. You only need to make these settings once (unless you change the placement of your current speaker system or add new speakers.). These settings are designed to fine-tune your system, but if you're satisfied with the settings made in Automatically setting up for surround sound (MCACC) on page 9, it isn't necessary to make all of these settings. Caution • The test tones used in the System Setup are output at high volume (the volume increases to -18 dB automatically). 41 En
-
 1
1 -
2
-
3
-
4
-
5
-
6
-
7
-
8
-
9
-
10
-
11
-
12
-
13
-
14
-
15
-
16
-
17
-
18
-
19
-
20
-
21
-
22
-
23
-
24
-
25
-
26
-
27
-
28
-
29
-
30
-
31
-
32
-
33
-
34
-
35
-
 36
36 -
 37
37 -
 38
38 -
 39
39 -
 40
40 -
 41
41 -
 42
42 -
 43
43 -
 44
44 -
 45
45 -
 46
46 -
47
-
48
-
49
-
50
-
51
-
52
-
53
-
54
-
55
-
56
-
57
-
58
-
59
-
60
-
61
-
62
-
63
-
64
-
65
-
66
 |
 |