Pioneer VSX-917V-S User Manual
Pioneer VSX-917V-S Manual
 |
View all Pioneer VSX-917V-S manuals
Add to My Manuals
Save this manual to your list of manuals |
Pioneer VSX-917V-S manual content summary:
- Pioneer VSX-917V-S | User Manual - Page 1
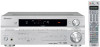
VSX-917V-S/-K AUDIO/VIDEO MULTI-CHANNEL RECEIVER Discover the benefits of registering your product online at http://www.pioneer.co.uk (or http://www.pioneer.eu). Operating Instructions - Pioneer VSX-917V-S | User Manual - Page 2
to alert the user to the presence of important operating and maintenance (servicing) instructions in the literature fuse: Open the fuse compartment with a screwdriver and replace the fuse. D3-4-2-1-2-2_B_En Thank you for buying this Pioneer product. Please read through these operating instructions - Pioneer VSX-917V-S | User Manual - Page 3
and appropriate one fitted. Replacement and mounting of an AC plug on the power supply cord of this unit should be performed only by qualified service personnel. If connected to an AC outlet, the cut-off plug can cause severe electrical shock. Make sure it is properly disposed of after removal - Pioneer VSX-917V-S | User Manual - Page 4
6 Loading the batteries 6 Installing the receiver 6 Ventilation 6 02 5 minute guide Introduction to home theater 7 Listening to Surround Sound 7 Automatically setting up for surround sound (MCACC 8 Other problems when using the Auto MCACC Setup 10 Better sound using Phase Control 10 Setting - Pioneer VSX-917V-S | User Manual - Page 5
63 LFE Attenuator Setup 63 SR+ Setup for Pioneer plasma displays . . . . 64 Digital Video Converter Setup 64 13 Additional information Troubleshooting 65 HDMI 67 Resetting the main unit 67 Switching the speaker impedance 68 Changing the TV format setting 68 Specifications 68 Power cord - Pioneer VSX-917V-S | User Manual - Page 6
received the following supplied accessories: • Setup microphone • Remote control unit • Dry cell batteries (AA size IEC R6) x2 • AM loop antenna • FM wire antenna • These operating instructions gives off a magnetic field). This may interfere with the sound. - in direct sunlight - in damp or wet areas - Pioneer VSX-917V-S | User Manual - Page 7
multiple audio tracks to create a surround sound effect, making you feel like you're in the middle of the action or concert. The surround sound you get from a home theater system depends not only on your speaker setup, but also on the source and the sound settings of the receiver. This receiver will - Pioneer VSX-917V-S | User Manual - Page 8
5 minute guide Automatically setting up for surround sound (MCACC) The Auto Multi-Channel Acoustic Calibration (MCACC) setup measures the acoustic characteristics of your listening area, taking into account ambient noise, speaker size and distance, and tests for both channel delay and channel level - Pioneer VSX-917V-S | User Manual - Page 9
button is not pressed in step 9 the Auto MCACC setup will start again from the beginning. A progress report is displayed on-screen while the receiver outputs more test tones to determine the optimum receiver settings for channel level, speaker distance, and Acoustic Calibration EQ. 2.Auto MCACC - Pioneer VSX-917V-S | User Manual - Page 10
If there are any instructions showing in the front panel display, please follow them. • Some older TVs may interfere with the operation of the microphone. If this seems to be happening, switch off the TV when doing the Auto MCACC Setup. Better sound using Phase Control This receiver's Phase Control - Pioneer VSX-917V-S | User Manual - Page 11
and white plugs to L (left) terminals. Analog audio cables Right (red) Left (white) Digital audio cables Commercially available coaxial digital audio cables or optical cables should be used to connect digital components to this receiver.1 Video cables Standard RCA video cables These cables are - Pioneer VSX-917V-S | User Manual - Page 12
by Macrovision Corporation, and is intended for home and other limited consumer uses only unless otherwise authorized by Macrovision. Reverse engineering or disassembly is prohibited. Note 1 You must connect your monitor/TV to the receiver's HDMI/component video outputs when connecting these video - Pioneer VSX-917V-S | User Manual - Page 13
outputs, see Connecting the multichannel analog outputs below for how to connect it. 3 Connect the analog audio outputs from your TV to the TV/SAT inputs on this receiver. This will allow you to play the sound from the TV's built-in tuner. Use a stereo RCA phono cable to do this. • If your - Pioneer VSX-917V-S | User Manual - Page 14
DVD/multi-channel decoder with multi-channel analog output jacks 2 1 DIGITAL OUT Connecting a satellite receiver or other digital set-top box Satellite and cable receivers, and terrestrial digital TV tuners are all examples of so-called 'set-top boxes'. OPTICAL COAXIAL R AUDIO L AV OUT VIDEO - Pioneer VSX-917V-S | User Manual - Page 15
The example shows a coaxial connection to the CD digital input jack using a coaxial digital audio cable. 2 If necessary, connect the analog audio outputs of the component to a set of spare audio inputs on this receiver. You'll need to make this connection for components without a digital output, or - Pioneer VSX-917V-S | User Manual - Page 16
, or registered trademarks of Microsoft Corporation in the United States and/or other countries. Connecting other video components This receiver has audio/video inputs and outputs suitable for connecting analog or digital video recorders, including VCRs, DVDrecorders and HDD recorders. 1 Connect - Pioneer VSX-917V-S | User Manual - Page 17
very stable, flicker-free picture. See the manuals that came with your TV and source audio/video connection. VIDEO VIDEO INPUT L AUDIO R DIGITAL IN USB MCACC/ AUDIO IN PUSH OPEN This receiver CD CD-R / TAPE / MD USB FM AM AUX VIDEO VIDEO INPUT L AUDIO R DIGITAL IN USB MCACC/ AUDIO - Pioneer VSX-917V-S | User Manual - Page 18
03 Connecting up Connecting antennas Connect the AM loop antenna and the FM wire antenna as shown below. To improve reception and sound quality, connect external antennas (see Using external antennas below). fig. a fig. b fig. c Using external antennas To improve FM reception Use a PAL - Pioneer VSX-917V-S | User Manual - Page 19
setup of eight speakers (including the subwoofer) is shown here but everyone's home setup will vary. Simply connect the speakers you have in the manner shown below.1 The receiver will work IN COAX 2 (DVR / VCR) IN COAX 1 (DVD/LD) OUT R AUDIO AUX FM UNBAL 75 Ω CD DVR / VCR TV / SAT AM LOOP ANTENNA - Pioneer VSX-917V-S | User Manual - Page 20
them at a narrower angle. • Place the center speaker above or below the TV so that the sound of the center channel is localized at the TV screen. Also, make sure the center speaker does not cross the line wire is touching the rear panel, this may cause the receiver to turn off automatically. 20 En - Pioneer VSX-917V-S | User Manual - Page 21
03 Overhead view of speaker setup You can also refer to the 3-D speaker setup illustration on page 7. Front left Center Front right Surround left Subwoofer Surround right Listening position Surround LS SB fig. A 0~60 RS SBL SBL SBR SBR fig. B 3-D view of 7.1 channel speaker setup 21 En - Pioneer VSX-917V-S | User Manual - Page 22
PHONES PHASE CONTROL ENTER VSX-917V MULTI JOG DIGITAL PRECISION PROCESSING DVD / LD TV/ SAT DVR/ VCR VIDEO/FRONT AUDIO CD CD-R / TAPE / MD USB FM AM AUX SOUND MIDNIGHT/ RETRIEVER LOUDNESS SIGNAL SELECT TONE PTY SPEAKERS SEARCH TUNING/ STATION TUNER EDIT SETUP RETURN MULTI JOG - Pioneer VSX-917V-S | User Manual - Page 23
(page 29). 16 SOUND RETRIEVER Press to restore CD quality sound to compressed audio sources (page 32). 17 station for recall (page 45). 24 System Setup menu controls SETUP - Use with the MULTI JOG dial to access the System Setup menu (page 8, page 36, page 61 channel encoding is detected. 23 En - Pioneer VSX-917V-S | User Manual - Page 24
- Lights when a source with DTS encoded audio signals is detected. 2 Lights to indicate indicate Pro Logic IIx decoding (see Listening in surround sound on page 28). 5 VIR.SB Lights during Virtual station carries the EON service (page 48). RDS - Lights when an RDS broadcast is received (page 47). - Pioneer VSX-917V-S | User Manual - Page 25
indicators These indicators show the EQ balance for each channel in Checking your Acoustic Calibration EQ settings on page 41. Also, L and R light when the Sound Retriever is active (page 32). Remote control 10 RECEIVER INPUT SELECT 1 SOURCE 11 AUDIO/VIDEO PRE-PROGRAMMED REMOTE CONTROL UNIT 12 - Pioneer VSX-917V-S | User Manual - Page 26
to memorize and name a station for recall (page 45). SETUP (Press RECEIVER first to access) - Use to access the System Setup menu (see page 36). PTY SEARCH - Use this button to search for RDS program types (page 47). GUIDE - Displays the guides on a digital TV. RETURN - Press to confirm and exit - Pioneer VSX-917V-S | User Manual - Page 27
SOUND RETRIEVER - Press to restore CD quality sound to compressed audio sources (page 32). 9 SHIFT Press to access the DVR controls (above the component control buttons) as well as some receiver rest of your system on page 50): SETUP - Indicates the setup mode, from which you choose the options - Pioneer VSX-917V-S | User Manual - Page 28
Using this receiver, you can listen to any source in surround sound. However, the options available will depend on your speaker setup and the type of source you're listening to. If you connected surround back speakers, see also Using surround back channel processing on page 31.2 The following modes - Pioneer VSX-917V-S | User Manual - Page 29
you want to adjust. Depending on the current status / mode of the receiver, certain options may not appear. Check the table below for notes on this sound mode you have selected, you may not get sound from the surround back speakers in your setup. For more on this, refer to Using surround back channel - Pioneer VSX-917V-S | User Manual - Page 30
your subwoofer depending STEREO - The audio is heard with Channel Level can be set. All other digital processing can not be set. Note 1 When using F.S.S. WIDE, a better effect can be obtained if Auto MCACC Setup is performed. For more on this, refer to Automatically setting up for surround sound - Pioneer VSX-917V-S | User Manual - Page 31
EQ • Default setting: OFF / ALL CH (after the Auto MCACC Setup or EQ Auto Setting) You can listen to sources using the Acoustic back channel information, or if the material sounds better in the format (for example, 5.1) for which it was originally encoded, you can have the receiver only apply - Pioneer VSX-917V-S | User Manual - Page 32
data is removed during the compression process, sound quality often suffers from an uneven sound image. The Sound Retriever feature employs new DSP technology that helps bring CD quality sound back to compressed 2-channel audio by restoring sound pressure and smoothing jagged artifacts left over - Pioneer VSX-917V-S | User Manual - Page 33
DVD players don't output DTS signals. For more details, refer to the instruction manual supplied with your DVD player. 3 • During playback from the multichannel inputs, you can't use any of the sound features/modes and only the volume and channel levels can be set. • You can't listen to your speaker - Pioneer VSX-917V-S | User Manual - Page 34
channel audio1 using the USB interface on the front of this receiver receiver. USB ERR2 The USB device is incompatible • Make sure the receiver is in standby when disconnecting the USB device. USB ERR3 See Troubleshooting digital audio players playback. • Pioneer cannot guarantee compatibility - Pioneer VSX-917V-S | User Manual - Page 35
device with the receiver switched off. • Select another input source (like DVD/CD), then switch back to USB. • Use a dedicated AC adapter (supplied with the device) for USB power. If this doesn't remedy the problem, it is likely your USB device is incompatible. Compressed audio compatibility Note - Pioneer VSX-917V-S | User Manual - Page 36
speaker channels with this system. In addition to a normal home theater setup where they are used for the surround back speakers, they can be used for bi-amping the front speakers or as a separate speaker system in another room. : Exit Note 1 If headphones are connected to the receiver, disconnect - Pioneer VSX-917V-S | User Manual - Page 37
see Other problems when using the Auto MCACC Setup on page 10 for notes regarding background noise and other possible interference. • If you're using a subwoofer, switch it on and turn up the volume as necessary. 1 Select 'Manual MCACC' from the System Setup menu. See Making receiver settings from - Pioneer VSX-917V-S | User Manual - Page 38
page 41). Fine Channel Level • Default setting: 0dB (all channels) You can achieve better surround sound by properly adjusting the overall balance of your speaker system. The following setting can help you make detailed adjustments that you may not achieve using the Manual speaker setup on page 41 - Pioneer VSX-917V-S | User Manual - Page 39
to go back and adjust a channel, simply use / to select it. 4 When you're finished, press RETURN. You return to the Manual MCACC setup menu. Acoustic Calibration EQ Acoustic Calibration Equalization is a kind of room equalizer for your speakers (excluding the subwoofer). It works by measuring the - Pioneer VSX-917V-S | User Manual - Page 40
Adjust' or 'EQ CUSTOM2 Adjust' from the Manual MCACC setup menu. 3.Manual MCACC a.Fine Ch Level b.Fine SP Distance c. channel. When adjusting, test tones will sound for each individual channel. • FRONT ALIGN - Speakers are set in accordance with the front speaker settings. The sound of the test - Pioneer VSX-917V-S | User Manual - Page 41
. 3 Select the channels you want, pressing ENTER when you're finished checking each one. 4 When you're finished, press RETURN. You return to the Manual MCACC setup menu. Manual speaker setup This receiver allows you to make detailed settings to optimize the surround sound performance. You only - Pioneer VSX-917V-S | User Manual - Page 42
Network- Specify which frequencies will be sent to the subwoofer (page 43). • Channel Level - Adjust the overall balance of your speaker system setting up for surround sound (MCACC) on page 8 are correct. 4.Manual SP Setup a.Speaker Setting b.Crossover Network c.Channel Level d.Speaker Distance - Pioneer VSX-917V-S | User Manual - Page 43
sent to the subwoofer (or LARGE speakers). 3 When you're finished, press RETURN. You return to the Manual SP Setup menu. Channel Level Using the channel level settings, you can adjust the overall balance of your speaker system, an important factor when setting up a home theater system. Note 1 • If - Pioneer VSX-917V-S | User Manual - Page 44
of your speakers from the listening position. The receiver can then add the proper delay needed for effective surround sound. 1 Select 'Speaker Distance' from the Manual SP Setup menu. 4.Manual SP Setup a.Speaker Setting b.Crossover Network c.Channel Level d.Speaker Distance :Return 4d.Speaker - Pioneer VSX-917V-S | User Manual - Page 45
to FM and AM radio broadcasts using the automatic (search) and manual (step) tuning functions. If you already know the frequency of E AUDIO SUBTITLE HDD DVD DISP CH CH AUTO SURR STEREO/ F.S.SURR STANDARD ADV.SURR PHASE ACOUSTIC EQ DIALOG SOUND RETRIEVER SHIFT EFFECT/CHSEL LEVEL RECEIVER 1 - Pioneer VSX-917V-S | User Manual - Page 46
pressing ENTER, the preset class and number stop blinking and the receiver stores the station. Naming station presets For easier identification, you can on the remote control to recall the station preset. Note 1 If the receiver is left disconnected from the AC power outlet for over a month, the - Pioneer VSX-917V-S | User Manual - Page 47
affairs Culture - National or Religion - Programs regional culture, theater, concerning religion etc. Phone In - Public Science - Science Note 1 In addition, there are three other program types, TEST, Alarm!, and None. Alarm! and TEST are used for emergency announcements. You can't search for - Pioneer VSX-917V-S | User Manual - Page 48
feature. When set to TA or NEWS, the EON indicator in the display lights (it flashes when receiving an EON broadcast).3 The indicator in the display lights when the current station carries the EON service.4 Note 1 RDS searches station presets only. If no stations have been preset, or if the program - Pioneer VSX-917V-S | User Manual - Page 49
how to do this. Most video recorders set the audio recording level automatically-check the component's instruction manual if you're unsure. 5 Start recording, then start playback of the source component.1 Note 1 • The receiver's volume, balance, tone (bass, treble, loudness), and surround effects - Pioneer VSX-917V-S | User Manual - Page 50
system Operating other Pioneer components Many Pioneer components have SR analog audio or video jacks connected to another component for grounding purposes. OUT CONTROL IN Receiver CONTROL work for the model that you are using.2 Note • You can cancel or exit any of the steps by pressing RECEIVER - Pioneer VSX-917V-S | User Manual - Page 51
SETUP ENTER PTY SEARCH TUNE GUIDE TV CONTROL MENU T.EDIT RETURN TV VOL INPUT SELECT TV CH VOL 1 While pressing the RECEIVER button, press and hold the SETUP button. The remote LCD display shows SETUP (for example, P for Pioneer). 5 Use / to it doesn't seem to work, select the next - Pioneer VSX-917V-S | User Manual - Page 52
codes Use this feature to check which preset code is assigned to a MULTI CONTROL button. 1 While pressing the RECEIVER button, press and hold the SETUP button. The remote LCD display shows SETUP. 2 Use / to select READ ID then press ENTER. 3 Press the MULTI CONTROL button of the component for - Pioneer VSX-917V-S | User Manual - Page 53
teaching the receiver the commands AUDIO Use to switch audio tracks. Satellite TV/TV GUIDE Use as the GUIDE button for navigating. Cable TV/Satellite TV/TV Switches TEXT OFF for TVs. TV RETURN Use to select RETURN or EXIT. Satellite TV/TV Number Buttons Use to select a specific TV channel - Pioneer VSX-917V-S | User Manual - Page 54
these components after entering the proper codes or teaching the receiver the commands (see Controlling the rest of your system on page /LD Repeated presses skips to the start of following tracks. player Go forward channels (channel +). VCR Pause playback or recording. CD/MD/CD-R/VCR/DVD/LD/ - Pioneer VSX-917V-S | User Manual - Page 55
ENTER Cassette deck Cassette deck DVD/DVR Player GUIDE Press to access the DVD player setup screen. DVD/DVR Player CH +/- Selects channels. VCR/DVD/DVR Player Selects tracks. CD/MD/CD-R/Cassette deck AUDIO Changes the audio language or channel. DVD/DVR Player SUBTITLE Displays/changes the - Pioneer VSX-917V-S | User Manual - Page 56
you can connect it to this receiver using a commercially available HDMI cable. The HDMI connection transfers uncompressed digital video, as well as almost every kind of digital audio that the connected component is compatible with, including DVD-Video, DVD-Audio (see below for limitations), Video CD - Pioneer VSX-917V-S | User Manual - Page 57
(DVI) in one specification. HDCP is used to protect digital content transmitted and received by DVIcompliant displays. HDMI has the capability to support standard, enhanced, or high-definition video plus standard to multi-channel surround-sound audio. HDMI features include uncompressed Second - Pioneer VSX-917V-S | User Manual - Page 58
Sound is output from speaker system A (up to 5 channels, depending on the source), the two speakers in speaker system B, and the subwoofer back speaker terminals output the same audio, it doesn't matter which set amping the speakers or you could severely damage the amplifier. See your speaker manual - Pioneer VSX-917V-S | User Manual - Page 59
DVD player Satellite receiver, etc DVD AUDIO IN STANDBY/ON PHONES TV/SAT AUDIO IN ENTER VSX-917 MULTI JOG DIGITAL PRECISION PROCESSING SAT DVR /VCR VIDEO/FRONT AUDIO CD CD-R / TAPE / MD USB FM AM AUX TONE PTY SPEAKERS SEARCH TUNING/ STATION TUNER EDIT SETUP RETURN MULTI JOG - Pioneer VSX-917V-S | User Manual - Page 60
on the plasma display. • Automatic volume muting on the plasma display.1 See also SR+ Setup for Pioneer plasma displays on page 64 for more on setting up the receiver. RECEIVER INPUT SELECT SOURCE AUDIO/VIDEO PRE-PROGRAMMED REMOTE CONTROL UNIT SLEEP SR+ SB ch DIMMER ANALOG ATT MIDNIGHT - Pioneer VSX-917V-S | User Manual - Page 61
Setup menu. System Setup 1.Surr Back System 2.Auto MCACC 3.Manual MCACC 4.Manual SP Setup 5.Input Assign 6.Other Setup 5.Input Assign a.Digital Input b.Component Input c.HDMI the digital inputs (see above). This setting tells the receiver what digital equipment is hooked up to which terminal so - Pioneer VSX-917V-S | User Manual - Page 62
. • If you connect any video component to the receiver using HDMI, you should also have your TV connected to this receiver's HDMI output. 4 When you're finished, press RETURN. You return to the Input Assign menu. The Other Setup menu The Other Setup menu is where you can make customized settings to - Pioneer VSX-917V-S | User Manual - Page 63
to discs with dual mono encoding (see Dual Mono Setup on page 63). • LFE ATT Setup - Choose the attenuator level for the LFE channel (LFE Attenuator Setup on page 63). • SR+ Setup - Specify how you want to control your Pioneer plasma display (SR+ Setup for Pioneer plasma displays on page 64). • DVC - Pioneer VSX-917V-S | User Manual - Page 64
display you've connected. See also Using this receiver with a Pioneer plasma display on page 59. 1 Select 'SR+ Setup' from the Other Setup menu. 6.Other Setup a.DRC Setup b.Dual Mono Setup c.LFE ATT Setup d.SR+ Setup e.DVC Setup :Return 6d.SR+ Setup PDP Volume Control OFF PDP Input Select DVD - Pioneer VSX-917V-S | User Manual - Page 65
and electrical appliances being used, because sometimes the problem may lie there. If the trouble isn't sorted out even after going through the checks below, ask your nearest Pioneer authorized independent service company to carry out repair work. • If the unit does not operate normally due - Pioneer VSX-917V-S | User Manual - Page 66
receiver, until the noise disappears. Sound to the instruction manual supplied with the DVD player. No sound is output subwoofer. subwoofer output). After using the Auto MCACC • Low-frequency noise could have been caused by an air conditioner or motor. Setup Pioneer components on page 50). 66 En - Pioneer VSX-917V-S | User Manual - Page 67
Compressed audio compatibility on page 35). This is not a malfunction. HDMI Symptom Remedy No picture or sound. • If the problem still persists when connecting your HDMI component directly to your monitor, please consult the component or monitor manual or contact the manufacturer for support - Pioneer VSX-917V-S | User Manual - Page 68
System Setup menu is not displayed correctly, it may be that the TV system is set incorrectly for your country or region. • With the receiver in standby, press STANDBY/ON while holding down the SIGNAL SELECT button. The display shows the new setting (PAL or NTSC). 68 En Specifications Amplifier - Pioneer VSX-917V-S | User Manual - Page 69
: 0.5 % (1 kHz) Alternate Channel Selectivity 60 dB (400 kHz) setup 1 Dry cell batteries (AA size IEC R6 2 Remote control 1 AM loop antenna 1 FM wire antenna 1 Warranty card 1 These operating instructions Note • Specifications ask your nearest Pioneer authorized service center or your dealer - Pioneer VSX-917V-S | User Manual - Page 70
ELECTRONICS OF CANADA, INC. 300 Allstate Parkway, Markham, Ontario L3R OP2, Canada TEL: 1-877-283-5901 PIONEER EUROPE NV Haven 1087, Keetberglaan 1, B-9120 Melsele, Belgium TEL: 03/570.05.11 PIONEER ELECTRONICS ASIACENTRE PTE. LTD. 253 Alexandra Road, #04-01, Singapore 159936 TEL: 65-6472-7555
-
 1
1 -
 2
2 -
 3
3 -
 4
4 -
 5
5 -
 6
6 -
 7
7 -
8
-
9
-
10
-
11
-
12
-
13
-
14
-
15
-
16
-
17
-
18
-
19
-
20
-
21
-
22
-
23
-
24
-
25
-
26
-
27
-
28
-
29
-
30
-
31
-
32
-
33
-
34
-
35
-
36
-
37
-
38
-
39
-
40
-
41
-
42
-
43
-
44
-
45
-
46
-
47
-
48
-
49
-
50
-
51
-
52
-
53
-
54
-
55
-
56
-
57
-
58
-
59
-
60
-
61
-
62
-
63
-
64
-
65
-
66
-
67
-
68
-
69
-
70
 |
 |

Operating Instructions
Discover the benefits of registering your product online at
(or
).
VSX-917V
-S/-K
AUDIO/VIDEO
MULTI-CHANNEL RECEIVER