Pioneer X-HM10-K Operating Instructions - Page 47
Remote Control, System, Input Select, Source, S.retriever, Tv Control, Buttons, Input, Multi Control
 |
View all Pioneer X-HM10-K manuals
Add to My Manuals
Save this manual to your list of manuals |
Page 47 highlights
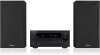
Controls and displays 03 English Français Deutsch Italiano Español Nederlands Remote control SYSTEM 1 SOURCE 3 2 SYSTEM TV CONTROL 4 INPUT 5 CH 6 DIMMER SIGNAL SEL VOL 7 BD MENU 8 9 10 ENTER 12 11 MUTE 14 13 DISPLAY 16 15 CH CH ENTER 17 SURROUND SYSTEM 1 SYSTEM Switches the system between standby and on. 2 INPUT SELECT Use to select the input source. 3 SOURCE Press to turn on/off other components connected to the system (see page 77 for more on this). 4 Switches the remote to control the system (used to select the white commands above the number buttons (S.RETRIEVER, etc)). Also use this button to set up surround sound (page 72) or Audio parameters (page 65). 5 TV CONTROL buttons These buttons are dedicated to control the TV assigned to the TV button. Thus if you only have one TV to hook up to this system assign it to the TV button (see page 76 for more on this). Use to turn on/off the power of the TV. INPUT Use to select the TV input signal. CH +/- Use to select channels. VOL +/- Use to adjust the volume on your TV. 6 MULTI CONTROL buttons Press to select control of other components (see Controlling the rest of your system on page 75). 7 DIMMER Dims or brightens the display. The brightness can be controlled in four steps. 8 SIGNAL SEL Use to select an input signal (page 54). Press BD first to access: BD MENU Displays the disc menu of Blu-ray Discs. 47 En
-
 1
1 -
2
-
3
-
4
-
5
-
6
-
7
-
8
-
9
-
10
-
11
-
12
-
13
-
14
-
15
-
16
-
17
-
18
-
19
-
20
-
21
-
22
-
23
-
24
-
25
-
26
-
27
-
28
-
29
-
30
-
31
-
32
-
33
-
34
-
35
-
36
-
37
-
38
-
39
-
40
-
41
-
 42
42 -
 43
43 -
 44
44 -
 45
45 -
 46
46 -
 47
47 -
 48
48 -
 49
49 -
 50
50 -
 51
51 -
 52
52 -
53
-
54
-
55
-
56
-
57
-
58
-
59
-
60
-
61
-
62
-
63
-
64
-
65
-
66
-
67
-
68
-
69
-
70
-
71
-
72
-
73
-
74
-
75
-
76
-
77
-
78
-
79
-
80
-
81
-
82
-
83
-
84
-
85
-
86
-
87
-
88
-
89
-
90
-
91
-
92
-
93
-
94
-
95
-
96
-
97
-
98
-
99
-
100
-
101
-
102
-
103
-
104
-
105
-
106
-
107
-
108
-
109
-
110
-
111
-
112
-
113
-
114
-
115
-
116
-
117
-
118
-
119
-
120
-
121
-
122
-
123
-
124
-
125
-
126
-
127
-
128
-
129
-
130
-
131
-
132
-
133
-
134
-
135
-
136
-
137
-
138
-
139
-
140
-
141
-
142
-
143
-
144
-
145
-
146
-
147
-
148
-
149
-
150
-
151
-
152
-
153
-
154
-
155
-
156
-
157
-
158
-
159
-
160
-
161
-
162
-
163
-
164
-
165
-
166
-
167
-
168
-
169
-
170
-
171
-
172
-
173
-
174
-
175
-
176
-
177
-
178
-
179
-
180
-
181
-
182
-
183
-
184
-
185
-
186
-
187
-
188
-
189
-
190
-
191
-
192
-
193
-
194
-
195
-
196
-
197
-
198
-
199
-
200
-
201
-
202
-
203
-
204
-
205
-
206
-
207
-
208
-
209
-
210
-
211
-
212
-
213
-
214
-
215
-
216
-
217
-
218
-
219
-
220
-
221
-
222
-
223
-
224
-
225
-
226
-
227
-
228
-
229
-
230
-
231
-
232
-
233
-
234
-
235
-
236
-
237
-
238
-
239
-
240
-
241
-
242
-
243
-
244
-
245
-
246
-
247
-
248
-
249
-
250
-
251
-
252
-
253
-
254
-
255
-
256
-
257
-
258
-
259
-
260
-
261
-
262
-
263
-
264
-
265
-
266
-
267
-
268
-
269
-
270
-
271
-
272
 |
 |
