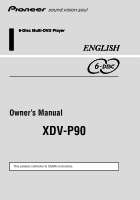
Pioneer XDV-P90 Owner's Manual - Page 4
Contents - remote
 |
View all Pioneer XDV-P90 manuals
Add to My Manuals
Save this manual to your list of manuals |
Page 4 highlights
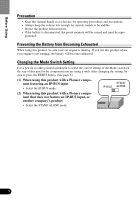
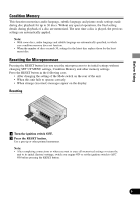
Contents Be sure to read this. Discs Compatible with this Product 9 Disc Operation 10 Before Using 3 Before Using This Product 3 - About This Product - About This Manual - How to Use This Manual - To Ensure Safe Driving - Precaution - Preventing the Battery from Becoming Exhausted - Changing the Mode Switch Setting - Condition Memory - Resetting the Microprocessor Key Finder 7 Using the Remote Controller 8 - Battery Discs Compatible with this Product 9 - Features of This Player - What the Marks on DVDs Indicate - Disc Organization Main Features of This Product 12 Care of Discs and Magazines 13 - Precaution Loading Discs 14 - Loading Discs - Loading the Magazine - Removing the Magazine Basic Operations 17 Switching Power ON/OFF 17 - Switching Power ON - Switching Power OFF Disc (DVD/Video CD/CD) Playback ........ 19 - Working with the Menu Screen Chapter and Track Advance/Return 20 - Skipping to the Next Chapter/Track - Returning to the Previous Chapter/Track Specifying Title/Chapter/Track (Direct Search 21 - Specifying Title - Specifying Chapter - Specifying Track Disc Fast Forward/Reverse 22 - Fast Forward - Fast Reverse Changing Discs 23 Stopping Playback 23 Playback Variations 24 Still, Frame-by-Frame and Slow Motion Playback 24 - Still Playback - Frame-by-Frame Playback - Slow Motion Playback Changing Audio Language during Playback (Multi-Audio 26 Changing Audio Output during Playback 26 Changing the Subtitle Language during Playback (Multi-Subtitle) ........ 27 Changing the Viewing Angle during Playback (Multi-Angle 28 Operating with Information Displays 29 Calling up Information Displays 29 Operating with the Information Display 1 of a DVD 30 - Searching for a Desired Scene, Starting Playback from a Specified Time - Selecting Audio, Subtitle and Angle Operating with the Information Display 2 of a DVD 32 - Switching Discs - Selecting Repeat Range - Selecting the Picture Mode 1
-
 1
1 -
 2
2 -
 3
3 -
 4
4 -
 5
5 -
 6
6 -
 7
7 -
 8
8 -
 9
9 -
 10
10 -
11
-
12
-
13
-
14
-
15
-
16
-
17
-
18
-
19
-
20
-
21
-
22
-
23
-
24
-
25
-
26
-
27
-
28
-
29
-
30
-
31
-
32
-
33
-
34
-
35
-
36
-
37
-
38
-
39
-
40
-
41
-
42
-
43
-
44
-
45
-
46
-
47
-
48
-
49
-
50
-
51
-
52
-
53
-
54
-
55
-
56
-
57
-
58
-
59
-
60
-
61
-
62
-
63
-
64
-
65
-
66
-
67
-
68
-
69
-
70
-
71
-
72
-
73
-
74
-
75
-
76
-
77
-
78
-
79
-
80
-
81
-
82
-
83
-
84
 |
 |