Pioneer XDV-P90 Owner's Manual - Page 56
Operating with the Head Unit
 |
View all Pioneer XDV-P90 manuals
Add to My Manuals
Save this manual to your list of manuals |
Page 56 highlights
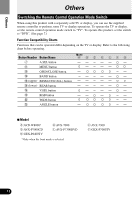
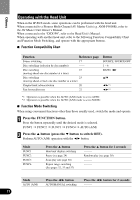
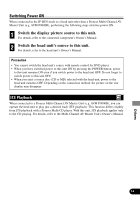
Others Operating with the Head Unit When in the IP-BUS mode, some operations can be performed with the head unit. When connected to a Pioneer Multi-Channel AV Master Unit (e.g. AVM-P9000R), refer to the AV Master Unit Owner's Manual. When connected to the "DEX-P9", refer to the Head Unit's Manual. When operating with another head unit, refer to the following Function Compatibility Chart and Function Mode Switching, and operate with the appropriate buttons. 7 Function Compatibility Chart Function Reference page Source switching 17 Disc switching (selection by disc number) -- Disc switching 23 (moving ahead one disc number at a time) Disc switching 23 (moving ahead or back one disc number at a time) Chapter/track advance/return 20 Fast forward/reverse 22 Button SOURCE, SOURCE/OFF 1 - 6 BAND, 23 5/∞ 2/3*1 2/3*2 *1 Operation is possible when the AUTO (A/M) mode is set to AUTO. *2 Operation is possible when the AUTO (A/M) mode is set to MANU. 7 Function Mode Switching When using convenient functions other than those usually used, switch the mode and operate. 1 Press the FUNCTION button. Press the button repeatedly until the desired mode is selected. FUNC1 = FUNC2 = FUNC3 = FUNC4 = AUTO (A/M) 2 Press the 5 button (press the ∞ button to switch OFF). Perform AUTO (A/M) operation with the 2/3 button. Mode FUNC1 FUNC2 FUNC3 FUNC4 Press the 5 button Head unit display switching Pause (see page 24) Scan play (see page 38) Repeat range switching (See pages 32, 35 and 37) Press the 5 button for 2 seconds --- Random play (see page 38) --- --- Mode AUTO (A/M) Press the 2/3 button AUTO/MANUAL switching Press the 2/3 button for 2 seconds --- 53
-
 1
1 -
2
-
3
-
4
-
5
-
6
-
7
-
8
-
9
-
10
-
11
-
12
-
13
-
14
-
15
-
16
-
17
-
18
-
19
-
20
-
21
-
22
-
23
-
24
-
25
-
26
-
27
-
28
-
29
-
30
-
31
-
32
-
33
-
34
-
35
-
36
-
37
-
38
-
39
-
40
-
41
-
42
-
43
-
44
-
45
-
46
-
47
-
48
-
49
-
50
-
 51
51 -
 52
52 -
 53
53 -
 54
54 -
 55
55 -
 56
56 -
 57
57 -
 58
58 -
 59
59 -
 60
60 -
 61
61 -
62
-
63
-
64
-
65
-
66
-
67
-
68
-
69
-
70
-
71
-
72
-
73
-
74
-
75
-
76
-
77
-
78
-
79
-
80
-
81
-
82
-
83
-
84
 |
 |