ProForm 970 Ci English Manual - Page 16
overtighten
 |
View all ProForm 970 Ci manuals
Add to My Manuals
Save this manual to your list of manuals |
Page 16 highlights
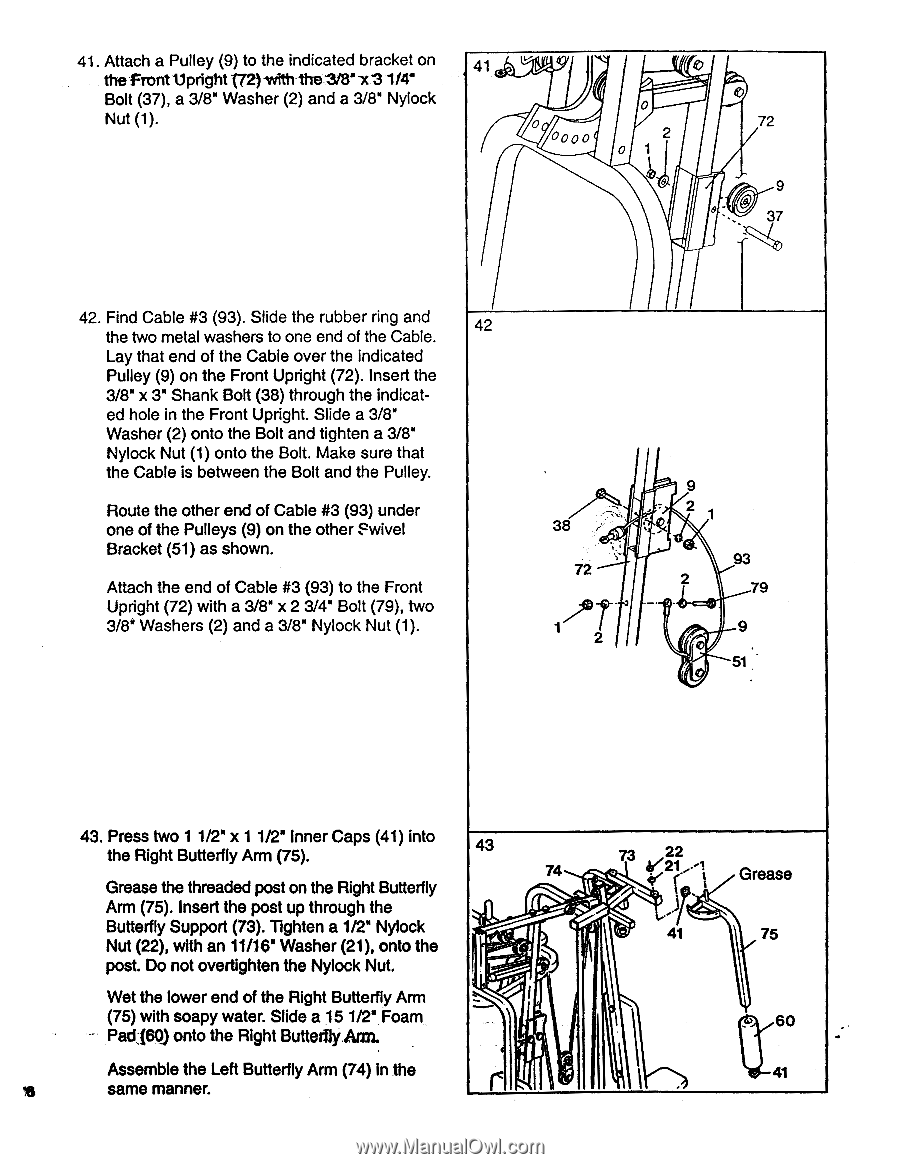
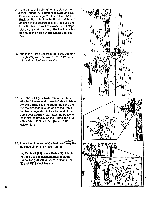
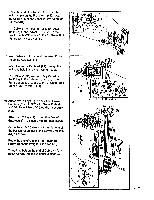
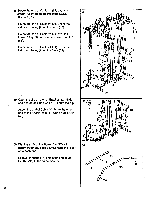
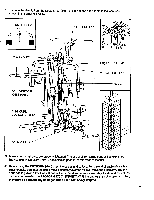
41. Attach a Pulley (9) to the indicated bracket on 41 the frontUpright (72)with-the'VW -xl 1/4" Bolt (37), a 3/8" Washer (2) and a 3/8" Nylock Nut (1). 0 000 0 72 9 9 37 42. Find Cable #3 (93). Slide the rubber ring and 42 the two metal washers to one end of the Cable. Lay that end of the Cable over the indicated Pulley (9) on the Front Upright (72). Insert the 3/8" x 3" Shank Bolt (38) through the indicat- ed hole in the Front Upright. Slide a 3/8" Washer (2) onto the Bolt and tighten a 3/8" Nylock Nut (1) onto the Bolt. Make sure that the Cable is between the Bolt and the Pulley. Route the other end of Cable #3 (93) under one of the Pulleys (9) on the other swivel Bracket (51) as shown. Attach the end of Cable #3 (93) to the Front Upright (72) with a 3/8" x 2 3/4" Bolt (79), two 3/8" Washers (2) and a 3/8" Nylock Nut (1). 38 72 3 1 2 9 2 93 2 79 9 51 43. Press two 1 1/2" x 1 1/2" Inner Caps (41) into the Right Butterfly Arm (75). 43 74 Grease the threaded post on the Right Butterfly Arm (75). Insert the post up through the Butterfly Support (73). Tighten a 1/2" Nylock Nut (22), with an 11/16" Washer (21), onto the post. Do not overtighten the Nylock Nut. Wet the lower end of the Right Butterfly Arm (75) with soapy water. Slide a 15 1/2" Foam Pad,(60) onto the Right Buttetty Atm. Assemble the Left Butterfly Arm (74) In the same manner. r 73 22 V21 f. 41 Grease 75 60 41
-
 1
1 -
2
-
3
-
4
-
5
-
6
-
7
-
8
-
9
-
10
-
 11
11 -
 12
12 -
 13
13 -
 14
14 -
 15
15 -
 16
16 -
 17
17 -
 18
18 -
 19
19 -
 20
20 -
 21
21 -
22
-
23
-
24
 |
 |