Ricoh 2210L Operating Instructions - Page 158
AaBbCc, Toner specs, Dropouts, Vertical lines, Gray background
 |
UPC - 026649304705
View all Ricoh 2210L manuals
Add to My Manuals
Save this manual to your list of manuals |
Page 158 highlights
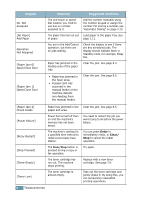
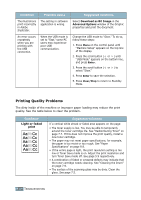
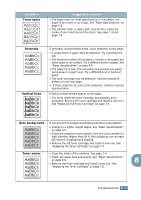
Condition Toner specs AaBbCc AaBbCc AaBbCc AaBbCc AaBbCc Suggested solutions • The paper may not meet specifications; for example, the paper is too moist or too rough. See "Paper Specifications" on page 9.9. • The transfer roller or paper path may be dirty. Clean the inside of your machine and the drum. See page 7.4 and page 7.9. Dropouts AaBbCc AaBbCc AaBbCc AaBbCc AaBbCc Vertical lines AaBbCc AaBbCc AaBbCc AaBbCc AaBbCc If generally rounded faded areas, occur randomly on the page: • A single sheet of paper may be defective. Try reprinting the job. • The moisture content of the paper is uneven or the paper has moist spots on its surface. Try a different brand of paper. See "Paper Specifications" on page 9.9. • The paper lot is bad. The manufacturing process can cause some areas to reject toner. Try a different kind or brand of paper. • The toner cartridge may be defective. Vertical repetitive defects on the next page. • If these steps do not correct the problems, contact a service representative. If black vertical streaks appear on the page: • The drum inside the toner cartridge has probably been scratched. Remove the toner cartridge and install a new one. See "Replacing the Toner Cartridge" on page 7.8. Gray background AaBbCc AaBbCc AaBbCc AaBbCc AaBbCc If the amount of background shading becomes unacceptable: • Change to a lighter weight pages. See "Paper Specifications" on page 9.9. • Check the machine's environment; very dry (low humidity) or high humidity (higher than 80 % RH) conditions can increase the amount of background shading. • Remove the old toner cartridge and install a new one. See "Replacing the Toner Cartridge" on page 7.8. Toner smear • Clean the inside of the machine. See page 7.4. • Check the paper type and quality. See "Paper Specifications" on page 9.9. 8 • Remove the toner cartridge and install a new one. See "Replacing the Toner Cartridge" on page 7.8. TROUBLESHOOTING 8.15
-
 1
1 -
2
-
3
-
4
-
5
-
6
-
7
-
8
-
9
-
10
-
11
-
12
-
13
-
14
-
15
-
16
-
17
-
18
-
19
-
20
-
21
-
22
-
23
-
24
-
25
-
26
-
27
-
28
-
29
-
30
-
31
-
32
-
33
-
34
-
35
-
36
-
37
-
38
-
39
-
40
-
41
-
42
-
43
-
44
-
45
-
46
-
47
-
48
-
49
-
50
-
51
-
52
-
53
-
54
-
55
-
56
-
57
-
58
-
59
-
60
-
61
-
62
-
63
-
64
-
65
-
66
-
67
-
68
-
69
-
70
-
71
-
72
-
73
-
74
-
75
-
76
-
77
-
78
-
79
-
80
-
81
-
82
-
83
-
84
-
85
-
86
-
87
-
88
-
89
-
90
-
91
-
92
-
93
-
94
-
95
-
96
-
97
-
98
-
99
-
100
-
101
-
102
-
103
-
104
-
105
-
106
-
107
-
108
-
109
-
110
-
111
-
112
-
113
-
114
-
115
-
116
-
117
-
118
-
119
-
120
-
121
-
122
-
123
-
124
-
125
-
126
-
127
-
128
-
129
-
130
-
131
-
132
-
133
-
134
-
135
-
136
-
137
-
138
-
139
-
140
-
141
-
142
-
143
-
144
-
145
-
146
-
147
-
148
-
149
-
150
-
151
-
152
-
 153
153 -
 154
154 -
 155
155 -
 156
156 -
 157
157 -
 158
158 -
 159
159 -
 160
160 -
 161
161 -
 162
162 -
 163
163 -
164
-
165
-
166
-
167
-
168
-
169
-
170
-
171
-
172
-
173
-
174
-
175
-
176
-
177
-
178
-
179
-
180
-
181
-
182
-
183
-
184
 |
 |
