Ricoh ISO1 Operation Manual - Page 24
Connecting The Power Cord
 |
View all Ricoh ISO1 manuals
Add to My Manuals
Save this manual to your list of manuals |
Page 24 highlights
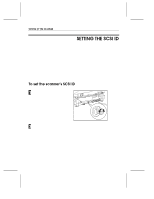
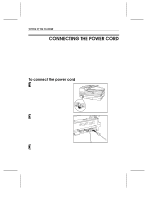
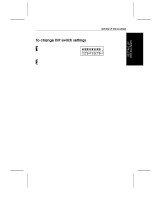
SETTING UP THE SCANNER CONNECTING THE POWER CORD Use only the power cord that comes with the scanner to connect it to a power source. Note the following important points when connecting the power cord. Ë Use only the power cord supplied with the scanner. Ë Connect the power cord to the scanner and plug it into a wall outlet before turning on the power switch. Ë The plug is equipped with a grounding pin, and must be plugged into a grounded outlet. To connect the power cord 1 Make sure that scanner power is turned off. 2 Attach the power cord to the power cord socket on the back of the scanner. 3 Plug the other end of the power cord into a standard grounded wall outlet. 1-10
-
 1
1 -
2
-
3
-
4
-
5
-
6
-
7
-
8
-
9
-
10
-
11
-
12
-
13
-
14
-
15
-
16
-
17
-
18
-
 19
19 -
 20
20 -
 21
21 -
 22
22 -
 23
23 -
 24
24 -
 25
25 -
 26
26 -
 27
27 -
 28
28 -
 29
29 -
30
-
31
-
32
-
33
-
34
-
35
-
36
-
37
-
38
-
39
-
40
-
41
-
42
-
43
-
44
-
45
-
46
-
47
-
48
-
49
-
50
-
51
-
52
-
53
-
54
-
55
-
56
-
57
-
58
-
59
-
60
-
61
-
62
-
63
-
64
-
65
-
66
-
67
-
68
-
69
-
70
-
71
-
72
-
73
-
74
-
75
-
76
-
77
-
78
-
79
-
80
 |
 |

SETTING UP THE SCANNER
1-10
CONNECTING THE POWER CORD
Use only the power cord that comes with the scanner to connect it to a power
source.
Note the following important points when connecting the power cord.
Use only the power cord supplied with the scanner.
Connect the power cord to the scanner and plug it into a wall outlet before
turning on the power switch.
The plug is equipped with a grounding pin, and must be plugged into a
grounded outlet.
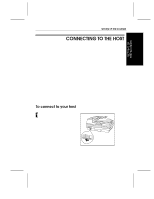
To connect the power cord
1
Make sure that scanner power is
turned off.
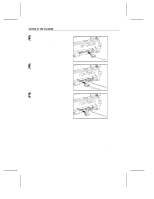
2
Attach the power cord to the
power cord socket on the back of
the scanner.
3
Plug the other end of the power
cord into a standard grounded
wall outlet.