Samsung CLX-3185 User Manual (user Manual) (ver.2.00) (English) - Page 118
In the tray, In the fuser unit area, Troubleshooting
 |
View all Samsung CLX-3185 manuals
Add to My Manuals
Save this manual to your list of manuals |
Page 118 highlights
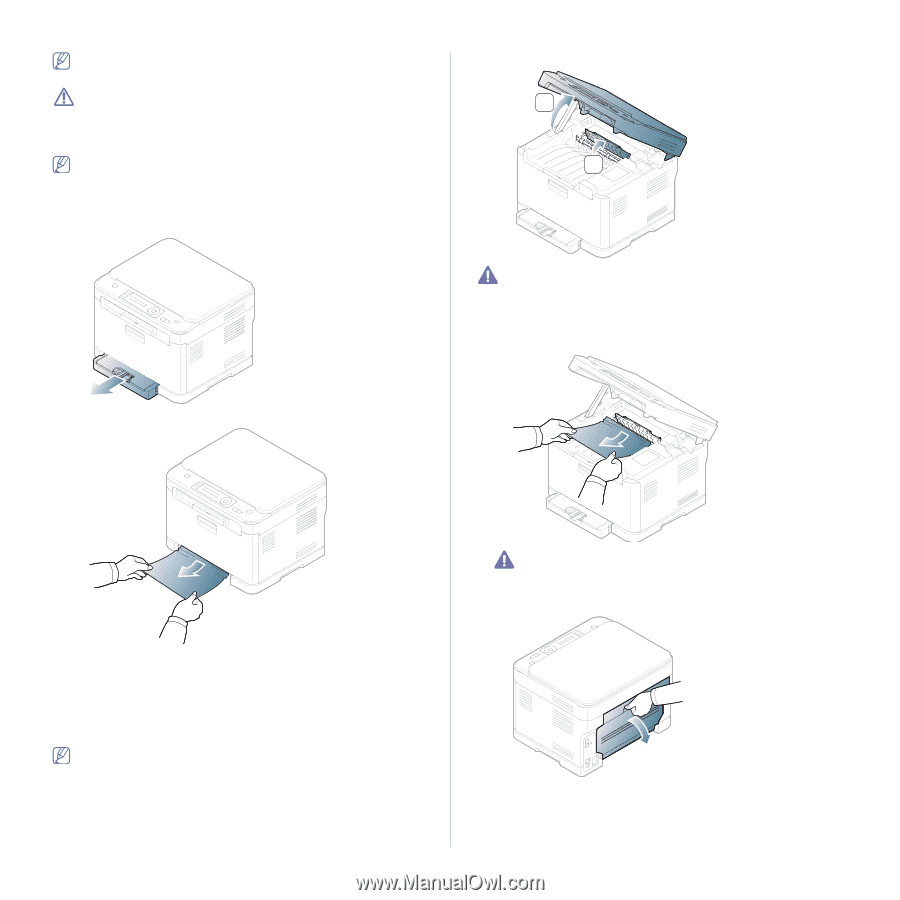
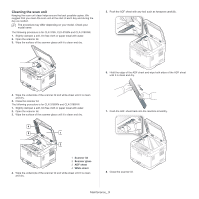
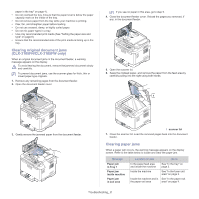
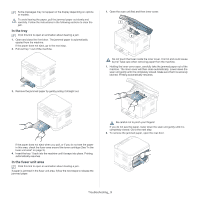
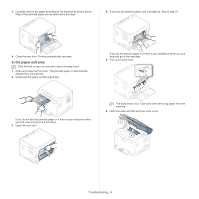
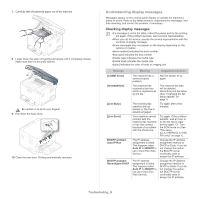
Some messages may not appear on the display depending on options or models. To avoid tearing the paper, pull the jammed paper out slowly and carefully. Follow the instructions in the following sections to clear the jam. In the tray Click this link to open an animation about clearing a jam. 1. Open and close the front door. The jammed paper is automatically ejected from the machine. If the paper does not eject, go to the next step. 2. Pull out tray 1 out of the machine. 1. Open the scan unit first and then inner cover. 1 2 Do not touch the fuser inside the inner cover. It is hot and could cause burns! Take care when removing paper from the machine. 1. Holding the inner cover open, carefully take the jammed paper out of the machine. The inner cover will then close automatically. Lower down the scan unit gently until it is completely closed. Make sure that it is securely latched. Printing automatically resumes. 3. Remove the jammed paper by gently pulling it straight out. If the paper does not eject when you pull, or if you do not see the paper in this area, check the fuser area around the toner cartridge (See "In the fuser unit area" on page 3). 4. Insert the tray 1 back into the machine until it snaps into place. Printing automatically resumes. In the fuser unit area Click this link to open an animation about clearing a jam. If paper is jammed in the fuser unit area, follow the next steps to release the jammed paper. Be careful not to pinch your fingers! If you do not see the paper, lower down the scan unit gently until it is completely closed. Go to the next step. 2. To remove the jammed paper, open the rear door. Troubleshooting_ 3
-
 1
1 -
2
-
3
-
4
-
5
-
6
-
7
-
8
-
9
-
10
-
11
-
12
-
13
-
14
-
15
-
16
-
17
-
18
-
19
-
20
-
21
-
22
-
23
-
24
-
25
-
26
-
27
-
28
-
29
-
30
-
31
-
32
-
33
-
34
-
35
-
36
-
37
-
38
-
39
-
40
-
41
-
42
-
43
-
44
-
45
-
46
-
47
-
48
-
49
-
50
-
51
-
52
-
53
-
54
-
55
-
56
-
57
-
58
-
59
-
60
-
61
-
62
-
63
-
64
-
65
-
66
-
67
-
68
-
69
-
70
-
71
-
72
-
73
-
74
-
75
-
76
-
77
-
78
-
79
-
80
-
81
-
82
-
83
-
84
-
85
-
86
-
87
-
88
-
89
-
90
-
91
-
92
-
93
-
94
-
95
-
96
-
97
-
98
-
99
-
100
-
101
-
102
-
103
-
104
-
105
-
106
-
107
-
108
-
109
-
110
-
111
-
112
-
 113
113 -
 114
114 -
 115
115 -
 116
116 -
 117
117 -
 118
118 -
 119
119 -
 120
120 -
 121
121 -
 122
122 -
 123
123 -
124
-
125
-
126
-
127
-
128
-
129
-
130
-
131
-
132
-
133
-
134
-
135
-
136
-
137
-
138
-
139
-
140
-
141
-
142
-
143
-
144
-
145
-
146
-
147
-
148
-
149
-
150
-
151
 |
 |