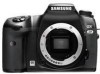
Samsung GX-20 User Manual (ENGLISH) - Page 37
Using the Drive Mode
 |
UPC - 044701008736
View all Samsung GX-20 manuals
Add to My Manuals
Save this manual to your list of manuals |
Page 37 highlights
Using the full automatic program mode Using the Drive Mode You can select the continuous shooting or self-timer function using the DRIVE mode. This chapter explains the [Continuous Shooting (Hi)] mode for example. 1. Press the Fn button on your camera and then press the direction button (▲). - The Drive Mode options screen appears. - If the AF mode is not set to SEL, you can directly press the direction buttons (▲) to use the drive mode. DRIVE Single Frame Shooting : Move : Set ● If you set [Remaining Count] to [Continuous] from the [Custom2 MENU], the maximum continuous-shootable images appears in the view finder on half shutter. ● The focus is adjusted each time the shutter is released while exposure metering timer is set (shutter release button is pressed halfway) if the focus mode is set to SAF (Single mode). ● Focusing is continuously active when the focus mode is set to CAF (Continuous mode). ● Note that in CAF (Continuous mode) / MF (Manual mode), the shutter will release when the shutter release button is pressed fully even if focusing is not complete. ● The shutter cannot be released until charging is complete when using the built-in flash. ● To take a picture while charging the built-in flash, set [Release in Charging] to [On] in the [CUSTOM2 MENU]. 2. Select the [( ) Continuous Shooting (Hi)] using the direction buttons (◄►) and then press the OK button. - The camera is ready to take pictures. DRIVE Continuous Shooting (Hi) : Move : Set 3. Continuous shooting starts as soon as you press and the hold the shutter button. 036
-
 1
1 -
2
-
3
-
4
-
5
-
6
-
7
-
8
-
9
-
10
-
11
-
12
-
13
-
14
-
15
-
16
-
17
-
18
-
19
-
20
-
21
-
22
-
23
-
24
-
25
-
26
-
27
-
28
-
29
-
30
-
31
-
 32
32 -
 33
33 -
 34
34 -
 35
35 -
 36
36 -
 37
37 -
 38
38 -
 39
39 -
 40
40 -
 41
41 -
 42
42 -
43
-
44
-
45
-
46
-
47
-
48
-
49
-
50
-
51
-
52
-
53
-
54
-
55
-
56
-
57
-
58
-
59
-
60
-
61
-
62
-
63
-
64
-
65
-
66
-
67
-
68
-
69
-
70
-
71
-
72
-
73
-
74
-
75
-
76
-
77
-
78
-
79
-
80
-
81
-
82
-
83
-
84
-
85
-
86
-
87
-
88
-
89
-
90
-
91
-
92
-
93
-
94
-
95
-
96
-
97
-
98
-
99
-
100
-
101
-
102
-
103
-
104
-
105
-
106
-
107
-
108
-
109
-
110
-
111
-
112
-
113
-
114
-
115
-
116
-
117
-
118
-
119
-
120
-
121
-
122
-
123
-
124
-
125
-
126
-
127
-
128
-
129
-
130
-
131
-
132
-
133
-
134
-
135
-
136
-
137
-
138
-
139
-
140
-
141
-
142
-
143
-
144
-
145
-
146
-
147
-
148
-
149
-
150
-
151
-
152
-
153
-
154
-
155
-
156
-
157
-
158
-
159
-
160
-
161
-
162
-
163
 |
 |
