Samsung ML 2851ND User Manual (ENGLISH) - Page 31
Replacing the toner cartridge - red light blinking
 |
UPC - 635753623222
View all Samsung ML 2851ND manuals
Add to My Manuals
Save this manual to your list of manuals |
Page 31 highlights
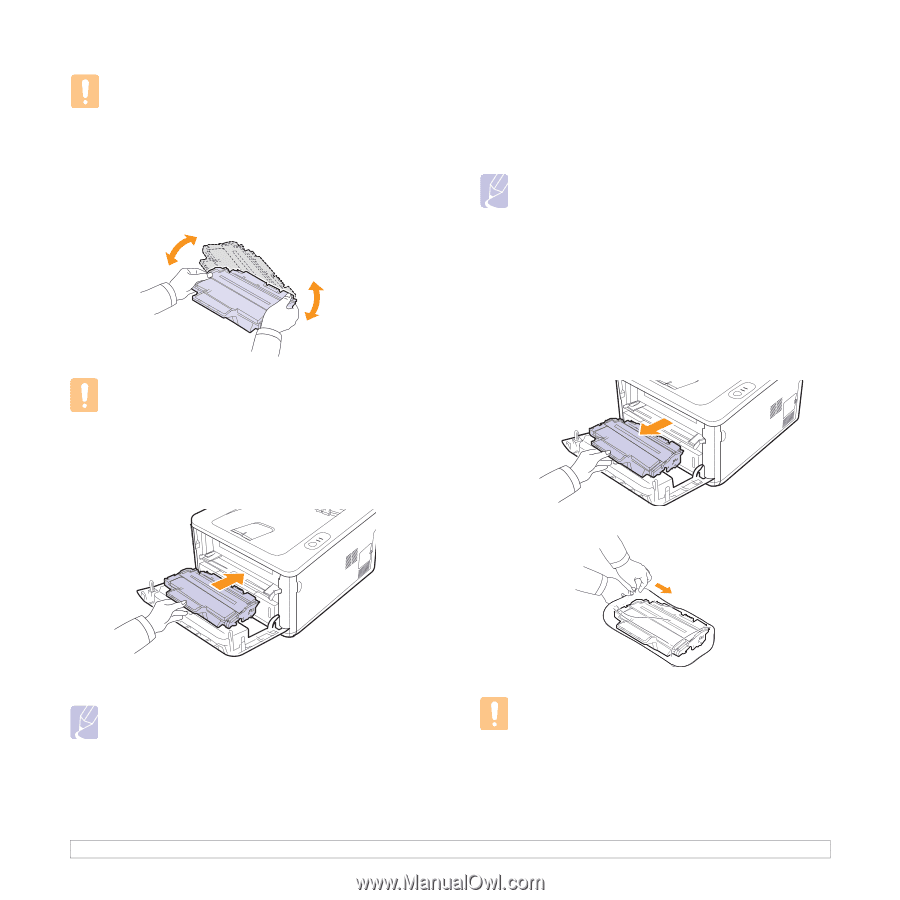
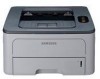
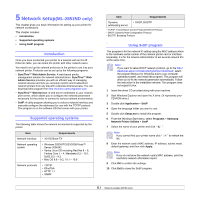
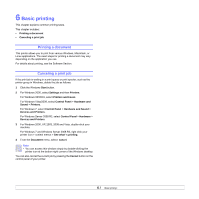
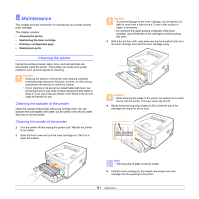
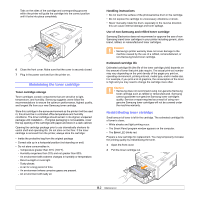
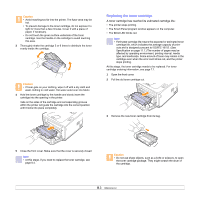
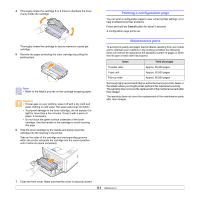
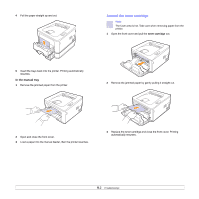
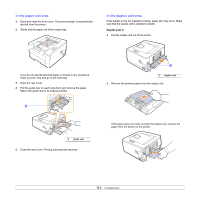
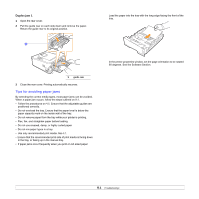
Caution • Avoid reaching too far into the printer. The fuser area may be hot. • To prevent damage to the toner cartridge, do not expose it to light for more than a few minutes. Cover it with a piece of paper, if necessary. • Do not touch the green surface underside of the toner cartridge. Use the handle on the cartridge to avoid touching this area. 3 Thoroughly shake the cartridge 5 or 6 times to distribute the toner evenly inside the cartridge. Caution • If toner gets on your clothing, wipe it off with a dry cloth and wash clothing in cold water. Hot water sets toner into fabric. 4 Hold the toner cartridge by the handle and slowly insert the cartridge into the opening in the printer. Tabs on the sides of the cartridge and corresponding grooves within the printer will guide the cartridge into the correct position until it locks into place completely. Replacing the toner cartridge A toner cartridge has reached its estimated cartridge life.: • The printer stops printing. • The Smart Panel program window appears on the computer. • The Error LED blinks red. Note • Estimated cartridge life means the expected or estimated toner cartridge life, which indicates the average capacity of printouts and is designed pursuant to ISO/IEC 19752. (See Specification on page 11.1.) The number of pages may be affected by operating environment, printing interval, media type, and media size. Some amount of toner may remain in the cartridge even when the error LED blinks red, and the printer stops printing. At this stage, the toner cartridge needs to be replaced. For toner cartridge ordering information, see page 7.1. 1 Open the front cover. 2 Pull the old toner cartridge out. 3 Remove the new toner cartridge from its bag. 5 Close the front cover. Make sure that the cover is securely closed. Note • At this stage, if you need to replace the toner cartridge, see page 8.4. Caution • Do not use sharp objects, such as a knife or scissors, to open the toner cartridge package. They might scratch the drum of the cartridge. 8.3
-
 1
1 -
2
-
3
-
4
-
5
-
6
-
7
-
8
-
9
-
10
-
11
-
12
-
13
-
14
-
15
-
16
-
17
-
18
-
19
-
20
-
21
-
22
-
23
-
24
-
25
-
 26
26 -
 27
27 -
 28
28 -
 29
29 -
 30
30 -
 31
31 -
 32
32 -
 33
33 -
 34
34 -
 35
35 -
 36
36 -
37
-
38
-
39
-
40
-
41
-
42
-
43
-
44
-
45
-
46
-
47
-
48
-
49
-
50
-
51
-
52
-
53
-
54
-
55
-
56
-
57
-
58
-
59
-
60
-
61
-
62
-
63
-
64
-
65
-
66
-
67
-
68
-
69
-
70
-
71
-
72
-
73
-
74
-
75
-
76
-
77
-
78
-
79
-
80
-
81
-
82
-
83
-
84
-
85
-
86
-
87
 |
 |