Samsung SF-650 Quick Guide (easy Manual) (ver.1.0) (English) - Page 23
Basic setup, Setting up the hardware - not printing
 |
UPC - 635753613803
View all Samsung SF-650 manuals
Add to My Manuals
Save this manual to your list of manuals |
Page 23 highlights
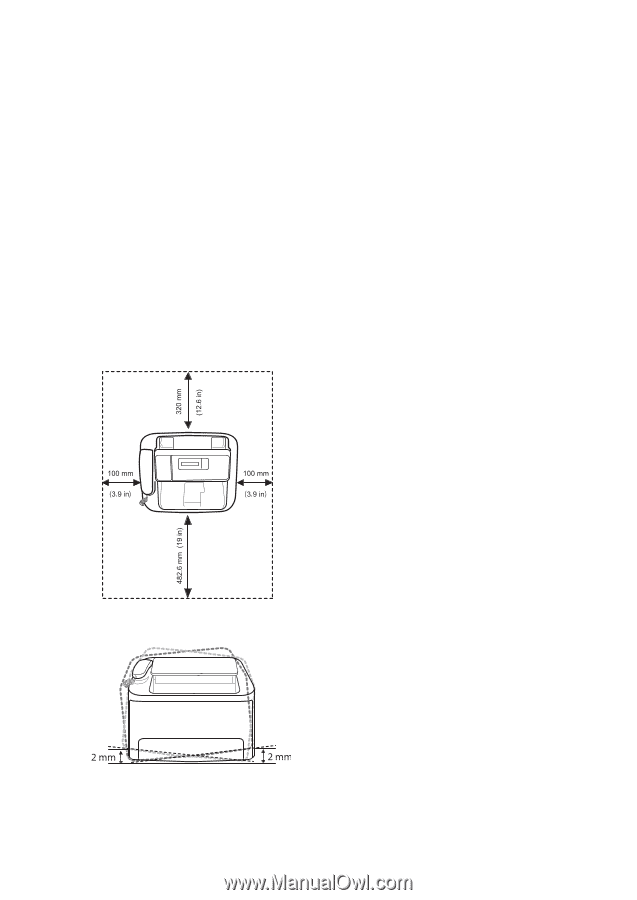
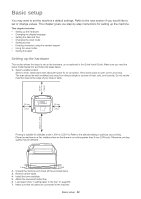
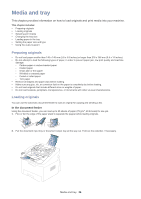
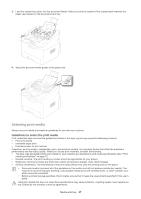
Basic setup 2. You may want to set the machine's default settings. Refer to the next section if you would like to set or change values. This chapter gives you step-by-step instructions for setting up the machine. This chapter includes: • Setting up the hardware • Changing the display language • Setting the date and time • Changing the clock mode • Setting sounds • Entering characters using the number keypad • Using the save modes • Setting the paper Setting up the hardware This section shows the steps to set up the hardware, as is explained in the Quick Install Guide. Make sure you read the Quick Install Guide first and follow the steps below: 1. Select a stable location. Select a level, stable place with adequate space for air circulation. Allow extra space to open covers and trays. The area should be well ventilated and away from direct sunlight or sources of heat, cold, and humidity. Do not set the machine close to the edge of your desk or table. Printing is suitable for altitudes under 1,000 m (3,281 ft). Refer to the altitude setting to optimize your printing. Place the machine on a flat, stable surface so that there is no incline greater than 2 mm (0.08 inch). Otherwise, printing quality may be affected. 2. Unpack the machine and check all the enclosed items. 3. Remove all the tapes. 4. Install the toner cartridge. 5. Attach the document output tray. 6. Load paper (See "Loading paper in the tray" on page29). 7. Make sure that all cables are connected to the machine. Basic setup_ 22
-
 1
1 -
2
-
3
-
4
-
5
-
6
-
7
-
8
-
9
-
10
-
11
-
12
-
13
-
14
-
15
-
16
-
17
-
 18
18 -
 19
19 -
 20
20 -
 21
21 -
 22
22 -
 23
23 -
 24
24 -
 25
25 -
 26
26 -
 27
27 -
 28
28 -
29
-
30
-
31
-
32
-
33
-
34
-
35
-
36
-
37
-
38
-
39
-
40
-
41
-
42
-
43
-
44
-
45
-
46
-
47
-
48
-
49
-
50
-
51
-
52
-
53
-
54
-
55
-
56
-
57
-
58
-
59
-
60
-
61
-
62
-
63
-
64
-
65
-
66
-
67
-
68
-
69
-
70
-
71
-
72
-
73
-
74
-
75
-
76
-
77
-
78
-
79
-
80
-
81
-
82
-
83
-
84
 |
 |