Samsung SF531P User Manual (user Manual) (ver.1.00) (English) - Page 93
Forwarding Received Faxes, Fax Forward, Start/Enter
 |
View all Samsung SF531P manuals
Add to My Manuals
Save this manual to your list of manuals |
Page 93 highlights
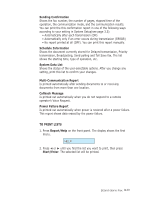
Forwarding Received Faxes You can forward all faxes which you receive during the specified period to a specified remote station. This can be useful when you are out of your work station and want to receive your faxes through another station. Setting Time and Destination for Forwarding Faxes To forward the received fax, you must define the remote fax machine where the fax is to be sent and the start time and end time of a period when the Fax Forward feature operates. 1. Press and hold down Fax Forward for about 2 seconds on front panel. 2. Enter the number of a designated fax machine to where the faxes are delivered using the ten number keypad. You can also use one of one-touch dial button or a speed dial number. Note: You cannot use the Group dial number for forwarding a fax. 3. When the correct number displays, press Start/Enter. The displays prompts you to enter the start time. 4. Enter the date and time when the Fax Forwarding feature starts to operate and press Start/Enter. The displays prompts you to enter the end time. 5. Enter the date and time when the Fax Forwarding feature ends and press Start/Enter. Turning the Fax Forwarding Feature On or Off Press Fax Forward on front panel to turn this feature on or off. • If the LED is on, Fax Forwarding activates. All faxes delivered to your machine during the specified period will be automatically forwarded to a registered station. • If the LED is off, Fax Forwarding deactivates. Notes: • If an error occurs during forwarding a fax, your machine will automatically redial the number every three minutes up to a maximum of two times, just like normal fax operation. • The Sending Confirmation report showing time when faxes are forwarded, the designated fax number, the transmission result, the contents of the fax and so on will automatically print right before the end time. 3.36 Stand-alone Fax
-
 1
1 -
2
-
3
-
4
-
5
-
6
-
7
-
8
-
9
-
10
-
11
-
12
-
13
-
14
-
15
-
16
-
17
-
18
-
19
-
20
-
21
-
22
-
23
-
24
-
25
-
26
-
27
-
28
-
29
-
30
-
31
-
32
-
33
-
34
-
35
-
36
-
37
-
38
-
39
-
40
-
41
-
42
-
43
-
44
-
45
-
46
-
47
-
48
-
49
-
50
-
51
-
52
-
53
-
54
-
55
-
56
-
57
-
58
-
59
-
60
-
61
-
62
-
63
-
64
-
65
-
66
-
67
-
68
-
69
-
70
-
71
-
72
-
73
-
74
-
75
-
76
-
77
-
78
-
79
-
80
-
81
-
82
-
83
-
84
-
85
-
86
-
87
-
 88
88 -
 89
89 -
 90
90 -
 91
91 -
 92
92 -
 93
93 -
 94
94 -
 95
95 -
 96
96 -
 97
97 -
 98
98 -
99
-
100
-
101
-
102
-
103
-
104
-
105
-
106
-
107
-
108
-
109
-
110
-
111
-
112
-
113
-
114
-
115
-
116
-
117
-
118
-
119
-
120
-
121
-
122
-
123
-
124
-
125
-
126
-
127
-
128
-
129
-
130
-
131
-
132
-
133
-
134
-
135
-
136
-
137
-
138
-
139
-
140
-
141
-
142
-
143
-
144
-
145
-
146
-
147
-
148
-
149
-
150
-
151
-
152
-
153
-
154
-
155
-
156
-
157
-
158
-
159
-
160
-
161
-
162
-
163
-
164
-
165
-
166
-
167
 |
 |