Samsung SPH-D600 User Manual (user Manual) (ver.f7) (English) - Page 101
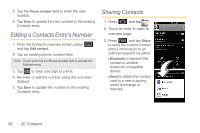
fields, and enter, a name for the new entry.
 |
View all Samsung SPH-D600 manuals
Add to My Manuals
Save this manual to your list of manuals |
Page 101 highlights
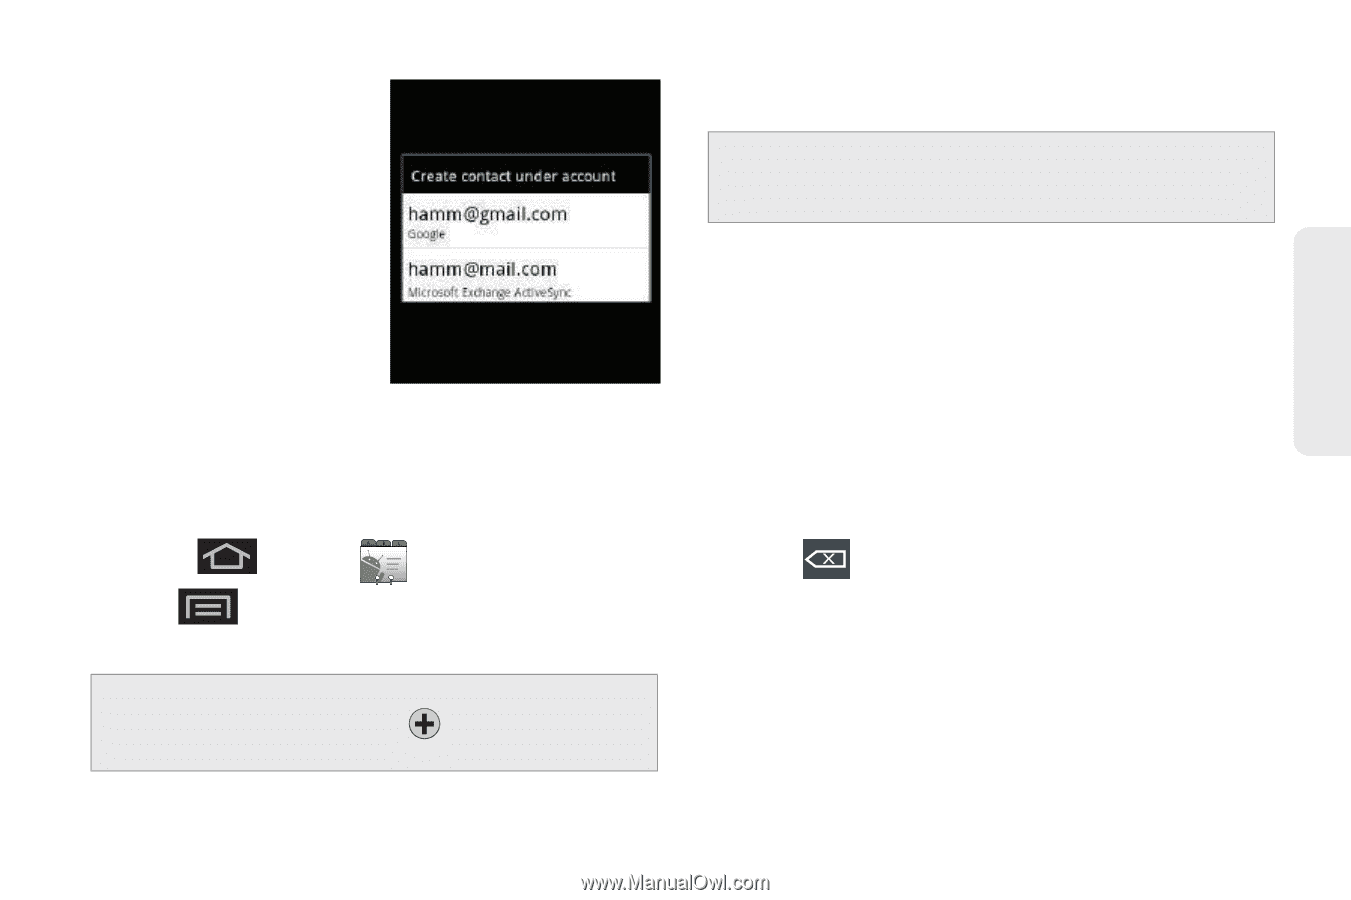
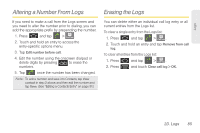
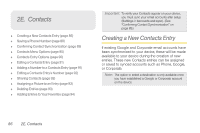
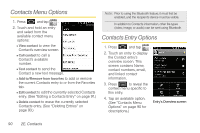
Contacts Your device automatically sorts the Contacts entries alphabetically. You can create either a Google or Corporate contact. ⅷ Google contacts are shared with your existing Google account and can also be imported to your device after you have created a Google Mail account. ⅷ Corporate (also known as Work or Outlook) contacts are those contacts that are intended to be shared with either an Exchange Server or from within Microsoft® Outlook®. 1. Press and tap . 2. Tap > New contact (to open the New contact screen). Shortcut: Enter a phone number from the keypad and tap Add to Contacts > . Proceed with steps 3-8. 3. Tap a destination type (Phone, Google, or Corporate). Note: You will not see the option to select a destination unless you have previously established a Google or Corporate account on the device. 4. Tap the First name and Last name fields, and enter a name for the new entry. 5. Tap the label button (to the left of the Phone field) to select a category such as Home, Mobile (default), Work, Work Fax, Home Fax, Pager, Other, Custom, Callback, Car, Company Main, ISDN, Main, Other Fax, Radio, Telex, TTY TDD, Work Mobile, Work Pager, Assistant, or MMS. 6. Tap a phone number field and enter a phone number. Ⅲ Tap to remove a previously entered phone number. 7. Enter additional information such as: Email, Postal address, Organization or More to input additional category information. Ⅲ Use your finger to slide the page up or down to see additional fields and categories. 2E. Contacts 87
-
 1
1 -
2
-
3
-
4
-
5
-
6
-
7
-
8
-
9
-
10
-
11
-
12
-
13
-
14
-
15
-
16
-
17
-
18
-
19
-
20
-
21
-
22
-
23
-
24
-
25
-
26
-
27
-
28
-
29
-
30
-
31
-
32
-
33
-
34
-
35
-
36
-
37
-
38
-
39
-
40
-
41
-
42
-
43
-
44
-
45
-
46
-
47
-
48
-
49
-
50
-
51
-
52
-
53
-
54
-
55
-
56
-
57
-
58
-
59
-
60
-
61
-
62
-
63
-
64
-
65
-
66
-
67
-
68
-
69
-
70
-
71
-
72
-
73
-
74
-
75
-
76
-
77
-
78
-
79
-
80
-
81
-
82
-
83
-
84
-
85
-
86
-
87
-
88
-
89
-
90
-
91
-
92
-
93
-
94
-
95
-
 96
96 -
 97
97 -
 98
98 -
 99
99 -
 100
100 -
 101
101 -
 102
102 -
 103
103 -
 104
104 -
 105
105 -
 106
106 -
107
-
108
-
109
-
110
-
111
-
112
-
113
-
114
-
115
-
116
-
117
-
118
-
119
-
120
-
121
-
122
-
123
-
124
-
125
-
126
-
127
-
128
-
129
-
130
-
131
-
132
-
133
-
134
-
135
-
136
-
137
-
138
-
139
-
140
-
141
-
142
-
143
-
144
-
145
-
146
-
147
-
148
-
149
-
150
-
151
-
152
-
153
-
154
-
155
-
156
-
157
-
158
-
159
-
160
-
161
-
162
-
163
-
164
-
165
-
166
-
167
-
168
-
169
-
170
-
171
-
172
-
173
-
174
-
175
-
176
-
177
-
178
-
179
-
180
-
181
-
182
-
183
-
184
-
185
-
186
-
187
-
188
-
189
-
190
-
191
-
192
-
193
-
194
-
195
-
196
-
197
-
198
-
199
-
200
-
201
-
202
-
203
-
204
-
205
-
206
-
207
-
208
-
209
-
210
-
211
-
212
-
213
-
214
-
215
-
216
-
217
-
218
-
219
-
220
-
221
-
222
-
223
-
224
-
225
-
226
-
227
-
228
-
229
-
230
-
231
-
232
-
233
-
234
-
235
-
236
-
237
-
238
-
239
-
240
-
241
-
242
-
243
-
244
-
245
-
246
-
247
-
248
-
249
-
250
 |
 |