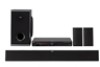
Sharp BD-MPC41U BD-MPC41U Operation Manual - Page 22
To mount the Sound Bar Speaker on the wall, Before installing the speaker, connect the speaker
 |
UPC - 074000354999
View all Sharp BD-MPC41U manuals
Add to My Manuals
Save this manual to your list of manuals |
Page 22 highlights
Positioning the Speaker System To mount the Sound Bar Speaker on the wall εWall mount angle fixed on the wall (Horizontal position) 1 Fix the pattern paper to the wall in horizontal position as below. 44 mm 509 mm Wall surface 44 mm 29 mm εInstalling the Sound Bar Speaker Before installing the speaker, connect the speaker connection cords to the speaker. (See pages 22-23.) 1 Align the wall mount slot at the speaker to the wall mount angle. 2 Slot the speaker into the wall mount angle. 3 Fix them securely. 29 mm Pattern paper 2 Make a hole on the wall following the screw point marks on the pattern paper by using a drill. 1-9/16" (40 mm) Wall surface 3/8" (8-9 mm) Wall surface 3 Fix a wall mount plug into the hole using a hammer until it is flush with the wall surface. 1-9/16" (40 mm) 3/8" (8-9 mm) Wall surface 4 Screw the wall mount angle to the wall as shown in the illustration. (Total screw is 8 pieces) Wall mount angle Wall surface Wall mount angle (screws x 4) (screws x 4) Wall surface Wall mount angle Wall surface NOTE • Make sure all screws are fully tighten. (screws are not supplied) 20
-
 1
1 -
2
-
3
-
4
-
5
-
6
-
7
-
8
-
9
-
10
-
11
-
12
-
13
-
14
-
15
-
16
-
 17
17 -
 18
18 -
 19
19 -
 20
20 -
 21
21 -
 22
22 -
 23
23 -
 24
24 -
 25
25 -
 26
26 -
 27
27 -
28
-
29
-
30
-
31
-
32
-
33
-
34
-
35
-
36
-
37
-
38
-
39
-
40
-
41
-
42
-
43
-
44
-
45
-
46
-
47
-
48
-
49
-
50
-
51
-
52
-
53
-
54
-
55
-
56
-
57
-
58
-
59
-
60
-
61
-
62
-
63
-
64
-
65
-
66
-
67
-
68
-
69
-
70
-
71
-
72
-
73
-
74
-
75
-
76
-
77
-
78
-
79
-
80
-
81
-
82
-
83
-
84
-
85
-
86
-
87
-
88
-
89
-
90
-
91
-
92
-
93
-
94
-
95
 |
 |
